Optical drive – HP TX1000 User Manual
Page 47
Optical drive
NOTE:
All optical drive spare part kits include an optical drive bezel.
Description
Spare part number
DVD±RW and CD-RW Super Multi Double-Layer Combo Drive with LightScribe
441130-001
DVD±RW and CD-RW Super Multi Double-Layer Combo Drive
441129-001
Before removing the optical drive, follow these steps:
1
.
Shut down the computer. If you are unsure whether the computer is off or in Hibernation, turn the
computer on, and then shut it down through the operating system.
2
.
Disconnect all external devices connected to the computer.
3
.
Disconnect the power cord.
4
.
Remove the battery (see
).
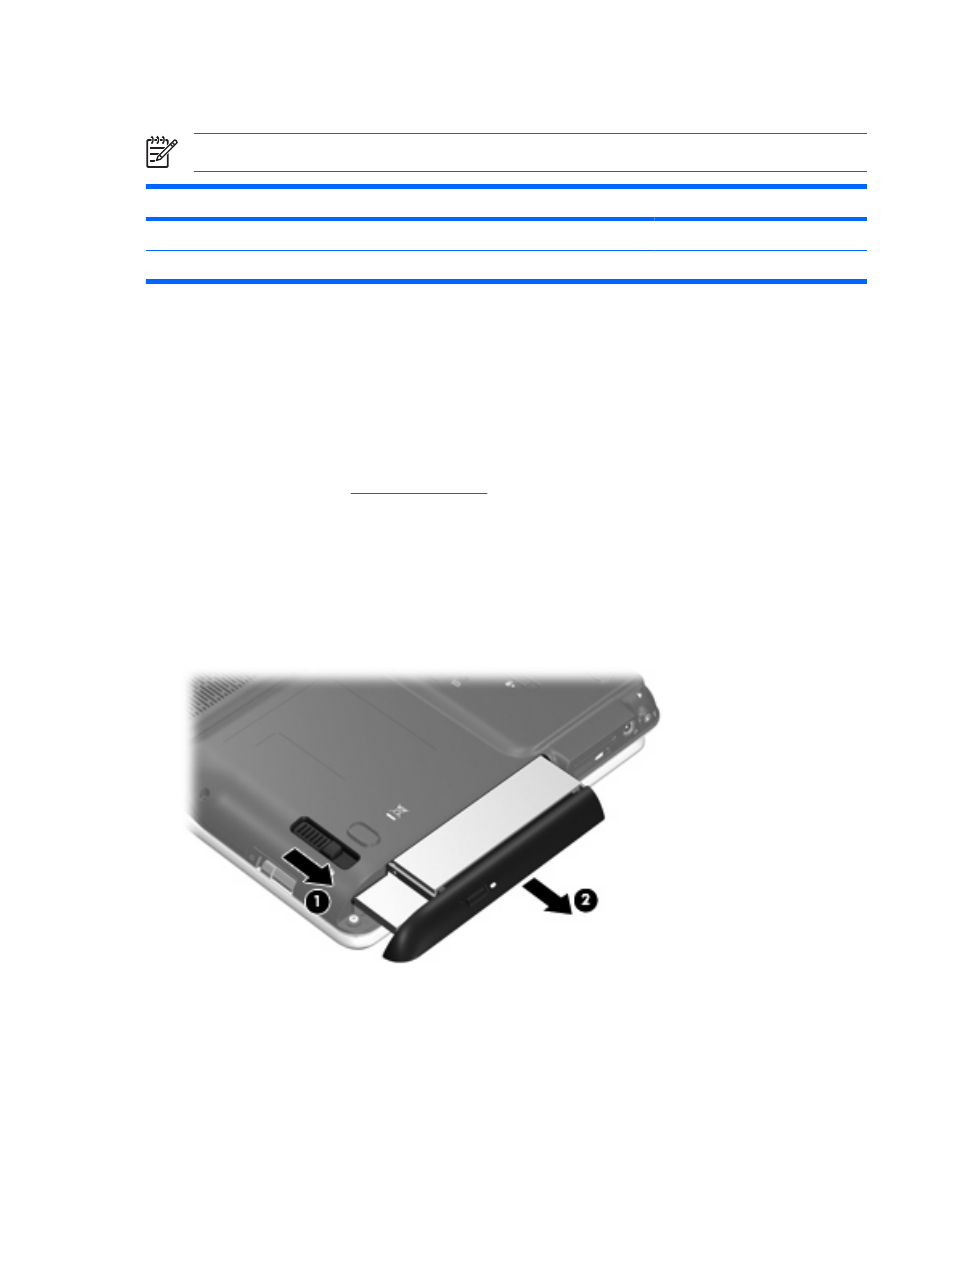
Remove the optical drive:
1
.
Position the computer with right side toward you.
2
.
Slide the optical drive release latch (1) toward you. (The optical drive is partially ejected from the
optical drive bay.)
3
.
Remove the optical drive (2) from of the computer.
To install an optical drive, slide the optical drive into the optical drive bay until you hear a click.
42 Chapter 5 Removal and replacement procedures
ENWW