BendixKing KMD 250 User Manual
Page 42
1-23
KMD 250 Pilot's Guide
Section 1
Basic Operation
Rev 2 Apr/2004
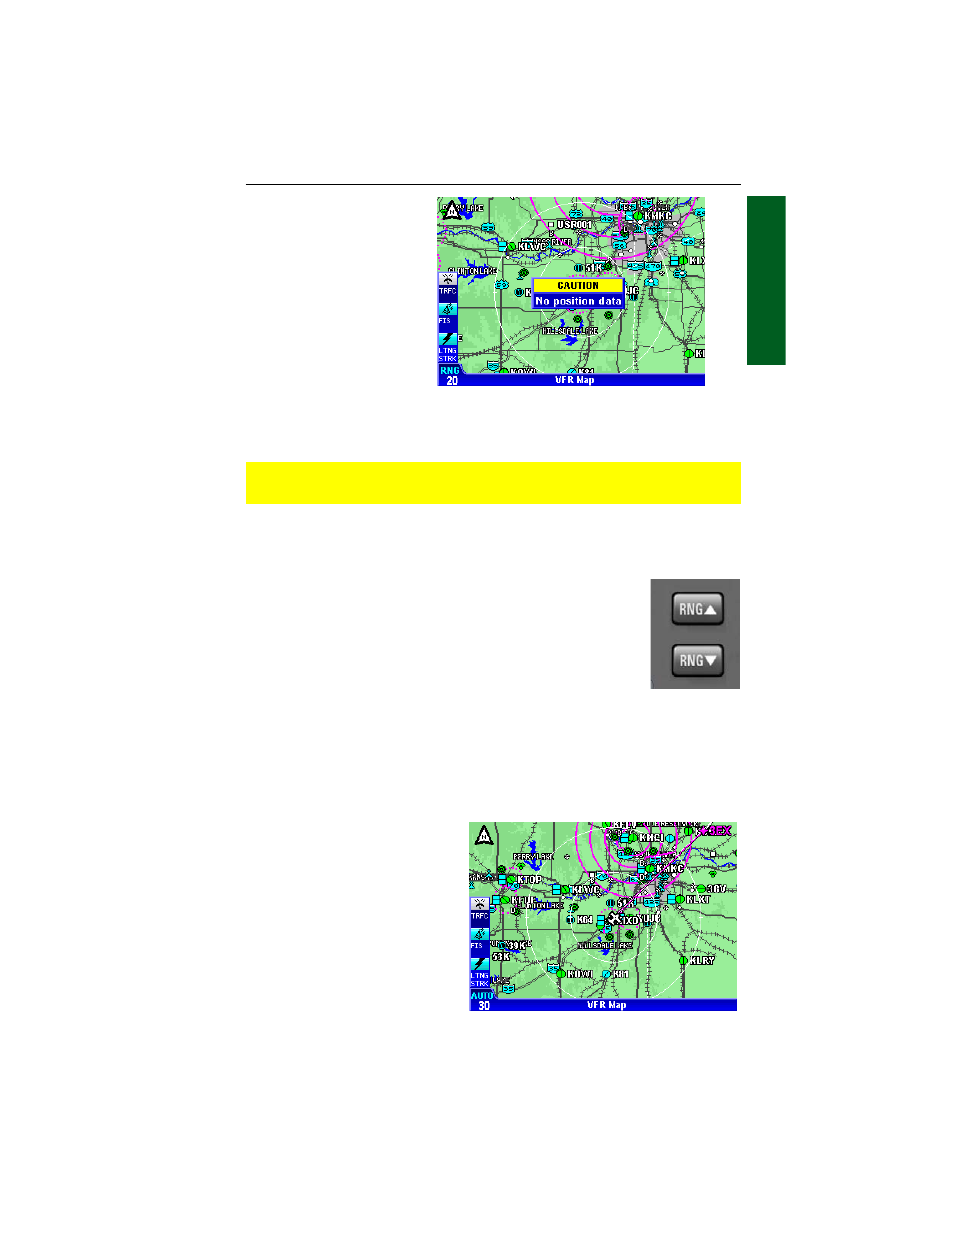
USING THE MAP
After power-up, the map
will initially be displayed at
a range setting of 20nm.
If there is no valid GPS or
FMS position fix data
available, the words
CAUTION, No position
data will be shown across
the center of the display in
a box as seen in Figure 1-
26. If the fix is lost at any time during normal operation of the unit, the
same CAUTION, No position data box will be overlayed on the map.
CAUTION: Do not use the map for navigation while this notification
is displayed.
The map will be shown in either North Up, Track Up or Heading Up
orientation depending upon the setting selected in the Map Setup and is
reflected by the North Pointer in the upper left of the display.
The displayed data is updated every second. Press the
RNG
ΔΔ (range up) or RNG ∇
∇ (range down) key at any time
to zoom the map in and out to whichever one of the twelve
pre-set scales desired. The available range settings are 1,
2.5, 5, 10, 15, 20, 30, 50, 100, 150, 200, 300, 500 and
1000 nm. The levels of detail appearing at each zoom
level can be changed in the Map Setup menu. See Map
Setup.
When active, Auto Zoom automatically adjusts the range setting up or
down as needed to keep the flight plan active waypoint within the view-
able area of the Map display.
Auto Zoom is enabled in either of the following ways:
1.
Pressing RNG
∇
∇ past the
minimum setting of 1 nm.
2.
Pressing and holding
either RNG Key for 2 seconds
or more. While Auto Zoom is
enabled, AUTO is displayed in
light blue text above the current
range setting (see Figure 1-
27).
Auto Zoom will be canceled if
the flight plan becomes invalid
or either RNG Key is pressed.
Figure 1-26
Figure 1-27
Map Operation