1 installing the webbox in the sunny central, 2 connecting the sunny webbox in the sunny central, 3 connecting the cable to the sunny webbox – SMA SC 500HE-US Installation User Manual
Page 45
SMA America, LLC
7 Connecting Optional Communication Devices
Installation Manual
SC500HEUS-IA-US_en-14
45
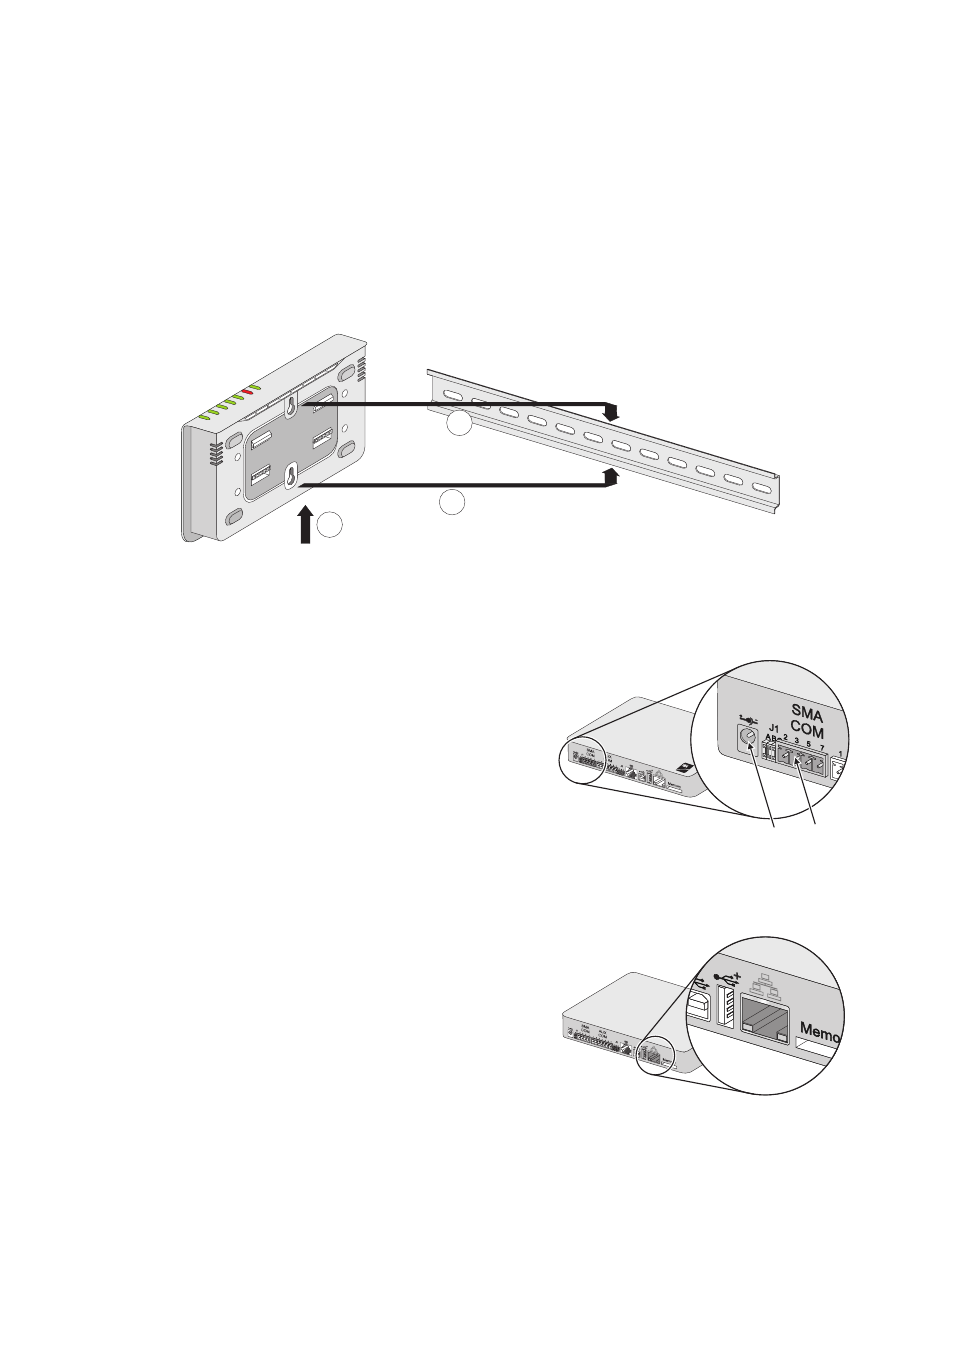
7.3.1 Installing the WebBox in the Sunny Central
1. Open the Control and Interface Cabinet as described in section 10.1.
2. Hook both lower brackets of the Sunny WebBox under the lower edge of the top-hat rail.
3. Press the Sunny WebBox upwards.
4. Snap the top edge of the top-hat rail into the top mounting brackets of the Sunny WebBox.
7.3.2 Connecting the Sunny WebBox in the Sunny Central
1. Plug the W215 connector into the SMA COM
socket (B) of the WebBox.
2. Insert the power supply plug into socket (A) of the
WebBox.
7.3.3 Connecting the Cable to the Sunny WebBox
The network connection on the Sunny WebBox is marked
as displayed on the adjacent graphic. The same marking
for the network connections is usually to be found on your
switch, router, PC or Laptop. If this is not the case, please
refer to the switch, router, PC or Laptop manual.
3. Route the cables separately from AC and DC
cables. Draw the cable into the Sunny Central
(see section 6).
4. Plug the cable into the Sunny WebBox's socket.
5. Plug the cable into the socket of the switch, router, PC or Laptop.
6. Close the Interface Cabinet of the Sunny Central.
2
3
4
A
B