Mounting the sunny webbox (wall or top-hat rail) – SMA SUNNY WEBBOX User Manual
Page 37
SMA Solar Technology AG / SMA America, LLC
Commissioning
User Manual
SWebBox-BA-en-36
37
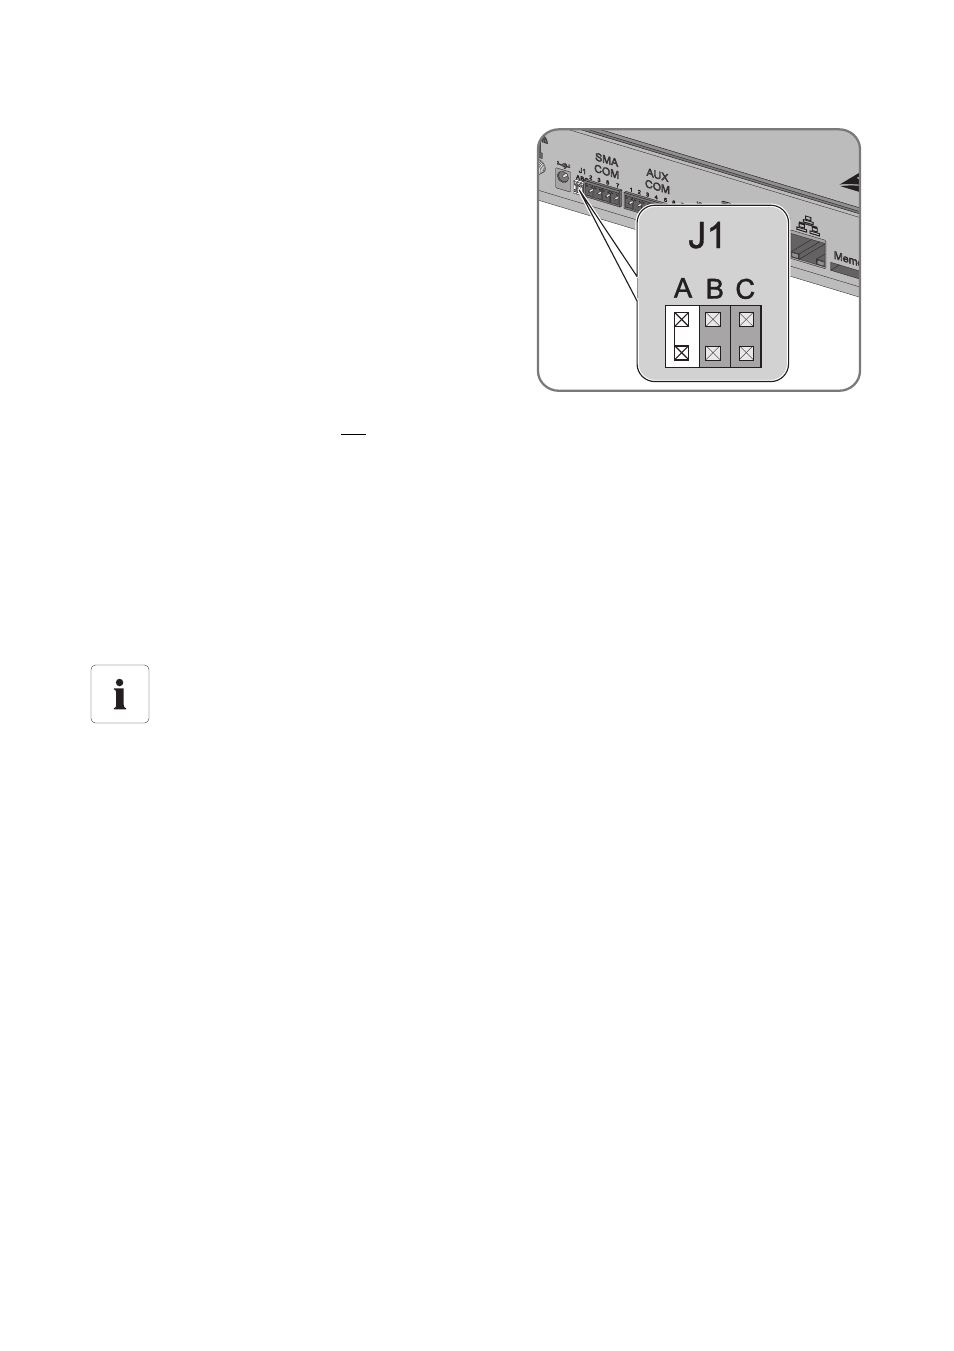
11. Whether the Sunny WebBox is located at one of
the two ends of the RS485 communication bus
determines whether or not a jumper must be
inserted in "J1A" of the "SMA COM" connection.
The jumper is connected upon delivery.
– If the Sunny WebBox is located at one of the
two ends of the RS485 communication bus, a
jumper must be inserted in "J1A". If no jumper is
inserted, connect a jumper.
– If the Sunny WebBox is not located at one of the two ends of the RS485 communication bus,
no jumper may be inserted in "J1A". Remove jumper from "J1A".
☑ The Sunny WebBox is now connected to the RS485 communication bus.
6.10 Mounting the Sunny WebBox (Wall or Top-Hat Rail)
This section describes how to mount the Sunny WebBox in the following ways:
• Mounting the Sunny WebBox on the wall
• Mounting the Sunny WebBox on the top-hat rail
Mounting the Sunny WebBox on the Wall
1. Determine the mounting location taking into consideration the mounting/installation location
requirements.
2. Determine the position of the drill holes on the wall. To do so mark two drill holes, one vertically
above the other at a distance of 75 mm (2.96 in).
3. Drill holes with 6 mm (0.24 in) diameter at the marked points and insert wall plugs.
4. Screw in the screws and leave about a 6 mm (0.24 in) clearance between the screw head and
the wall.
Noting the serial number
Before mounting the Sunny WebBox, note the serial number on the type label.
You will require the serial number later to call up the user interface.