3 windows xp, windows 2000, Windows xp, windows 2000 – SMA SUNNY WEBBOX User Manual
Page 27
SMA Solar Technology AG / SMA America, LLC
Commissioning
User Manual
SWebBox-BA-en-36
27
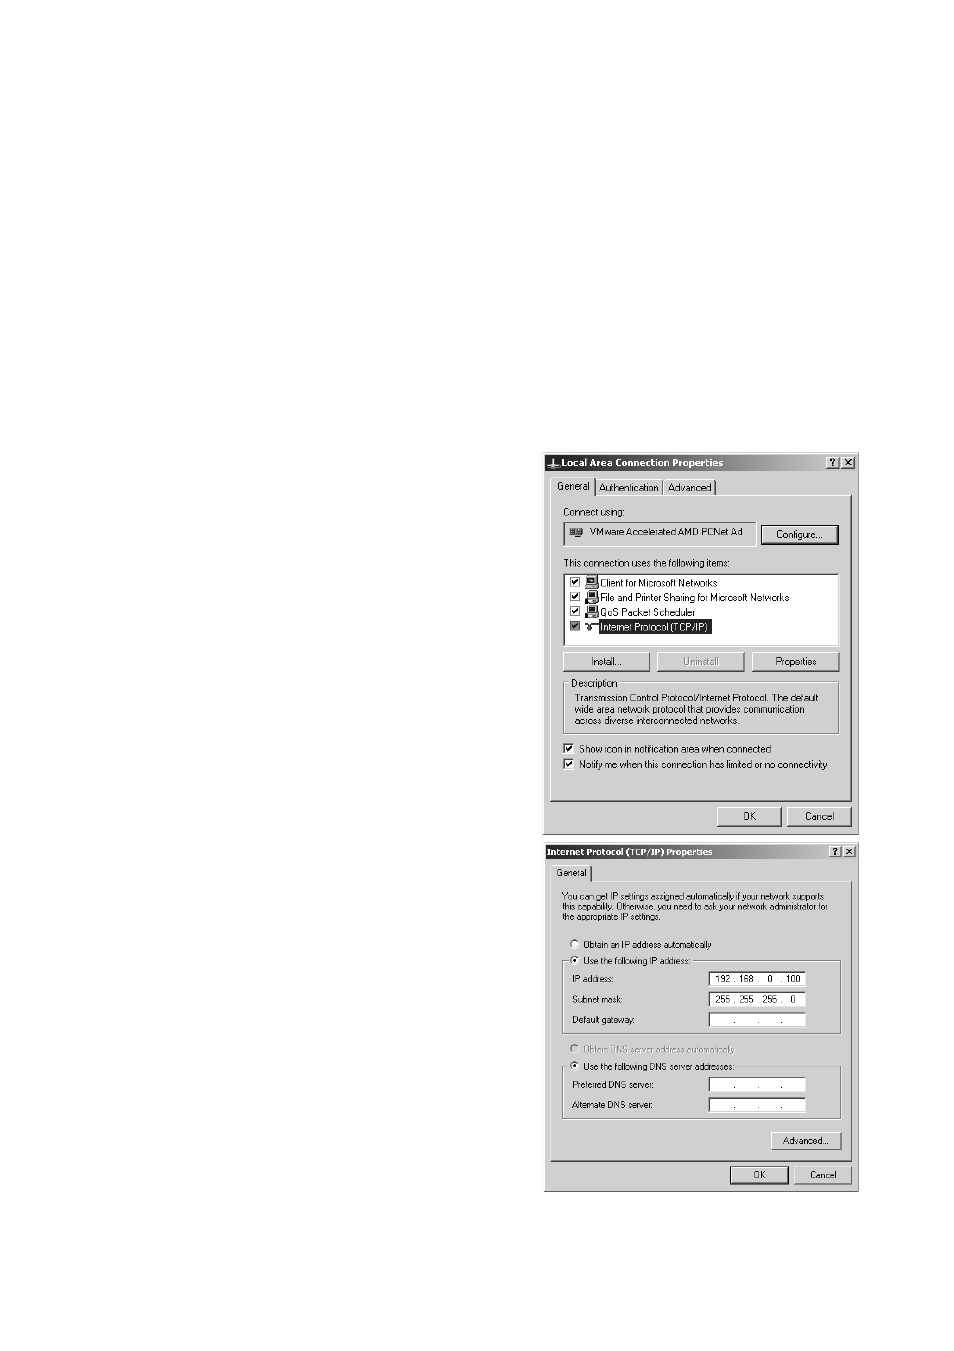
6.4.3 Windows XP, Windows 2000
1. Start the computer.
2. In Windows select "Start > Settings > Network Connections".
3. Double-click the LAN connection used to connect the Sunny WebBox.
– If Windows displays several LAN connections, there are probably several network
connections installed on the computer. Ensure that you select the network connection that the
computer is using to connect to the Sunny WebBox. If necessary, refer to the computer manual.
– In the event that no LAN connection is displayed, refer to Section 14 "Troubleshooting"
☑ The "Local Area Connection Status" window opens.
4. In the "General" tab, select [Properties].
☑ The "Local Area Connection Properties" window
opens.
5. Select "Internet Protocol (TCP/IP)" and click
[Properties].
☑ The "Internet Protocol (TCP/IP) Properties"
window opens.
6. Note the current network settings in the
"Internet Protocol (TCP/IP) Properties" window.
This enables you to reset the computer network
settings after configuration of the Sunny WebBox.
7. Enter the following static network settings for the
computer in the "Internet Protocol (TCP/IP)
Properties" window:
– Check the "Use the following IP address" field.
– Enter 192.168.0.100 into the "IP address:" field.
– Enter 255.255.255.0 into the "Subnet mask:"
field.
– Delete any entries in the "Default gateway",
"Preferred DNS server", and
"Alternate DNS server" fields.
8. Select [OK].
9. In the "Local Area Connection Properties" window,
select [OK].
☑ The computer is set to the network settings of the
Sunny WebBox.