7 connecting the sunny webbox to the local network, Connecting the sunny webbox to the local network – SMA SUNNY WEBBOX User Manual
Page 31
SMA Solar Technology AG / SMA America, LLC
Commissioning
User Manual
SWebBox-BA-en-36
31
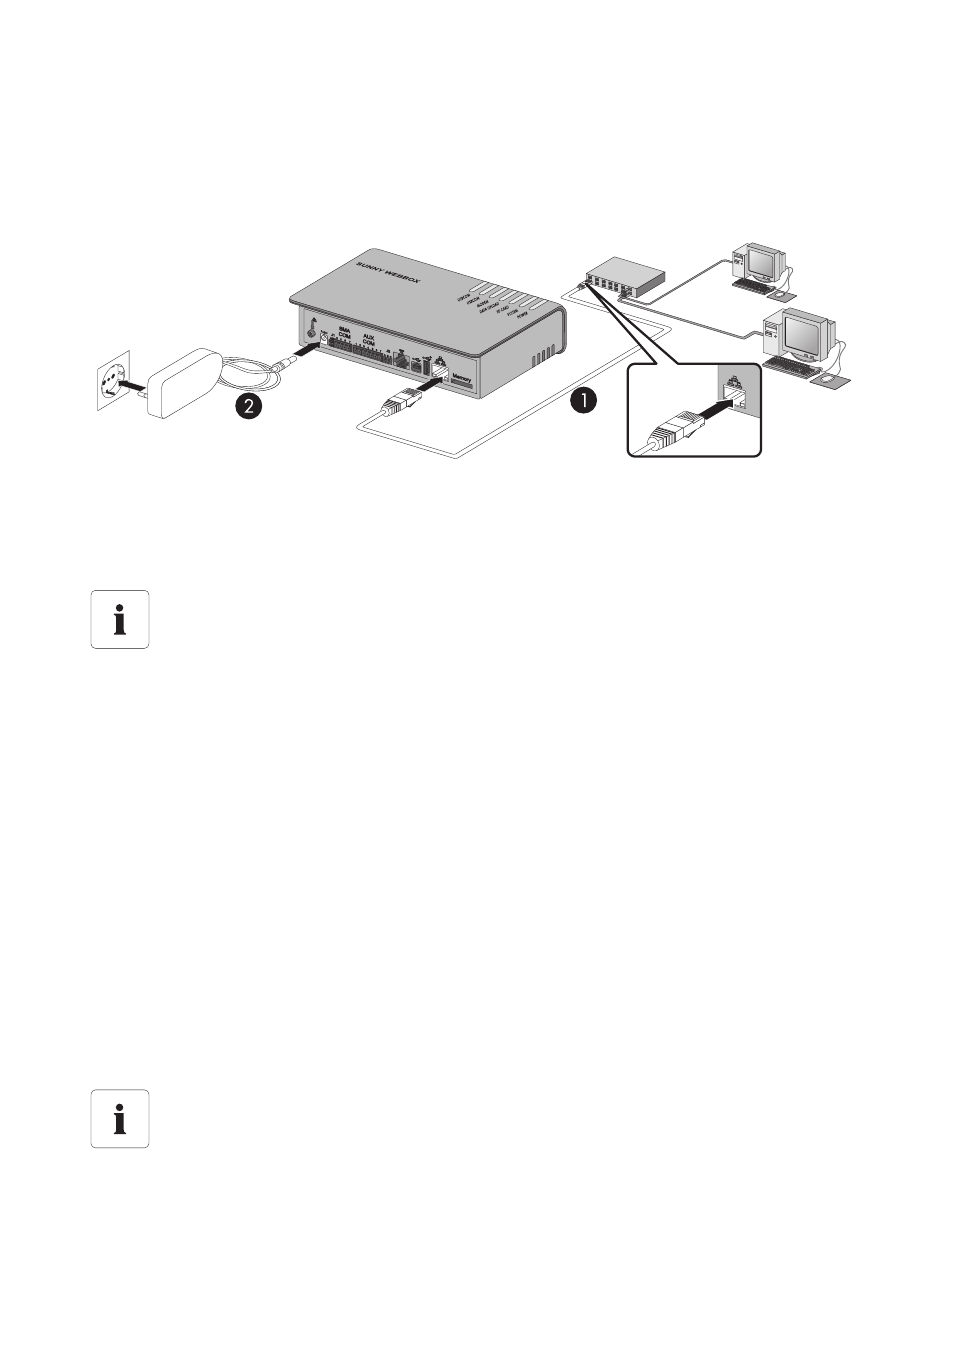
6.7 Connecting the Sunny WebBox to the Local Network
1. Remove the plug-in power supply of the Sunny WebBox from the socket-outlet.
2. Remove the blue patch cable (Ethernet crossover cable).
3. Connect the Sunny WebBox directly to the remote terminal (e.g. router, switch or hub) of the
local network using the red patch cable (see ➀ ). The connection of the remote terminal is
normally indicated by the same symbol as the Sunny WebBox network connection. If necessary,
please refer to the remote terminal manual.
4. Connect the plug-in power supply to the Sunny WebBox and plug it into the socket-outlet
(see ➁ ).
☑ The Sunny WebBox starts. As soon as the "SYSTEM" and "POWER" LEDs light up green, the
Sunny WebBox has started up and is ready for operation. The start-up procedure can take
up to 90 seconds. With Sunny WebBox devices from hardware version M1 and from
firmware version 1.61, the start-up procedure can take up to 240 seconds.
– IF the "SYSTEM" or "POWER" LEDs do not light up green, please refer to Section 14
Recommendation on network cabling
If the supplied patch cable is too short, observe the following patch cable requirements:
• Use a cable of type Cat5 or higher.
• Use a shielded cable.
• For a total length of no more than 100 m (328 ft), observe the directives for
structured cabling as described in EIA/TIA-568, ISO/IEC 11801 and/or EN 50173
(cable for fixed layout at least AWG24).
• For a total length of maximum 50 m (164 ft) you can use a patch cable with
AWG26/7.
Resetting the computer to the network settings
Reset your computer to its original network settings so that it can be accessed over the local
network whenever necessary (see Section 25).