T-bar lever maintenance, T-bar lever handle removal, T-bar lever assembly removal – Grass Valley K2 Dyno S v.3.0 User Manual
Page 50
Chapter 4 Dyno S Controller FRUs
T-bar lever maintenance
K2 Dyno S Replay Controller
50
Installation & Service Manual
4 December 2012
4. Remove 4 locking hex nuts, using a 1/4 in. wrench, and lift the encoder out of the top
of the chassis.
T-bar lever maintenance
The K2 Dyno S Replay Controller T-bar handle can be removed from the top without
opening the chassis. Servicing the T-bar lever’s internal assembly requires opening the
chassis.
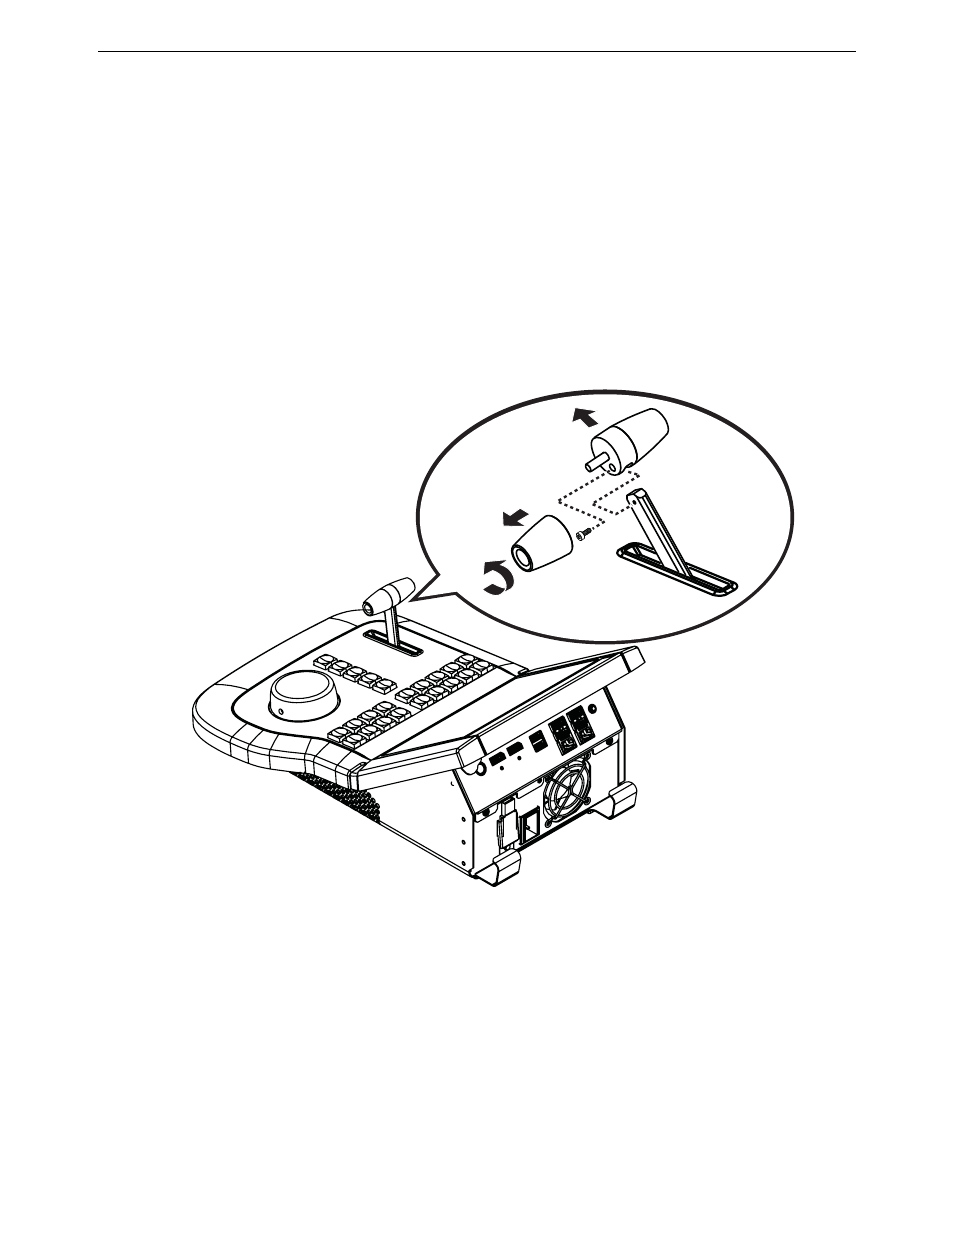
T-bar lever handle removal
1. Unscrew the small half of the handle. It turns counter-clockwise if installed on the right
(as facing the front of the panel), and clockwise if installed on the left. Only one side
can be unscrewed.
2. Remove the exposed hex head screw. Use 1.5mm Allen wrench.
3. Lift the larger half of the handle off the arm.
NOTE: The Allen screw threads into the arm, not into the other half of the handle.
4. Place the two halves of the handle and the Allen screw into a container to ensure parts
are not misplaced.
T-bar lever assembly removal
1. Remove T-bar lever handle (see
“T-bar lever handle removal” on page 50
).
8702_07