Channelflex option, Software installation, System startup – Grass Valley K2 Dyno S v.3.0 User Manual
Page 30: Start up k2 system, Software installation system startup
Chapter 2 Dyno S Controller Installation
ChannelFlex option
K2 Dyno S Replay Controller
30
Installation & Service Manual
4 December 2012
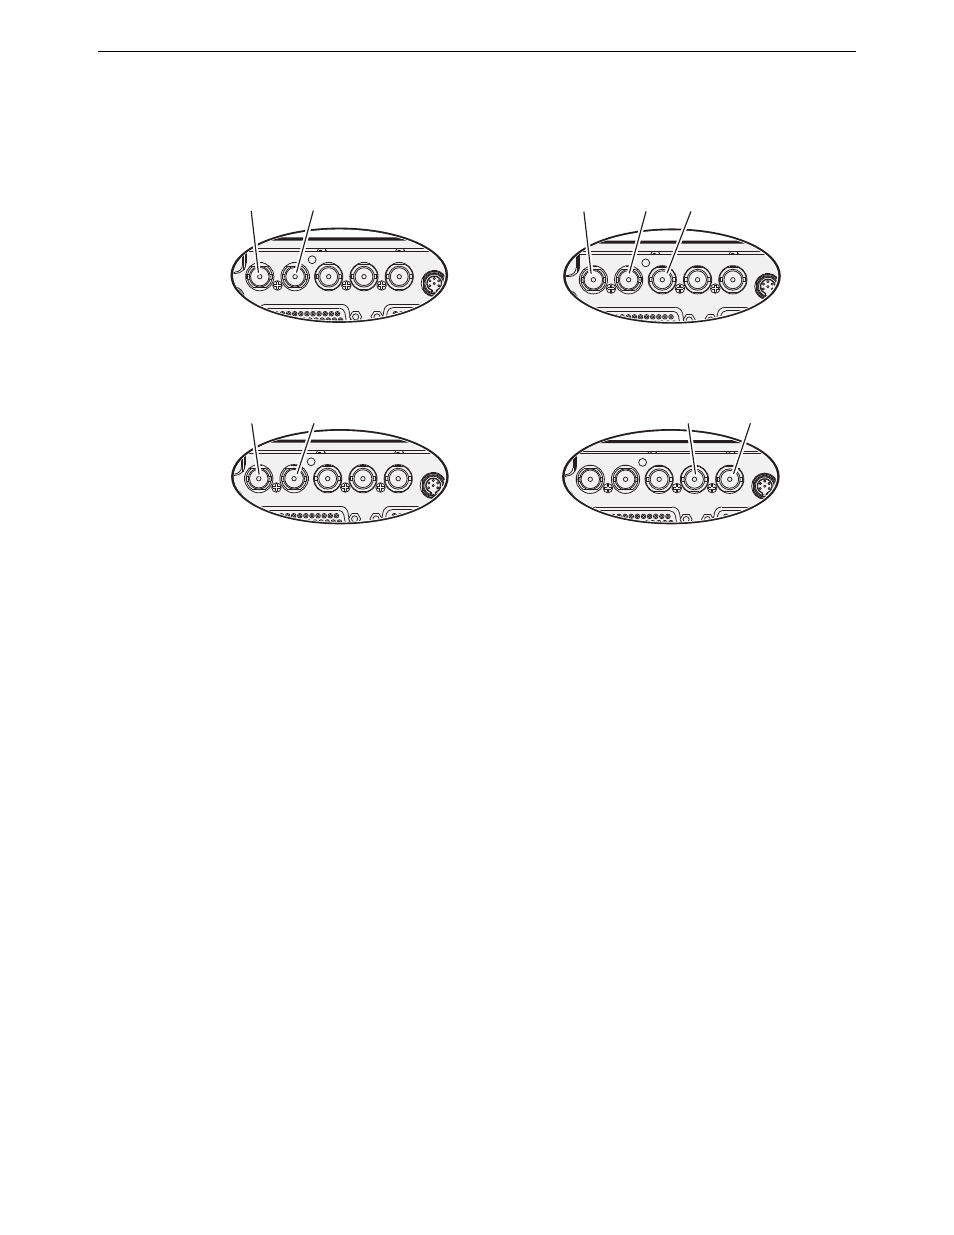
ChannelFlex option
A variety of cabling options are available when ChannelFlex is available.
For complete cabling instructions, refer to the K2 System Guide.
Software installation
Dyno S Controllers are shipped from the factory with the current software version installed.
No software installation is required. However, the version of software running on the
Dyno S Controller must be compatible with the software running on the K2 system it will
connect to.
For version compatibility information, and for Dyno S Controller software update
procedures, refer to the appropriate version of the K2 Dyno Controller Release Notes.
System startup
Start up K2 system
1. Press the Standby button on the K2 frame to activate the unit.
2. Power up the computer monitor connected to the K2 system.
3. Log on to the K2 system with the default Windows administrator account:
• Username: Administrator
• Password: adminGV! (The password is case sensitive)
4. At first startup, End User License Agreements appear on the K2 system screen.
Accept the agreements to continue.
The Power LED goes on and stays on. The Service LED stays off. Startup processes
complete in approximately two minutes and the K2 system is ready for connection and
operation.
SDI IN1
SDI OUT1
SDI OUT2
LTC I/O
AES AUDIO
RS422
SDI IN2
SDI IN3
Phase 1
Phase 2
Phase 3
Super Slo-Mo Recorder
1
SDI IN1
SDI OUT1
SDI OUT2
LTC I/O
AES AUDIO
RS422
SDI IN2
SDI IN3
Video 1
Video 2
Multi-Cam Recorder
SDI IN1
SDI OUT1
SDI OUT2
LTC I/O
AES AUDIO
RS422
SDI IN2
SDI IN3
Video or
Left eye
Key or
Right eye
3D/Video + Key Recorder
SDI IN1
SDI OUT1
SDI OUT2
LTC I/O
AES AUDIO
RS422
SDI IN2
SDI IN3
Video or
Left eye
Key or
Right eye
3D/Video + Key Player