2 viewfinder (2-inch), 1 mounting the viewfinder, Viewfinder (2-inch) 2.2.1 – Grass Valley DMC 1000 v.12.4 User Manual
Page 26: Mounting the viewfinder
26
DMC 1000 Digital Media Camcorder User’s Guide (v4.0)
Chapter 2 - Attaching parts
When a new lens is fitted to the camcorder it may be necessary to carry out some
adjustments to optimize its use, for example, back focus or shading. For more information
about these adjustments refer to the lens manufacturer’s documentation. Also refer to the
to change the camcorder’s lens settings.
☞
Note
☞
Note
Always mount the lens protection cap when the lens is not attached to the camcorder to
prevent dust and scratches.
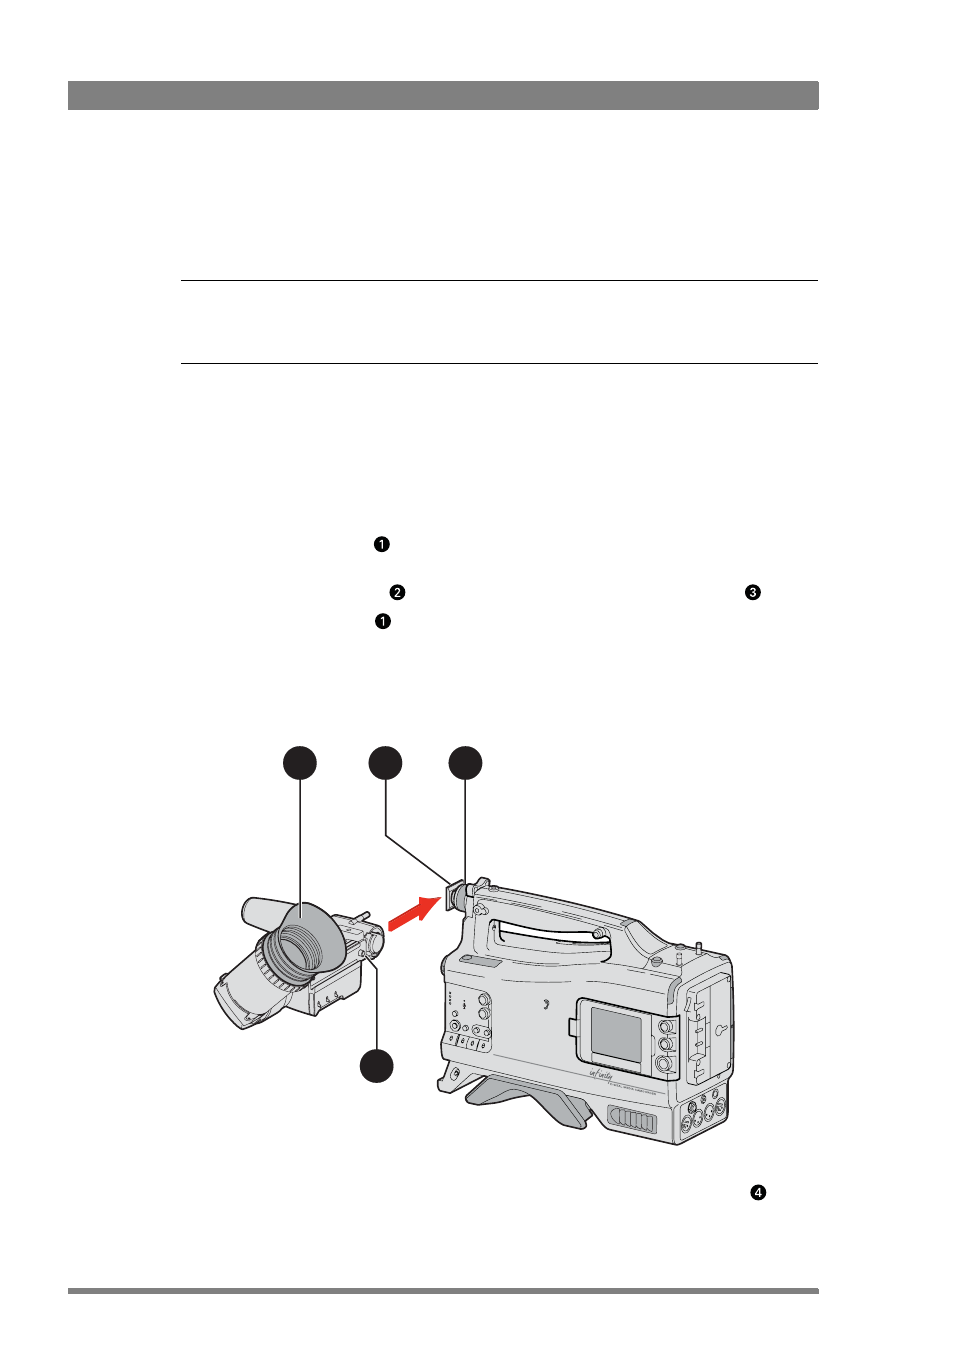
2.2 Viewfinder (2-inch)
2.2.1 Mounting the viewfinder
1.
Loosen the locking ring
at front of the camcorder handle.
–
As seen from camcorder rear, turning the locking ring counterclockwise loosens it.
2.
Push down retaining stud
and slide the viewfinder onto the support bracket
.
3.
Tighten the locking ring
by turning it clockwise (as seen from camcorder rear) so that
the viewfinder is mounted securely to the support.
4.
Connect the viewfinder cable to the viewfinder connector socket at the right of the
camcorder.
5.
Place the cable into the top clip at the front of the camcorder.
Hint: for improved comfort, fit the supplied eyepiece cover over the rubber eyepiece
. Spare
eye piece covers (3922 405 00461) are available from your Grass Valley representative.
1
3
4
2