Setting up a remote host as a 3270 terminal, Tn3270, Communications setup, tn3270 – Visara iCON-XT User Manual
Page 68: Communications setup, Setting up a remote host, Setting up a remote host as a 3270 terminal -2

5-2
707096-005
iCON-XT Single Station Console Terminal User’s Manual
• Numeric Lock – Allows a field to be defined to accept only numeric characters
and the Period, Minus, and Dup keys. The comma may be substituted for the period
on some international keyboards.
• Multiple Sessions – A maximum of 10 sessions can be accessed with this emulator.
Setting up a remote host as a 3270 terminal
To setup a remote host:
1. Click the
button in the lower left-hand corner of the screen. The application
menu will appear.
2. Click TN3270. The main TN3270 screen will appear with four menu options, Setup,
Session, Macro and Export.
3. Click Setup.
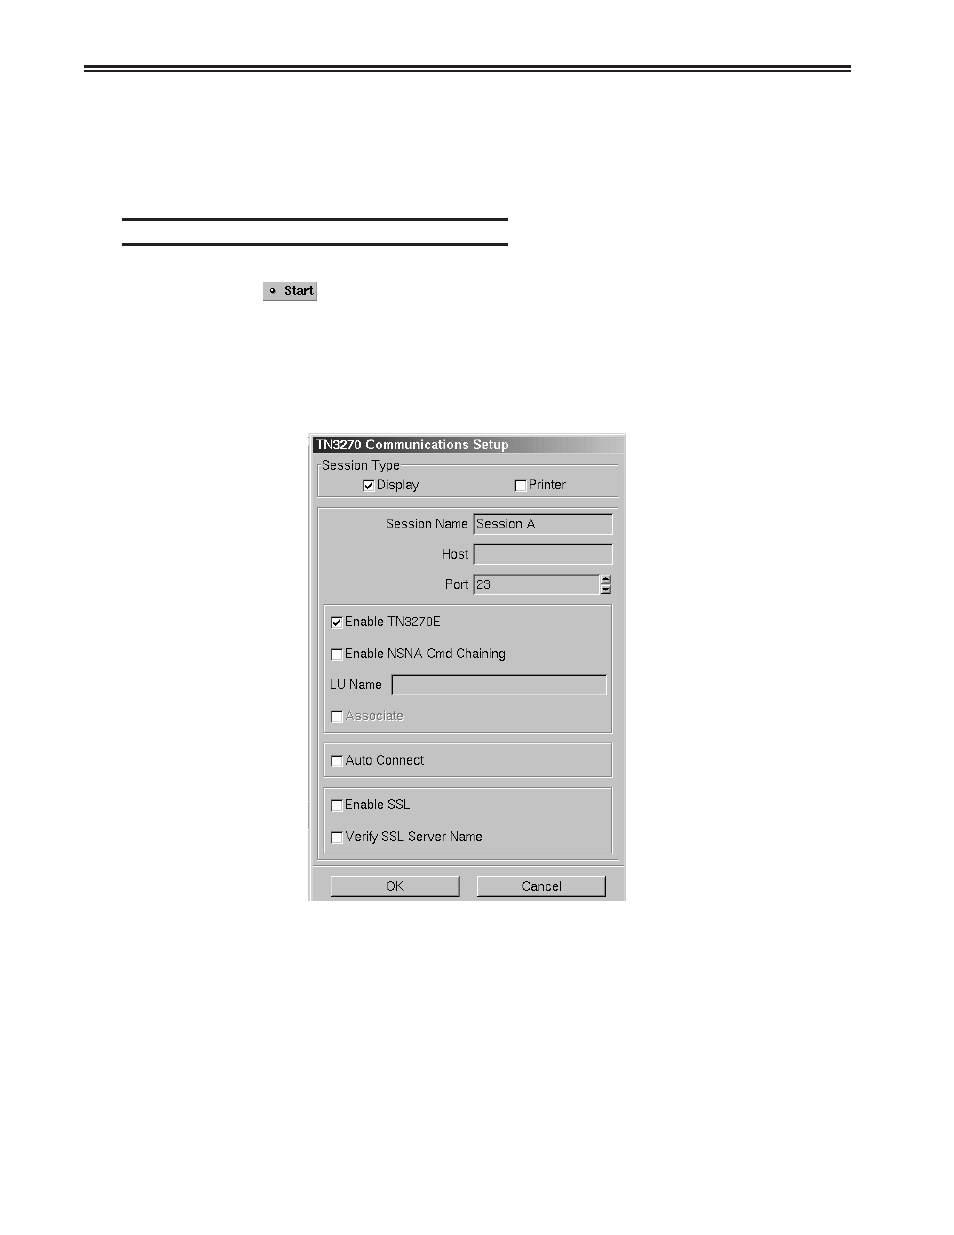
4. Click Communications from the Setup menu. This screen will appear:
• Session Type – Select Display to configure a TN3270 Display session. Select
Printer to configure a TN3287 Printer session.
• Session Name – Enter the name to be displayed in the window title.
• Host – Enter the Internet address of the TN3270 server to which you wish to connect,
for example, 192.168.1.1.
• Port – If the host requires that a port number (other than port 23) be specified when
connecting, select the port number using the up and down arrows or by typing the
port in directly.
