2 - investigation mode testing, Investigation mode testing 2, Gather known “good” and “bad” parts – Measurement Computing eZ-NDT version 6.0.9 User Manual
Page 7
eZ-NDT
938691
Investigation Mode Testing 2-1
Investigation Mode Testing
2
1. Gather known “good” and “bad” parts ……2-1
2. Set up the analyzer, hammer, microphone, and computer …… 2-1
3. Launch eZ-NDT
5. Select Investigation Mode …… 2-4
6. Configure the Analyzer
7. Select Plot Display Type …… 2-4
8. Turn on Data Acquisition ……2-4
9. Test All Good Parts …… 2-4
10. Test All Bad Parts ……2-6
11. Compare the Results of Good and Bad
12. Configure the Limits …… 2-7
13. Verifying the Limits and Ranges …… 2-9
The following process can be used to determine whether eZ-NDT testing is feasible for the part that is
being tested. Typically this is an iterative process in which the user:
establishes the resonant signature of the part
determines the distinct peaks of the signature
uses the peaks to set up eZ-NDT test criteria
To ensure repeatable results make certain that setup conditions are consistent;
for example: the Impact Location and Force of hammer strike.
When an automated system is used, there are additional process considerations.
These are typically addressed and configured at the factory prior to shipment.
1.
Gather known “good” and “bad” parts.
Locate both good and bad parts. Typically 10 of each are sufficient. Make sure the Bad parts include all
possible reject (failure) modes. The good parts will be used to test for NDT feasibility.
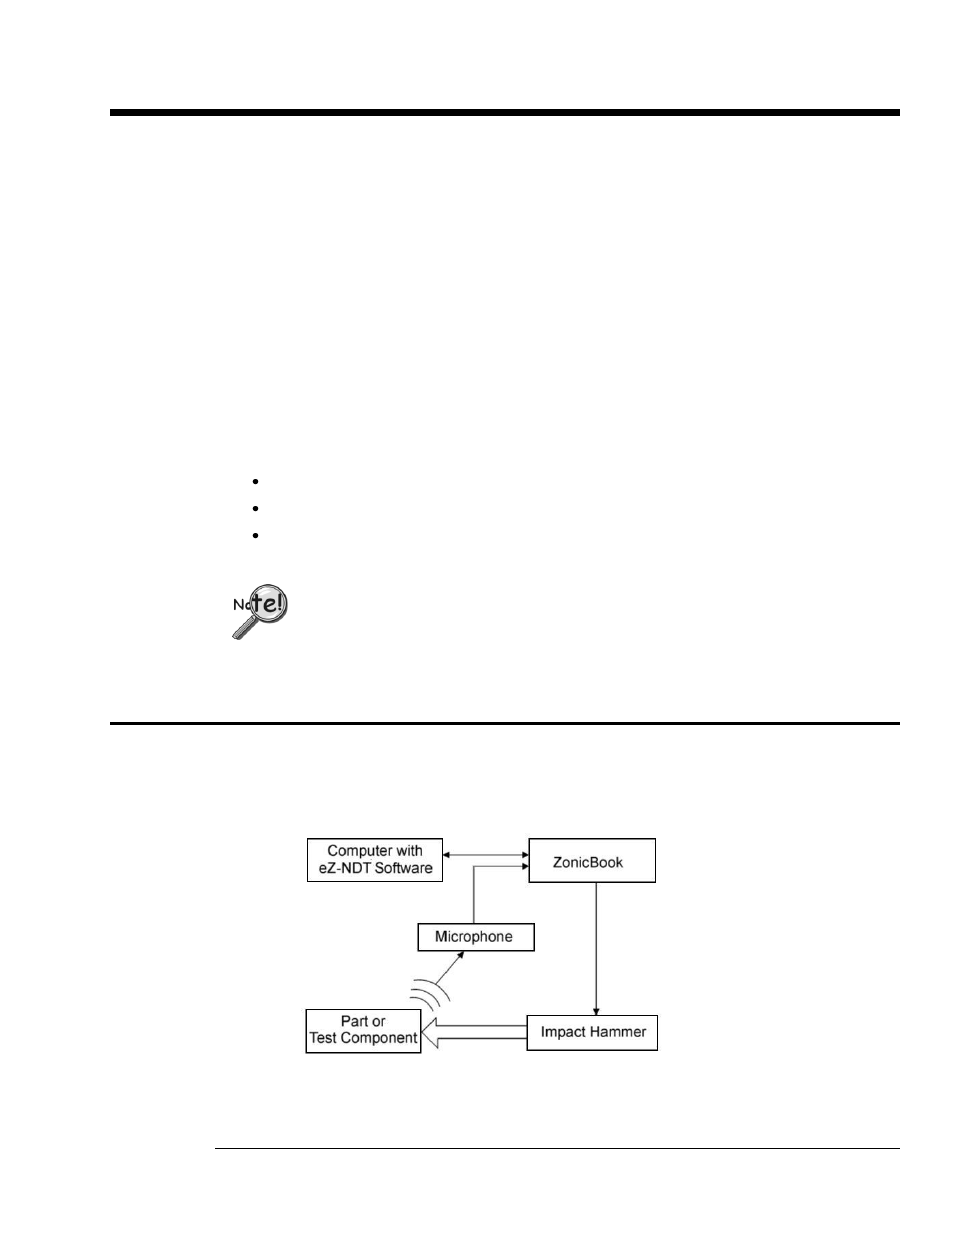
Block Diagram of Typical NDT Setup