Acquisition panel with mode selection – Measurement Computing eZ-NDT version 6.0.9 User Manual
Page 23
eZ-NDT
878493
Windows and Menus 4-
3
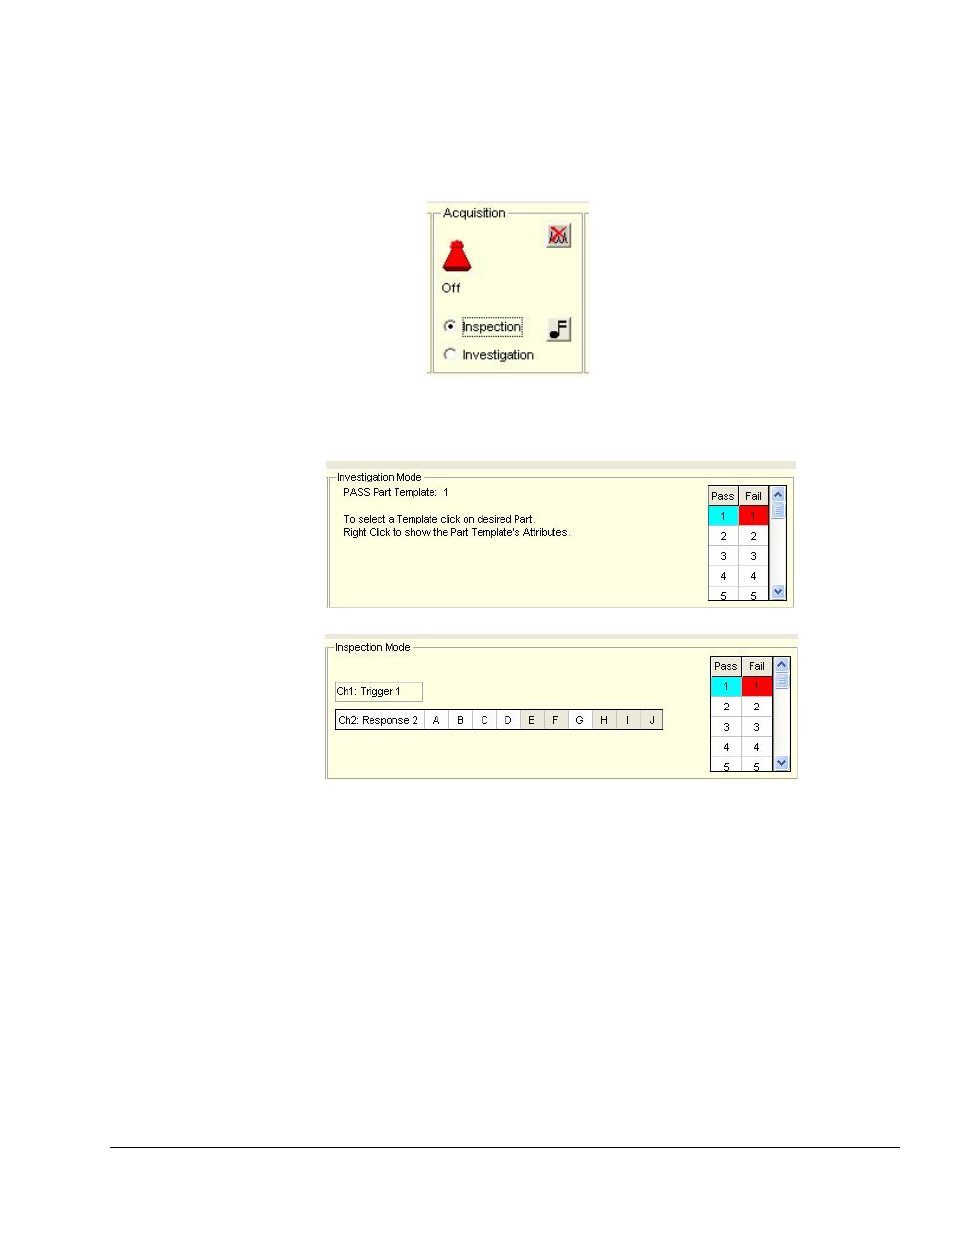
Acquisition Panel with Mode Selection
The Acquisition Panel includes an ON/OFF toggle switch, two icon-buttons, and two radio buttons. The
toggle switch turns the acquisition “on” or “off.” The
is for discounting and rejecting the last test, regardless of whether it was a Pass or a Fail. The lower button,
with the musical note image, is for playing a sound after each production test, or for turning that sound off.
Acquisition Panel
The two radio buttons for selecting the mode of operation. Investigation Mode is for feasibility testing
and Limit Configuration. Inspection Mode is for normal testing of production parts.
Mode Panel, Investigation Mode Selected
Mode Panel, Inspection Mode Selected
On eZ-NDT start-up, this button is blank. After each NDT inspection, the button’s color and status
message reflect the inspection results. Red indicates a failed part. Green indicates a good part. Click on
this button to view the entire spectral range.
Channels: <Channel> buttons are shown vertically from 1 to 8. Both Force and Response channels can be
displayed in either the Time or Spectrum format. Unused channels are not enabled (dimmed).
Limit Range Buttons: The horizontal numbered buttons show the NDT inspection status for the defined
limit ranges. Red indicates fail. Green indicates pass. Up to 10 ranges exist for each response point. To
display a range of interest, click on the desired
Clicking on a
Limit Range.