Control panel (cont.), Quick align” button, Video” button – Ask Proxima D-ILATM Pro AV SX1 User Manual
Page 10: Fi “computer” button, Setting” button, Controls and features (cont.)
Attention! The text in this document has been recognized automatically. To view the original document, you can use the "Original mode".
Controls and Features (cont.)
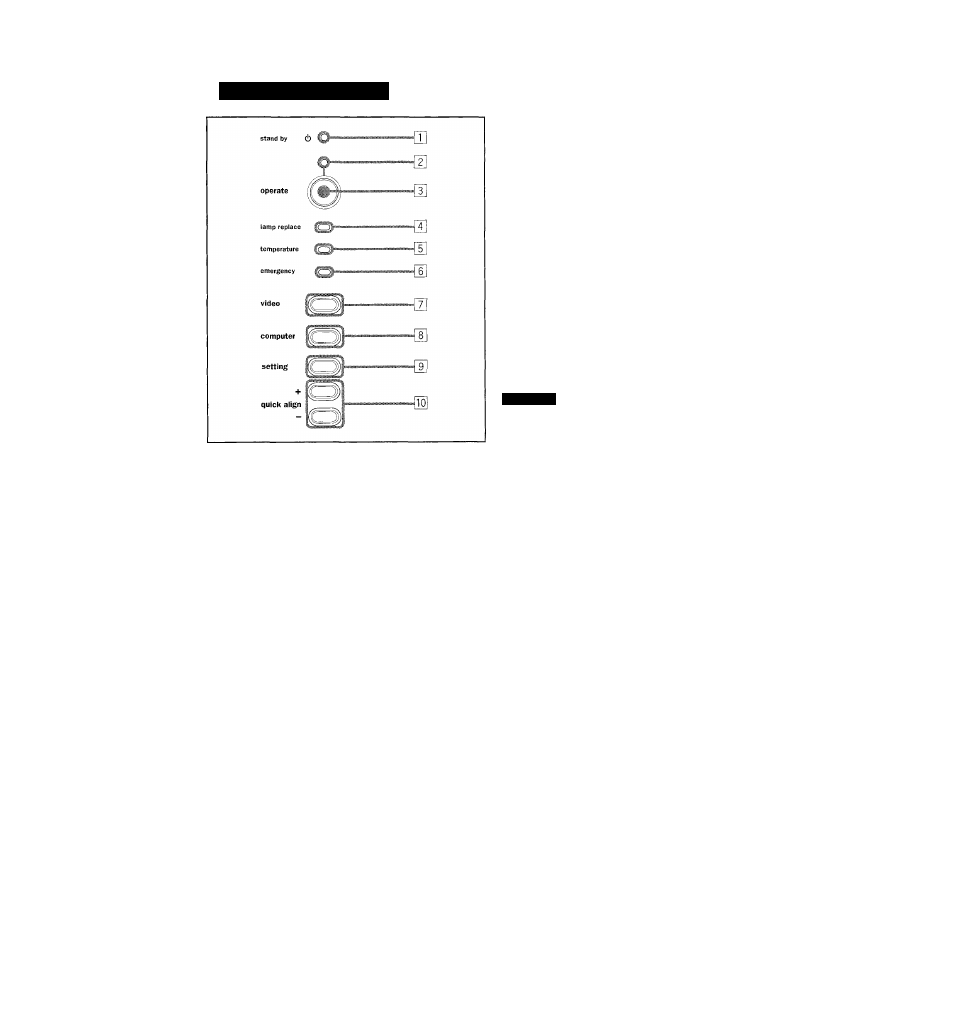
Control Panel (Cont.)
“quick align” button
While a menu screen is shown, use this button to adjust
the values for the item selected. When no menu is shown,
the quick alignment function works.
• When a menu is shown
+ button:
The value for the selected item increases.
- button:
The value for the selected item decreases.
• When no menu is shown
Press the + button and - button at the same time:
QUICK ALIGNMENT is displayed on the screen and the
quick alignment function works (TRACKING, PHASE, H.
POS. and V. POS. are automatically adjusted). When the
adjustment is finished, the display goes off automatically.
The quick alignment function :
• Works for computer input (PC IN-1 and PC lN-2 input terminals)
signals.
• Does not work for video input (AV IN input terminal) signals.
“video” button
Use this button to select a device such as a VCR connected
to the AV IN terminal of the projector. Each time you press
the button, the device selected changes as follows:
Y/c ---------- VIDEO ............... .~i»»-Y,PB/B-Y,PR/R-Y
CAUTION
■Automatic
adjustment
with
the
quick
alignment
function
should be done on a bright still-picture screen. This function
may not work correctly on a dark screen or motion-picture
screen. If adjustment with this function is not satisfactory,
adjust TRACKING, PHASE, H. POS. and V. POS. manually
(see pages 31, 37 and 38).
[FI “computer” button
Use this button to select a device connected to the PC IN-
1 or PC IN-2 terminals. Each time you press the button,
the selection changes as follows:
COMPUTER 1 ....... —^ COMPUTER 2
“setting” button
Use this button to call up the setting menu. For details,
refer to “Making Basic Settings" on page 31.
10