Sening the clock, 1 press the ii set button, 2 press the down or up button to – Aiwa LCX-301 User Manual
Page 14: Designate the hour, 3 press the ii set button to set the hour, 4 press the down or up button to, Designate the minute, To correct the current time, To display the current time, To switch to the 24-hour standard
Attention! The text in this document has been recognized automatically. To view the original document, you can use the "Original mode".
SEniNG THE CLOCK
PREPARATIONS
1
1,3,5
2,4
CP
■ Cl OCK
SHIFT
@
□□aa
P“
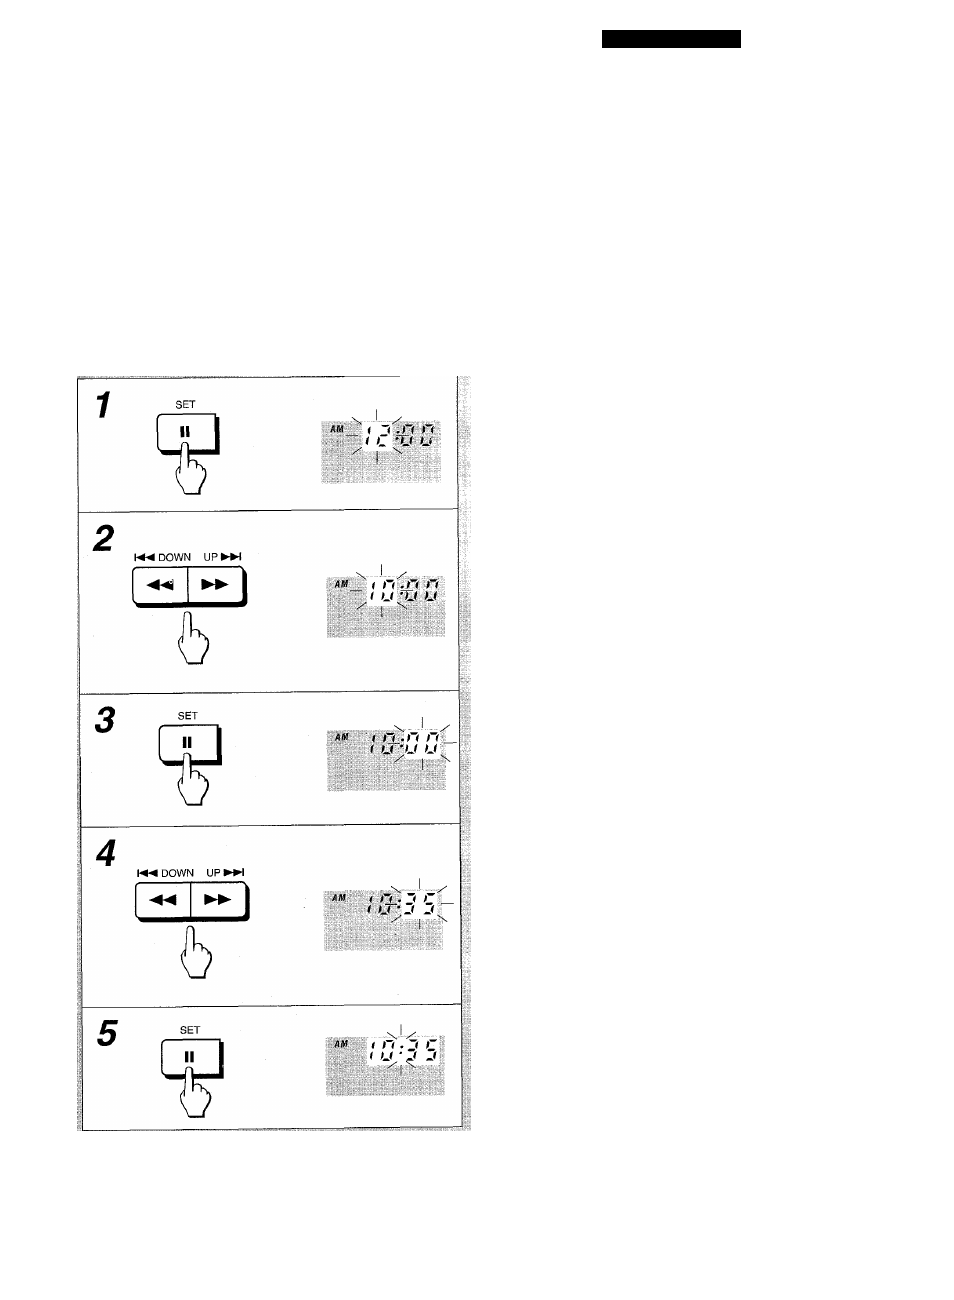
When the AC cord is just connected, the clock display flashes.
Set the time as follows while the power is off.
1 Press the II SET button.
The hour flashes.
2 Press the
DOWN or UP
button to
designate the hour.
3 Press the II SET button to set the hour.
The hour stops flashing and the minute starts flashing.
4 Press the
DOWN or UP
button to
designate the minute.
5 Press the II SET button to set the minute and
complete setting.
The minute stops flashing on the display and the clock starts
from 00 second.
To correct the current time
Press the POWER button to turn the unit off. Press the
II SET
button, the clock display flashes and carry out steps 1 to 5 above.
To display the current time
Press the CLOCK button while pressing the SHIFT button on
the remote control. The clock is displayed for 4 seconds.
However, the time cannot be displayed during recording.
To switch to the 24-hour standard
Press the CLOCK button while pressing the SHIFT button on
the remote control and then press the ■ button within 4 seconds.
Repeat the same procedure to restore the 12-hour standard.
If the clock display flashes while the power is off
This is caused by a power interruption. The current time needs
to be reset.
If power is interrupted for more than approximately 24 hours, all
settings stored in memory after purchase need to be reset.
14