Top Flite TOPA0145 User Manual
Page 36
❏ 7. Use 30-minute epoxy to glue the blocks in place on
the saddles. Clean any excess epoxy from the block.
Glue some leftover 3/8” tri balsa to the block and wing
saddle to reinforce the joint.
The parts you have just glued together are going to
take some time to cure. This would be a good time to
cut out and assemble the plastic parts that are on
page 38 of the manual.
❏ 8. After everything has cured, put the wing back in
position on the saddle and double check to make
sure the wing is properly positioned. When you are
satisfied with the fit, drill a #10 (or 13/64") [5.2mm]
hole through the holes in the wing and through the
mounting blocks you just glued into position. The #10
(or 13/64") [5.2mm] drill is the proper diameter for
tapping the mounting block.
❏ 9. Remove the wing and tap the holes in the
mounting block with a 1/4 - 20 tap. Wick some thin
CA into the threads to harden them. Allow the CA to
cure fully. Run the tap through the threads again to
clean up the threads. Drill out the holes in the Wing
Bolt Plate only with a 17/64" [6.7mm] bit.
FINISH THE LOWER FUSELAGE
❏ 1. Glue the die-cut balsa wing saddle doubler onto
each side of the fuselage. Some sanding of the
doubler is going to be required in order to match the
shape of the wing saddle. Make sure that you test fit
the wing to the fuselage before you glue the saddle
doubler in place. The saddle doubler should uniformly
contact the wing along the entire chord length.
❏ 2. Glue the remaining 3/16" [4.8mm] stringers to
the rear of the fuselage the same way you did with
the top half. The stringer at the middle of the
fuselage side runs the full length of the fuse. Splice
two stringers together the same way you did the top
stringers. Make one for each side.
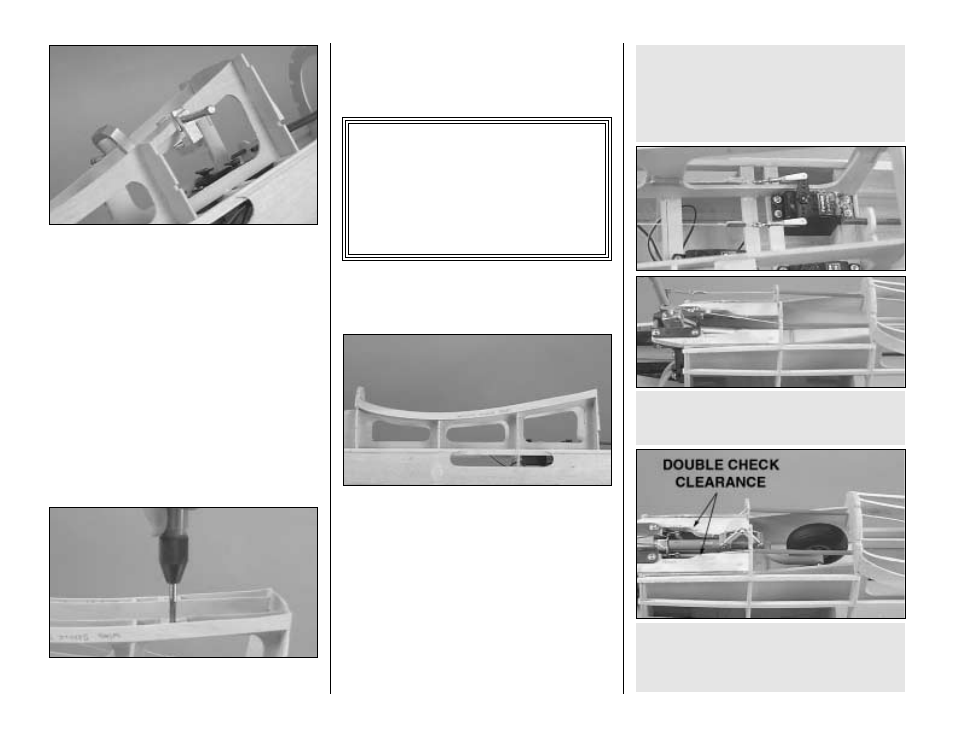
❏ R2. Retract the nose gear with the cable in place
and make sure there is clearance for the cables as
they retract into the nose of the model. Make
adjustments to the landing gear plate as needed.
❏ R1. Attach the cable to the servo arm and the
nose steering arm following the instructions
included in the Pull-Pull kit.
Nose Gear Steering
Pull-Pull System installation.
This step is only if you have retracts installed.
We will use the Sullivan Pull-Pull System (SULQ3121)
P
P
P
P
-
-
3
3
3
3
9
9
9
9
F
F
F
F
a
a
a
a
c
c
c
c
tt
tt
Production models of the P-39 started arriving
at Air Corps squadrons in January 1941; six
months later the first Airacobras reached
England. The British had planned to order 675
of the planes, but after disappointing combat
experience, the order was canceled.
36