Top Flite TOPA0145 User Manual
Page 10
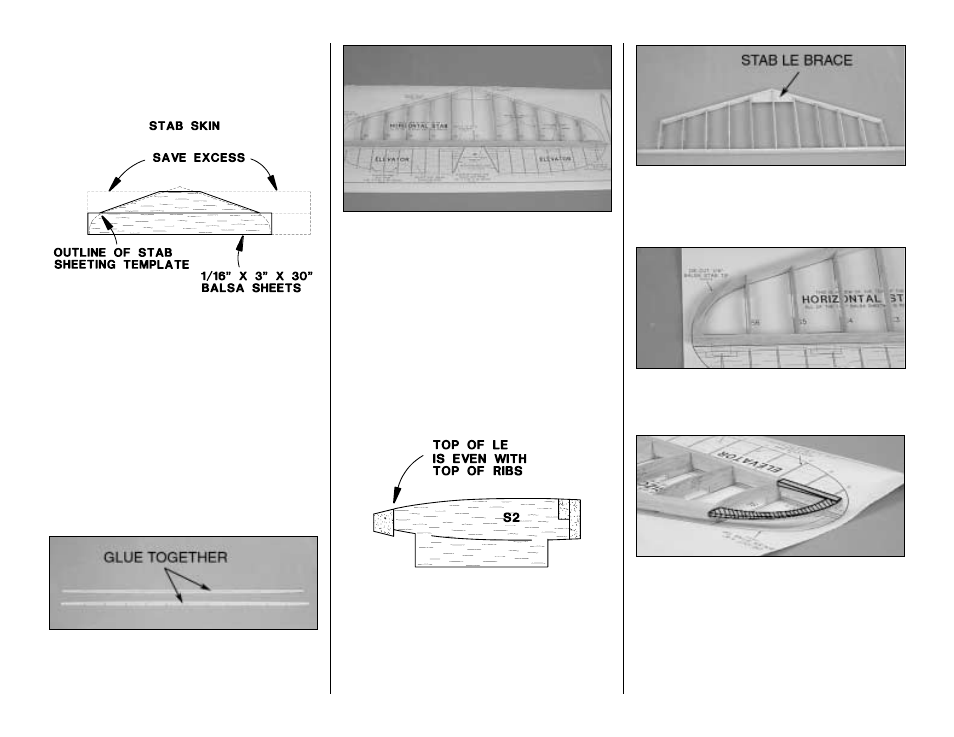
❏ 2. Place one of the balsa skins over the stab plan
and cut the sheeting as shown in the sketch below.
Be sure to cut the balsa skins slightly larger than the
plan to allow for positioning.
❏ 3. Use a small piece of the excess that you cut off
to fill in the small area at the front of the stab skin.
❏ 4. Cut a second skin to the same size and shape.
Build the stabilizer
❏ 1. Cut the stab plan along the dashed line and
tape it to your building board. Cover the stab plan
with Plan Protector.
❏ 2. Glue the die-cut 1/8" [3.2mm] balsa stab TE
spar to the die-cut 1/8" [3.2mm] balsa stab TE.
These pieces are symmetrical so it does not matter
how you join them.
❏ 3. Insert all the die-cut 3/32" [2.4mm] balsa stab
ribs except for rib S1 into the TE spar and place the
assembly over the plan.
❏ 4. Make sure all the ribs are fully seated into the
TE spar and that the jig tabs are contacting the
building board. Use a square to make sure the TE is
perpendicular to your building board. Glue the ribs
to the TE with thin CA.
❏ 5. Sand a bevel on the front of the ribs to
accommodate the aft sweep of the LE. Cut the 5/16”
x 15” [7.9 x 381] tapered balsa leading edge at the
angles shown on the plan. When you are satisfied
with the fit, glue the leading edge to the front of the
ribs. Be sure that the top of the tapered balsa leading
edge is flush with the top of the ribs.
❏ 6. Fit the Stab LE Brace into the slot in rib S1. Test
fit S1 and the stab brace as shown on the plan.
When you are satisfied with the fit, glue S1 and the
stab LE brace into position.
❏ 7. Glue the stab tips to the stab where shown on
the plan. Make sure the tips are centered (vertically)
on tip ribs S6 and the trailing edge.
❏ 8. Relocate any T-pins that are protruding above
the structure so they will not be in the way when you
sand the stab tip and the leading and trailing edges.
Use a bar sander and 80-grit sandpaper to bevel the
top of the stab tips to accommodate the sheeting.
Shape the top of the TE and LE to blend with the
stab tips and the ribs. We've marked the centerline of
the stab tip and highlighted the top of it so you can
see how the stab tip is tapered.
10