Top Flite TOPA0145 User Manual
Page 17
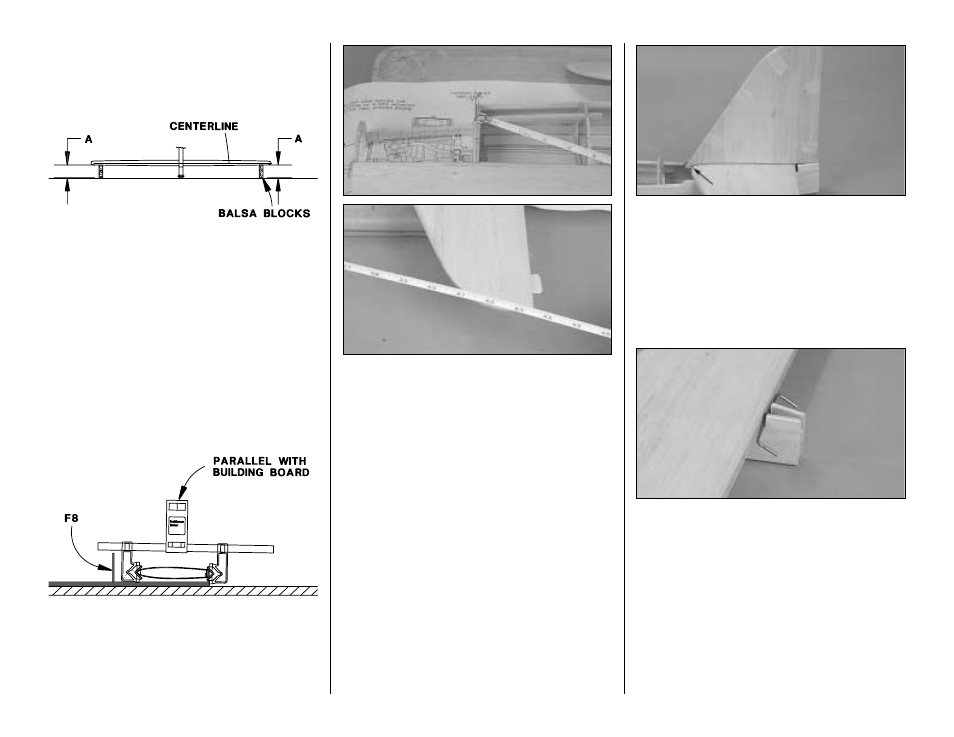
Mount the stab and fin
❏ 1. Remove the elevators from the stab.
❏ 2. Place the stab on the stab saddle, aligning the
centerline mark on the trailing edge of the stab with
the center of the fuselage. Place weights on top of
the stab to hold it in position. View the fuse from the
rear and make sure the stab is level. To confirm,
place balsa blocks (not included) under both sides of
the stab and measure the distance from the
centerline on the TE of the stab to your building
board. If necessary, reposition the balsa blocks, shift
the weight or carefully sand the high stab saddle until
the stab will rest level. Be sure to sand carefully and
a little at a time so as not to change the incidence
angle of the stab.
❏ 3. With the stab resting on the saddles and
weights on top to hold it down, check the stab
incidence by placing an Incidence Meter across one
side of the stab, then the other side of the stab near
the fuse. If necessary, adjust the stab saddles so the
incidence is parallel with your building board.
❏ 4. Place a leftover piece of 3/16" x 3/16" [4.8 x
4.8mm] stringer in the top center notch of formers F3
and F4. Insert a T-pin in the center of the stringer at F3.
Place a Hobbico Retractable Fabric Tape Measure
(HCAR0478) (or any suitable measuring device) over
the T-pin and measure the distance from the pin to the
left tip of the horizontal stab and then to the right tip of
the stab. Adjust the stab until the distance from the pin
is the same on both sides of the stab
❏ 5. Recheck to see that your stab is still level. Mark
the exact location where you will glue the stab to
the saddle.
❏ 6. Now that you are sure the stab will align, remove it
and apply 30-minute epoxy to the joining areas and
glue it to the fuse sheeting and the ply stab saddle. Use
the tape measure technique to recheck your alignment.
Make sure the stab is level and the incidence is correct.
Wipe away excess epoxy before it cures. Do not disturb
the fuse until the epoxy is fully cured.
❏ 7. Test fit the fin on the fuselage at former F10.
Sand a little of the stab where the leading edge comes
together. This is necessary to give proper clearance
for the leading edge of the fin to attach to the front of
the stab. Sand the fin sheeting as needed to achieve
a good fit with the stab.
❏ 8. Remove the vertical fin and place the elevator
joiner wire into position into the slot in the stab saddle.
❏ 9. After you are satisfied with the fit of the fin to the
stab, apply a film of 30-minute epoxy to the base of
fin rib V1 and to the stab sheeting. Pin V1 of the fin
assembly so that you get a good glue joint between
V1 and the stab. Align the LE of the fin with the
centerline on the plan. Immediately proceed to the
next step.
17