Top Flite TOPA0145 User Manual
Page 29
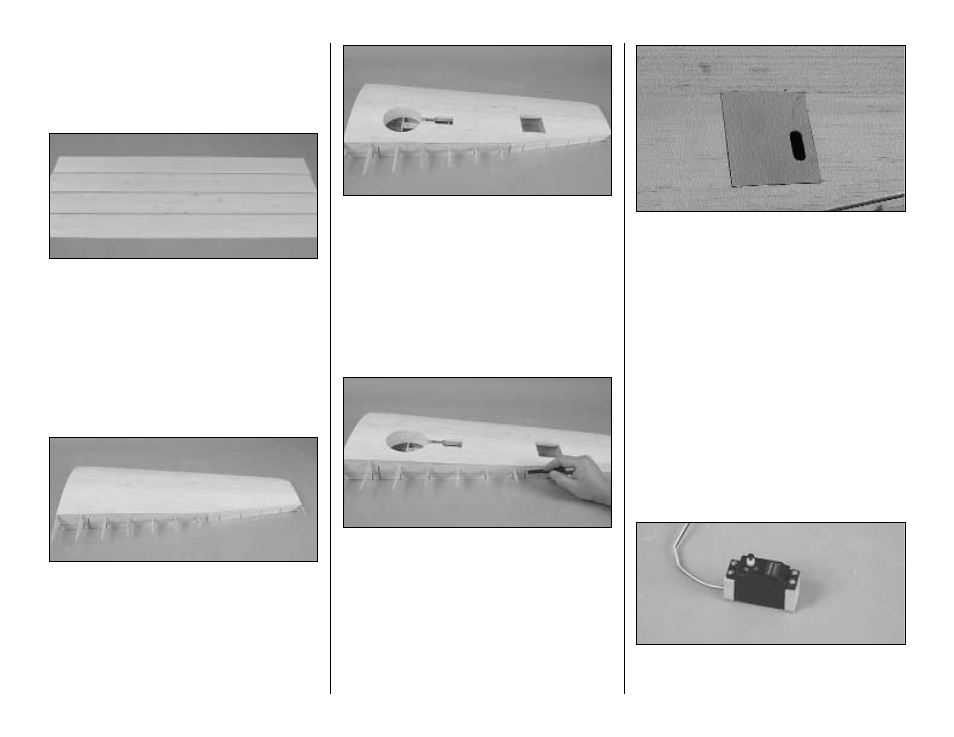
Sheet The Bottom Of The Wing
❏ ❏ 1. Remove the T-pins. Use a sanding bar to sand
the LE, TE spars and ribs so they are smooth and
even. Be careful not to change the shape of the ribs.
❏ ❏ 2. Glue four sheets of 1/16" x 3" x 30" [1.6 x 76
x 762mm] balsa together in the same manner as you
did for the horizontal stabilizer. This will create the
bottom wing skin.
❏ ❏ 3. Cut the skin to the shape of the wing, but cut
it approximately 1/4" [6.4mm] larger than the wing.
This will provide a bit of excess when positioning the
skin. Save the excess that was cut away for later use
in the sheeting process.
❏ ❏ 4. Glue the skin to the wing ribs and spar. Use
an aliphatic glue for this. Tape the leading and trailing
edges of the sheet to the leading and trailing edge of
the wing. Hold the skin in place on the ribs with a few
weighted bags.
Note: DO NOT GLUE the skin to the area around the
aileron hatch cover. This will be cut away in the next
step. Gluing the skin to the spar around the hatch will
make it difficult to cleanly remove the hatch.
❏ ❏ 5. After the glue has dried, cut away the openings
for the landing gear and the aileron servo hatch. Start
by cutting the hatch opening under size and carefully
enlarge it using a fresh #11 blade and a straightedge
until the die-cut 1/16" [1.6mm] ply hatch cover fits.
Hint: As you zero-in on the final shape of the hatch
opening, use the hatch cover itself as a template to
finalize the exact shape and size of the opening.
❏ ❏ 6. Use thin CA to adhere the sheeting at the
aileron hatch opening and the wheel well.
❏ ❏ 7. Cut the trailing edge support on the
embossed line.
Installing the Aileron Servos
This is a good time to get the aileron servos installed.
Doing it now will make it easy to run the wires and
get the hatches to fit.
❏ ❏ 1. Locate the die-cut 1/16" [1.6mm] aileron
servo hatch and fit it to the opening in the wing.
❏ ❏ 2. Use six of the #2 X 3/8" [9.5mm] flat head
sheet metal screws to mount the hatch to the servo
rails. Place the hatch cover on the servo hatch rails
making sure it is in the correct orientation as shown
on the plan. Drill 1/16" [1.6mm] holes through the
punch marks in the hatch cover into the rails.
Enlarge the holes in the hatch cover only with a 3/32"
[2.4mm] drill bit. Countersink the holes for the #2 x 3/8"
[9.5mm] flat head screws with a countersink or Dremel
#178 bit. Test fit the hatch cover to the rails with the
screws. If necessary, sand the edges of the hatch cover
so they align with the edges of the hatch opening.
Note: If you find it difficult to countersink the holes in
the hatch cover for the flat head screws, you could
use regular #2 x 3/8" [9.5mm] screws (not supplied)
and not countersink the holes.
❏ ❏ 3. Locate two of the 5/16" x 3/4" x 7/8" [7.9 x
19.1 x 22.2mm] basswood aileron servo mounting
blocks and mount the servo to the blocks.
29