Toa DP-SP3 User Manual
Page 45
44
45
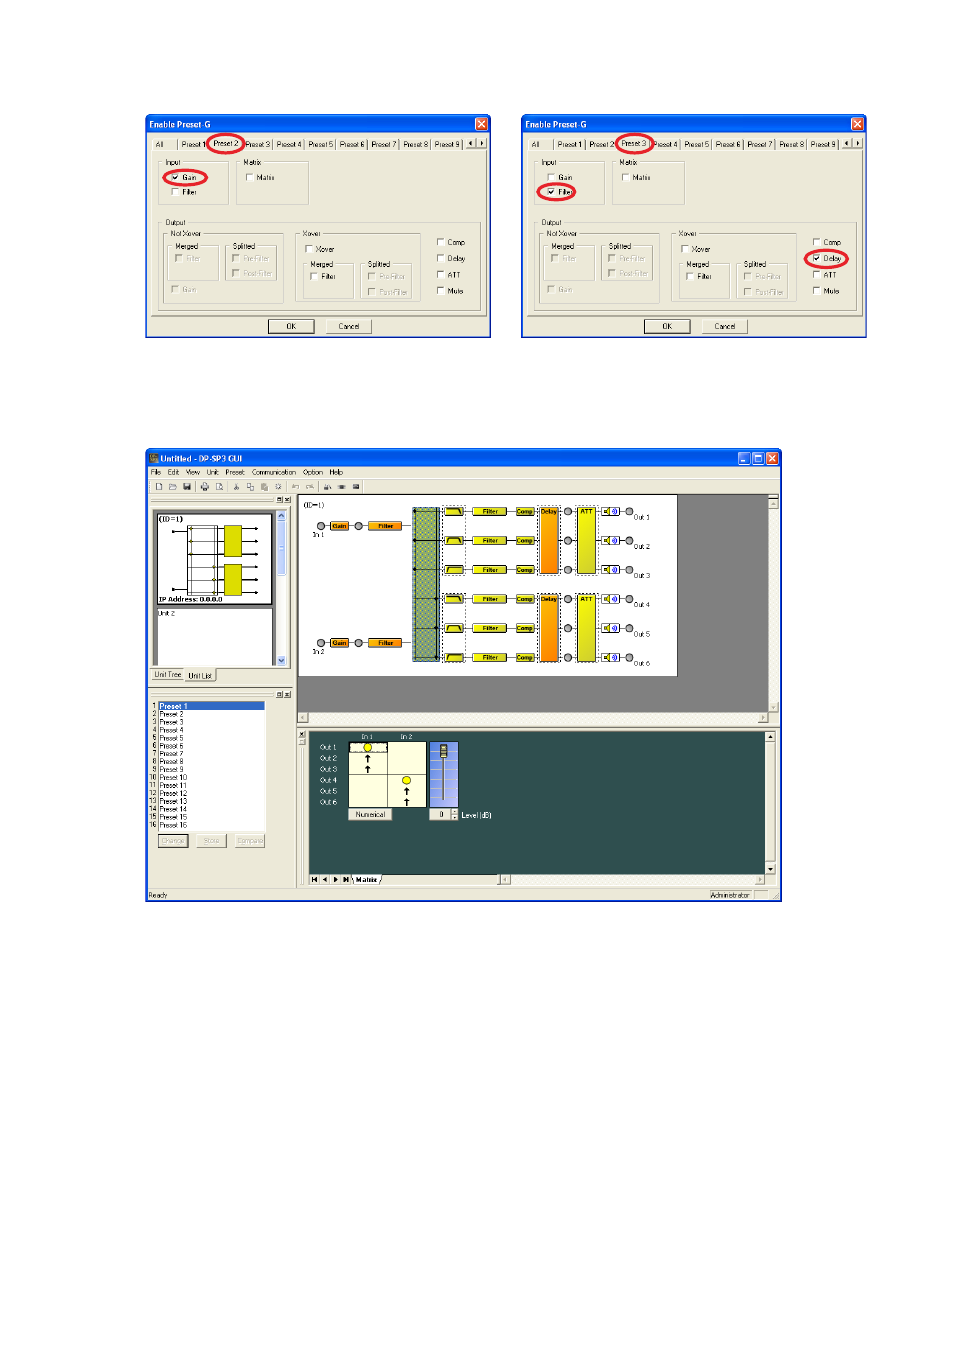
(Example when a checkmark is placed
in the Preset 2’s Gain box)
(Example when checkmarks are placed
in the Preset 3’s Filter and Delay boxes)
Step 4. Click the “OK” button on the “Enable Preset G” screen.
Setting is completed, and the screen returns to the display in Step 1.
The boxes corresponding to the set parameters are displayed in orange.
Step 5. To cancel the Preset G setting, return to Step 2, select the corresponding Preset memory, uncheck the
desired parameter checkboxes, then click the “OK” button.
For the cancelled parameters, the original parameters of the selected Preset memory become enabled.
See also other documents in the category Toa Equipment:
- D-2000 Series Installation (84 pages)
- DD-2000 Series Manual (24 pages)
- D-2000 Series Read Me First (12 pages)
- D-2012AS (2 pages)
- D-2012C (4 pages)
- D-901 (96 pages)
- CR-273 (20 pages)
- CR-413-6 (20 pages)
- EV-20R (20 pages)
- MP-1216 (8 pages)
- MB-WT3 (2 pages)
- MT-251H (1 page)
- F-2322C (12 pages)
- F-2852C (12 pages)
- SC-630 (2 pages)
- ES-0851 (4 pages)
- ES-C0651 (4 pages)
- F-1000B (18 pages)
- F-122C (12 pages)
- F-122CU (20 pages)
- F-122CU2 (16 pages)
- F-1300B (18 pages)
- F-1522SC (8 pages)
- AN-9001 (1 page)
- C-AL80 (16 pages)
- DP-K1 (28 pages)
- DP-K1 (102 pages)
- DP-L2 v.2.00 (28 pages)
- DP-SP3 Protocol (14 pages)
- DP-SP3 (24 pages)
- E-232 (8 pages)
- AT-063AP (4 pages)
- BS-1015BSB (8 pages)
- BS-1030B (4 pages)
- BS-634 (4 pages)
- BS-1034EN (8 pages)
- BS-1110W (4 pages)
- BS-301B (8 pages)
- BS-301B AS (4 pages)
- MB-WT1 (1 page)
- S-D7300 (16 pages)
- VX-200SP-2 (24 pages)
- YA-1000A (1 page)
- ZM-9001 (2 pages)