0 coil maintenance, 0 drive components (cont'd) – Reznor MAPSII Series REDA Users Manual User Manual
Page 8
Form O-MAPS II, P/N 209179 R7, Page 8
Condenser Coil
Connections
Coils in the Cabinet (Evaporative Coils)
1. Verify that the electrical power has been turned
off and the disconnect switch locked.
2. Open the access panels.
3. Use a soft brush to remove any dirt and debris
from both sides of the coil.
4. Spray with cold or warm (not hot) water and a
cleaning solution (non-acid based coil cleaner is
recommended). Due to possible damage to the
coil, high pressure spray is not recommended.
First spray the leaving airflow side, then the inlet
airflow side.
As much as possible, spray the solution perpen-
dicular to the face of the coil.
Follow the instructions on the cleaning solution.
When cleaning process is complete, rinse both
sides with cool, clean water.
5. Replace the panels.
Coils on the Side of the Cabinet (Condenser
Coils)
The entering airflow side of the condenser coils can
be reached for cleaning without removing any com-
ponents. Remove the access panel on the end of
the condenser section to access leaving side and
additional coils.
1. Verify that the electrical power has been turned
off and the disconnect switch locked.
2. Use a soft brush to remove any dirt and debris
from the coil.
3. Spray with cold or warm (not hot) water and a
cleaning solution (non-acid based coil cleaner is
recommended). Due to possible damage to the
coil, high pressure spray is not recommended.
Spray up through the coil. Follow the instructions
on the cleaning solution. When clean, rinse with
cool, clean water.
5.0 Coil
Maintenance
Inspect all cooling coils at the beginning of the cooling season or more often if
needed.
Coil Access - The entering air side of the condenser coils is visible on the
outside of the system. For additional inspection, remove the tubing access
panel.
The evaporative coils can be accessed by opening the coil cabinet door (See
FIGURE 1).
Coil Maintenance - Inspect coils for debris, dirt, grease, lint, pollen, mold, or
any element which would obstruct heat transfer or airflow. Inspect coils and
tubing for physical damage. Inspect feeders, piping connections, coil headers,
and return bends for signs of fatigue, rubbing, and physical damage.
Clean the coils annually, or more often if needed. Use the proper tools and
follow the instructions carefully to avoid damaging the coil. Use of a non-acid
based coil cleaner is recommended. Due to possible damage to the coil, high
pressure spray is not recommended.
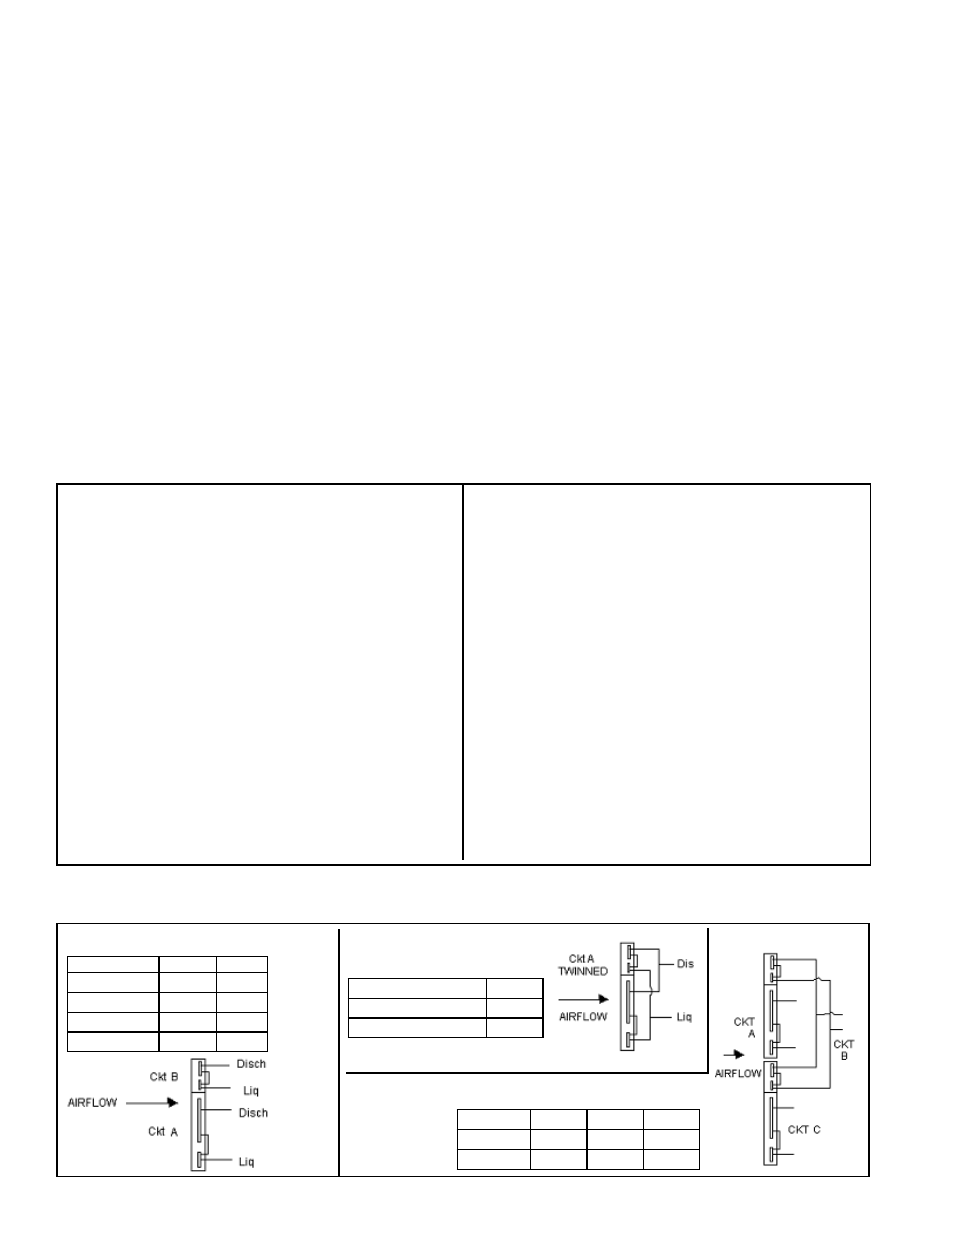
MODELS: 037, 025 (bottom circuit only)
FIGURE 3B - One
Twinned Circuit
FIGURE 3A - Two Single Circuits
FIGURE 3C - Three Single Circuits
Sizes
Ckt A Ckt B
059. 060
3 ton
2 ton
077, 078, 102 4.5 ton 2 ton
090, 114
4.5 ton 3 ton
108, 126
6.2 ton 3 ton
Sizes
Ckt A
025 (bottom ckt only) 2 ton
037
3 ton
Sizes
Ckt A Ckt B Ckt C
184, 220 4.5 ton 6.2 ton 4.5 ton
198, 234 4.5 ton 6.2 ton 6.2 ton
If additional cleaning is required or if coils are removed for any reason, refer to
FIGURES 3A-3L for making condenser coil connections.
The belt tension should be checked at regular maintenance inspections. Proper
belt tension is important to the long life of the belt and motor.
Be sure the belt is aligned in the pulleys. If belt is removed or replaced, be sure
to align directional arrows on the belt to the proper drive rotation.
4.0 Drive
Components
(cont'd)