Installation of waterflow switches – Potter Releasing Systems User Manual
Page 31
31
Installation of Waterflow Switches
Read and follow the manufacturers instructions.
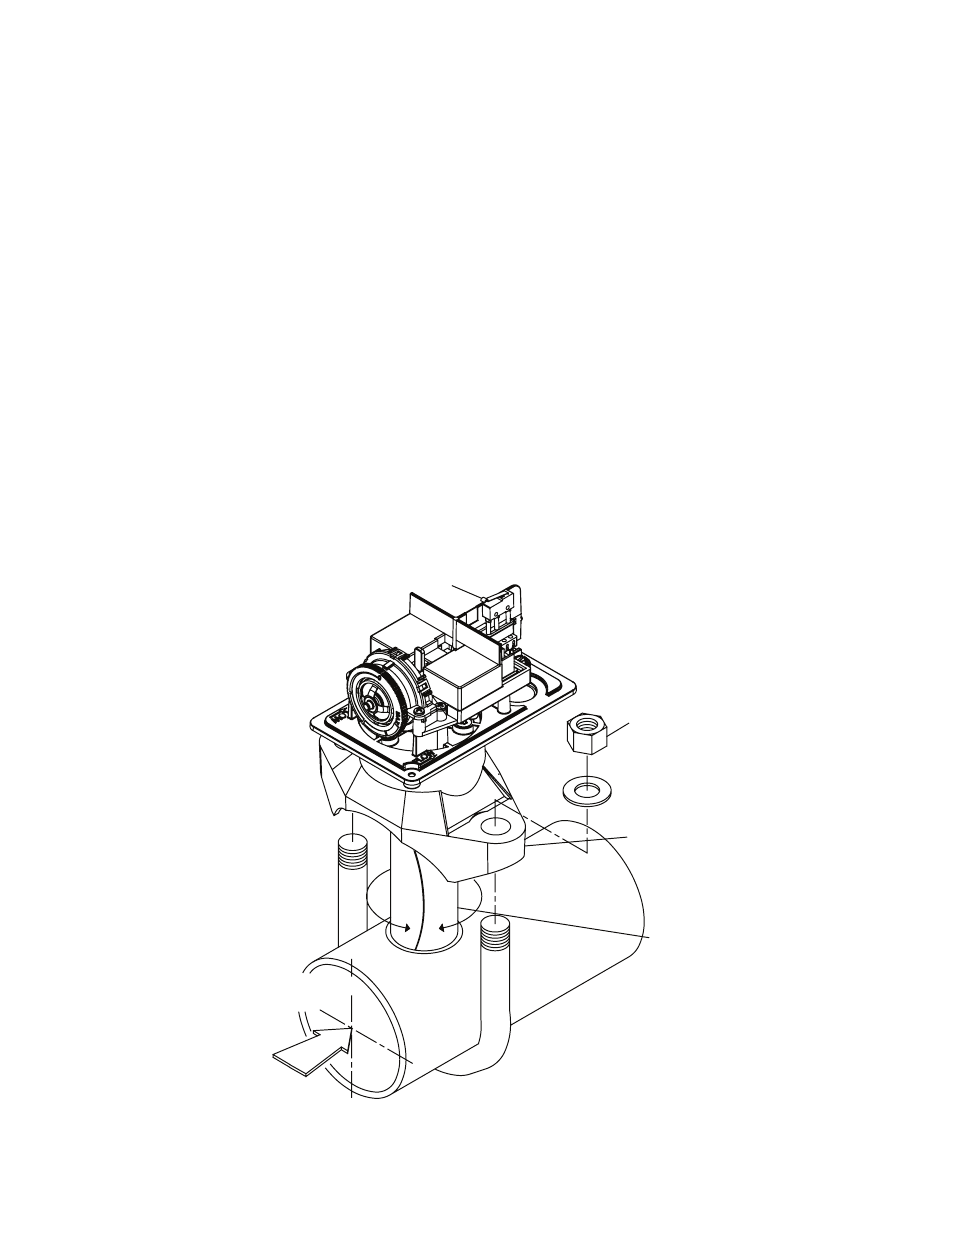
Vane (Paddle) type: For use in wet pipe systems only!
Vane type water flow switches can be installed in either vertical or horizontal sections of pipe. If they are
installed in a horizontal section, they must be installed on the top half of the pipe. This is to prevent any debris
in the pipe from falling into the throat area of the flow switch and affecting the paddle movement. They should
never be installed on the bottom half of the pipe.
After shutting off the water to the system and draining it, drill the correct size hole for the flow switch. The hole
should be de-burred and the inside of the pipe should be cleaned of any rust, scale or corrosion. Do not trim the
paddle. The most likely area for a paddle to hang up is the area immediately upstream of the hole in the pipe,
on the same side of the pipe as the hole. When water flows through the system, the paddle is pressed against the
inside of the pipe.
The flow switch should be centered in the pipe and the “U” bolt should be tightened evenly according to the
manufacturer’s specifications. This will prevent the paddle from dragging on the inside of the pipe and prevent
the flow switch from leaking.
When filling the system, first open any valves at the end of the system or branch lines. Slowly open the water
supply valve, let the water flow out of the valves until it is flowing smoothly. This will prevent air from entering
the system and help bleed any trapped air out of the system.
Fig. 11
WATERFLOW
DIRECTION OF
TIGHTEN NUTS
ALTERNATELY
MOUNT ON PIPE SO
ARROW ON SADDLE
POINTS IN DIRECTION
OF WATERFLOW
ROLL PADDLE IN
OPPOSITE DIRECTION
OF WATERFLOW
DWG. #1146-1E
DO NOT LEAVE COVER OFF FOR
EXTENDED PERIOD OF TIME
COVER TAMPER SWITCH