Checkline TI-UMX2 User Manual
Page 8
– 8 –
Press & Long Hold:
Primary function – manually turn off the TI-UMX2.
The TI-UMX2 will automatically shut off after 5 minutes if it hasn’t detected a
measurement.However,tobesuretheunitisshutoffafteruse,whenthebuttonis
pressed and held down for approximately 10 seconds, “POWER” “OFF” will be
displayed, and the unit will manually turn off. Once the unit turns off, the button can be
released.
It’s really just that simple!
3.3 Gauge settings
The current settings of the TI-UMX2 will be displayed on initial power up and every 30
seconds following. This is intended to provide the user with an easy way to confirm the
settings at any time, without having to scroll to the specific menus items individually.
The parameters will be displayed in the order that follows:
However,iftheuserisinthemenusandviewingthesubmenuitems,thecurrently
selectedoption/featurecanbeidentiiedbythe“,”(comma)illuminatedinthetopleft
corner of the small display.
Gauge Model TI-UM2
battery status
LO, MED or HI
Transducer Type
Identiied
P-E, PECT, E-E or TCG
Current Gain setting
VLOW, LOW, MED, HIGH, VHIGH
Material Type
ALU, STL, STST, IRON, CIRO, PVC, PLST,
PLUR or Cush
– 49 –
3. Plug either the RS232 into a serial port, or USB connector into a USB port on the
PC.
noTe:
IftheUSBcableisused,thecomport‘must’besettoports1-4.Otherwise,ifa
standard serial port is used, skip to step #9.
4. We’ll assume the USB cable
is used for this example.
Connect the USB cable to
the TI-UMX2 and PC.
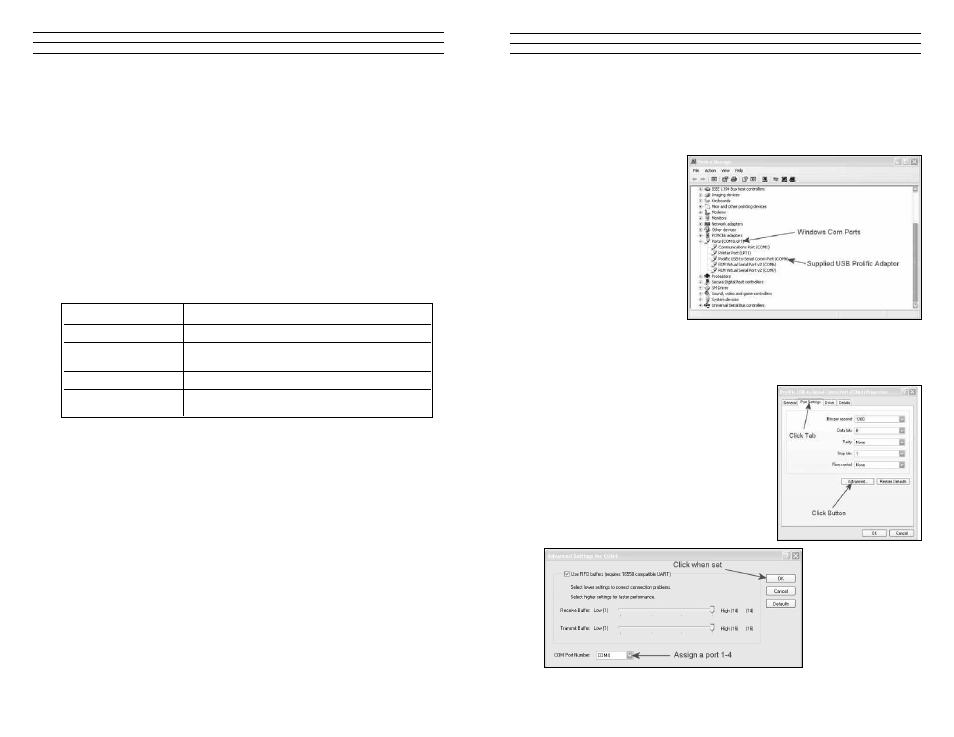
5. OpenWindows®‘devicemanager’andclicktheplussignnexttoPORTS,inorder
to display the complete list of all com ports in use. Look for the device named
“Prolific USB-to-Serial to determine the current port that windows® has assigned
the device.
noTe: If the com port is 1-4 skip to step #9.
6. Assuming the assigned port is other than 1-4,
double click on the “Prolific” port to display the
properties dialog box, as shown above.
7. Assign a com port 1-4 to the device, and click
OK to set the port.