Checkline TI-UMX2 User Manual
Page 7
– 7 –
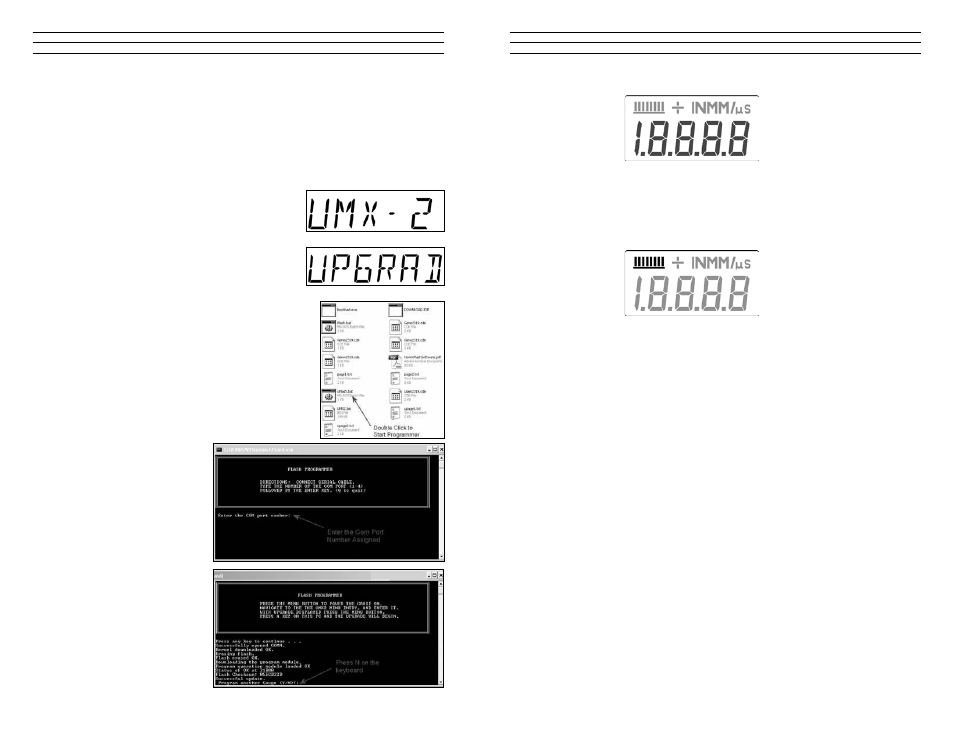
The numeric portion of the display consists of 4 complete digits preceded by a leading
“1”, and is used to display numeric values, as well as occasional simple words, to
indicate the status of various settings. When the TI-UMX2 is displaying thickness
measurements, the display will hold the last value measured, until a new measurement
is made.
These eight vertical bars form the Stability Indicator. When the TI-UMX2 is idle,
only the left-most bar and the underline will be on. When the gauge is making a
measurement, six or seven of the bars should be on. If fewer than five bars are on, the
TI-UMX2 is having difficulty achieving a stable measurement, and the thickness value
displayed will most likely be erroneous.
3.2 single button operation
The TI-UMX2 is controlled using a single button to move around the menu structure
andenable/disableitsfeatures.Thereare3basic‘buttonpress’sequencesavailableas
follows:
Press & Hold:
Primary function – enter into, or exit out of the menu structure.
When the button is pressed and held down for a specific duration of time, the
single level menu structure will begin scrolling through the top level of menu items
continuously. If entering into the menu structure, “Enter” will be displayed, followed by
scrolling through the menu items. If exiting the menu items, “Exit” will be displayed,
followed by advancing to the current storage location (i.e. A 1), or “MEMOFF” if data
storage has been disabled by the user. Once either instance has occurred, the button can
be released.
Press & Release:
Primary function – selection of menu items.
To select a menu item, press and release the button. The sub menu items will begin
scrolling on the display. Finally, to select a sub menu item, press and release again.
– 50 –
8. Reboot your computer.
9. Power on the TI-UMX2 that should already be connected to your PC.
10. Press and hold the single TI-UMX2 button, located on the top end cap, until the top
level menu options begin scrolling on the alpha display. Once this occurs, the button
can now be released. The menu options will scroll one to the next in a time delayed
sequence, and will display all the menu options in a continuous loop.
11. When TI-UMX2 is displayed, immediately press
and release the button to enter the sub menu
options. Again, the options will begin scrolling
in a continuous loop (LT ON, LT OFF, LAUTO,
MEMON/OFF,UPGRAD).
12. When UPGRAD is displayed, immediately press
and release the button to set put the TI-UMX2
into upgrade mode.
13.Openthetemporaryfolderwiththeunzipped
firmware files, and double click the batch file uflash.
bat.
14. Enter the com port number previously assigned to the
Prolific USB device, again 1-4, and press ENTER on
your keyboard, followed by pressing the spacebar to
proceed.
15. The flash programming
process will begin, and
continuously display the
active status of the blocks
transferred. When the
process is complete, press
wN on your keyboard to end
the process.
16. The TI-UMX2 has
successfully been upgraded
to the latest version of
firmware.