Checkline TI-UMX2 User Manual
Page 20
– 20 –
6.0 seleCTInG THe MeasureMenT Mode
6.1 Which mode & transducer do I use for my application?
High penetration plastics and castings
The most common mode for these types of applications is pulse-echo. The
TI-UMX2hasbeenoptimizedforcastmaterials.Castironapplicationsrequire1-
5MHzfrequencies,andcastaluminumrequireshigherfrequenciesfrom7-10MHz
frequency. Plastics typically require lower frequencies depending on the thickness
and make-up of the material. Larger diameters offer greater penetration power
becauseofthecrystalsize,fordificulttomeasurematerials.
Corrosion & Pit Detection in steel and cast materials
Use pulse-echo mode whenever attempting to locate pits and flaws. Typically a
5MHztransducer,orhigher,willbeusedforthesetypesofapplications.Uselow
frequencies for greater penetration and use higher frequencies for better resolution.
Measuring Material & Coatings
The pulse-echo coating mode should be used when both material and coating
thicknesses are required, while still requiring the ability to detect flaws and pits. A
special coating style transducer is required for use in this mode. There are a variety
of coating transducers in various frequencies available from Dakota. If a dual
element transducer is selected with the TI-UMX2 kit, it will be a coating enabled
version.
Thru Paint & Coatings
Often times, users will be faced with applications where the material will be coated
with paint or some other type of epoxy material. Since the velocity of the coating
is approximately 2.5 times slower than that of steel, pulse-echo mode will induce
error if the coating or paint is not completely removed. By using echo-echo mode,
the user is able to successfully measure through both, the coating and steel, and
completely eliminate the thickness of the paint or coating. Therefore, the steel can
be measured without having to remove the coating prior to measuring. Users will
often use pulse-echo mode and echo-echo mode in conjunction when performing
inspections on coated materials.
Thru coating measurements require special high damped transducers. The most
commontransducersarethe3.5,5,and7.5MHzhidampedtransducers.These
transducers are suitable for use in both pulse-echo and echo-echo modes. This
conveniently enables the user to accurately measure overall material thickness using
the thru Coating mode, and then conveniently switch to pit detection mode without
changingtransducers.The_”5MHzHidampedtransduceristhemostcommonly
used transducer for standard thru coating applications.
– 37 –
Selecting the Auto Increment Direction
The Auto Increment feature gives the user the ability to specify which direction to
advance the cursor after storing a reading.
saVInG GraPHICs: The TI-UMX2 provides the user with the ability to save
a snapshot of the display screen and all the current settings of the TI-UMX2
with every reading, or just save the reading only. Saving the graphics might be
advantageous to the user for reporting purposes, and additional confidence in the
measurements, as a snapshot of the actual A-Scan waveform will be recorded for
every individual reading. This offers the user the ability to review and confirm the
validity of the measurements, based on the waveforms. Additionally, enabling this
feature will store all the current TI-UMX2 setup parameters for each measurement.
11.3 Creating a new Grid or sequential log (file)
ThissectionwillgothroughthesteptocreateaGrid/LogileandsaveitonyourPC,as
follows:
noTe: This section assumes
that DataComm has already been
installed on your PC, has been
executed, and ready to go.
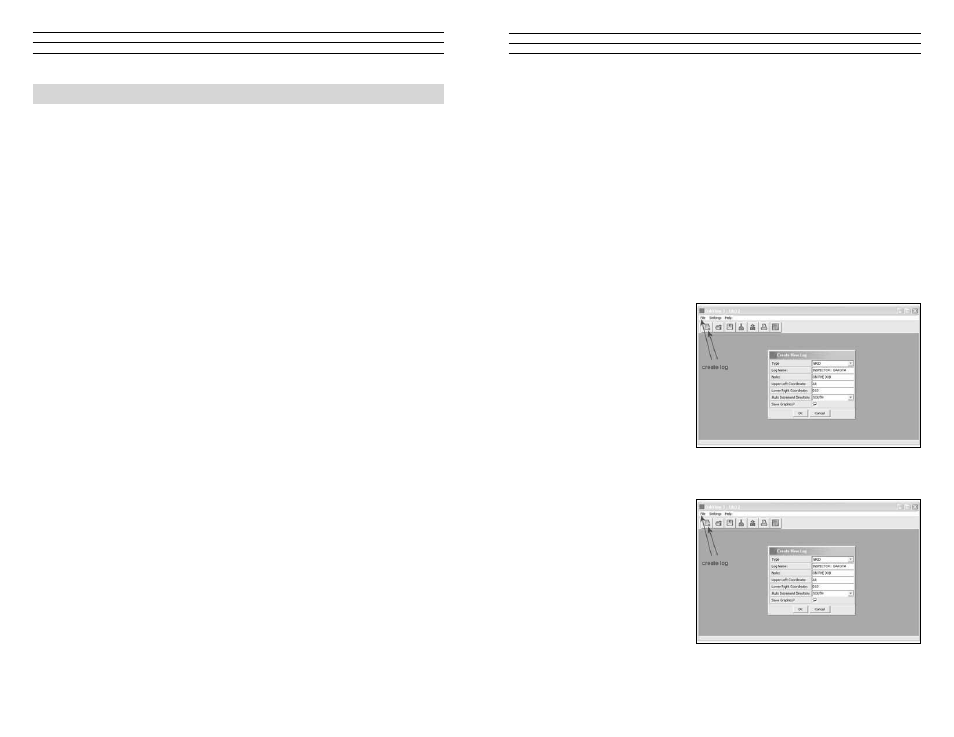
1. A log file can be created two
different ways; Click the icon
buttontoinitiatethe‘New
Log’ dialog box, or click
FILE, followed by clicking
NEW.
2. Clickinthe‘whitespace’ields,oronthedownarrowsnexttotheieldstoenterthe
options for the file template, as illustrated above.
3. When all the information has
been entered into the fields,
click the OK button to create
and display the log file.
4. The log file can be saved two
different ways; Click the icon
buttontoinitiatethe‘SAVE’
dialog box, or click FILE,
followed by clicking SAVE.
5. Specify the path to the folder
to store the log file in, give the
log file a unique name, and click save to store the file on your PC.