2 connections of the k-376/k-377, Notice – BUCHI KjelSampler K-377 User Manual
Page 45
5 Putting into operation
45
K-375/376/377 Operation Manual, Version B
• Connect the dosing unit for the acid to connector
i
.
• Connect the RS232 cable to the sampler (if present) to the corresponding connector b.
• Connect any additional perihperals according to the description in figure 5.1.
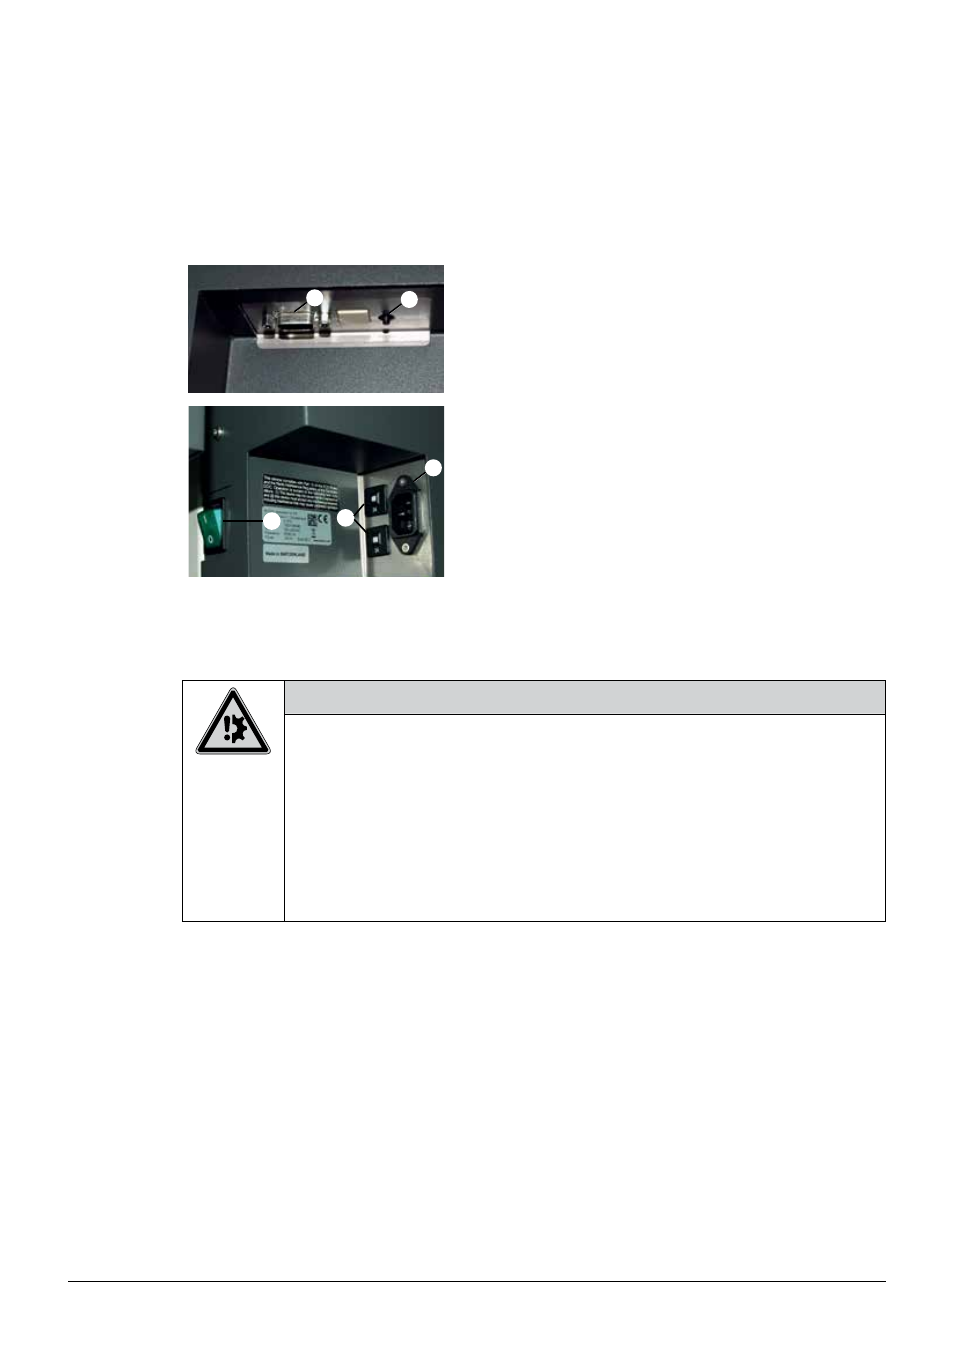
5 .2 .2
Connections of the K-376/K-377
ቢ
ባ
ብ
ቦ
ቤ
(left rear side of the housing)
(right rear side of the housing)
a Power switch K-376/K-377
b Power connection K-376/K-377
c Fuses (2 x 3A)
d RS232 connection to K-375
e Toggle switch (see chapter 8.3)
Fig. 5.2: Electrical connections of the K-376/K-377
NOTICE
Risk of device damage by wrong voltage.
• Make sure that the voltage on the socket corresponds to the voltage given on the type plate
of the instrument.
• Always connect the device to an earthed socket. External connections and extension cables
must be provided with an earthed conductor lead (3-pole couplings, cable or plug equipment)
as the mains lead has a molded plug, thus avoiding risks due to inadvertent defective wiring.
• Make sure that no electric sparks form in the device or its surroundings as they might
damage the instrument.
On the K-376/K-377 sampler
• Connect the power cable to the power connection
b
• Connect the cable to the K-375 device to the RS232 connector
d