Digital effect functions, Digital effects 2 [effect2, Selecting a desired digital effect – Panasonic PV-DV901 User Manual
Page 26: Canceling the digital effect, Wipe mode and mix mode
Attention! The text in this document has been recognized automatically. To view the original document, you can use the "Original mode".
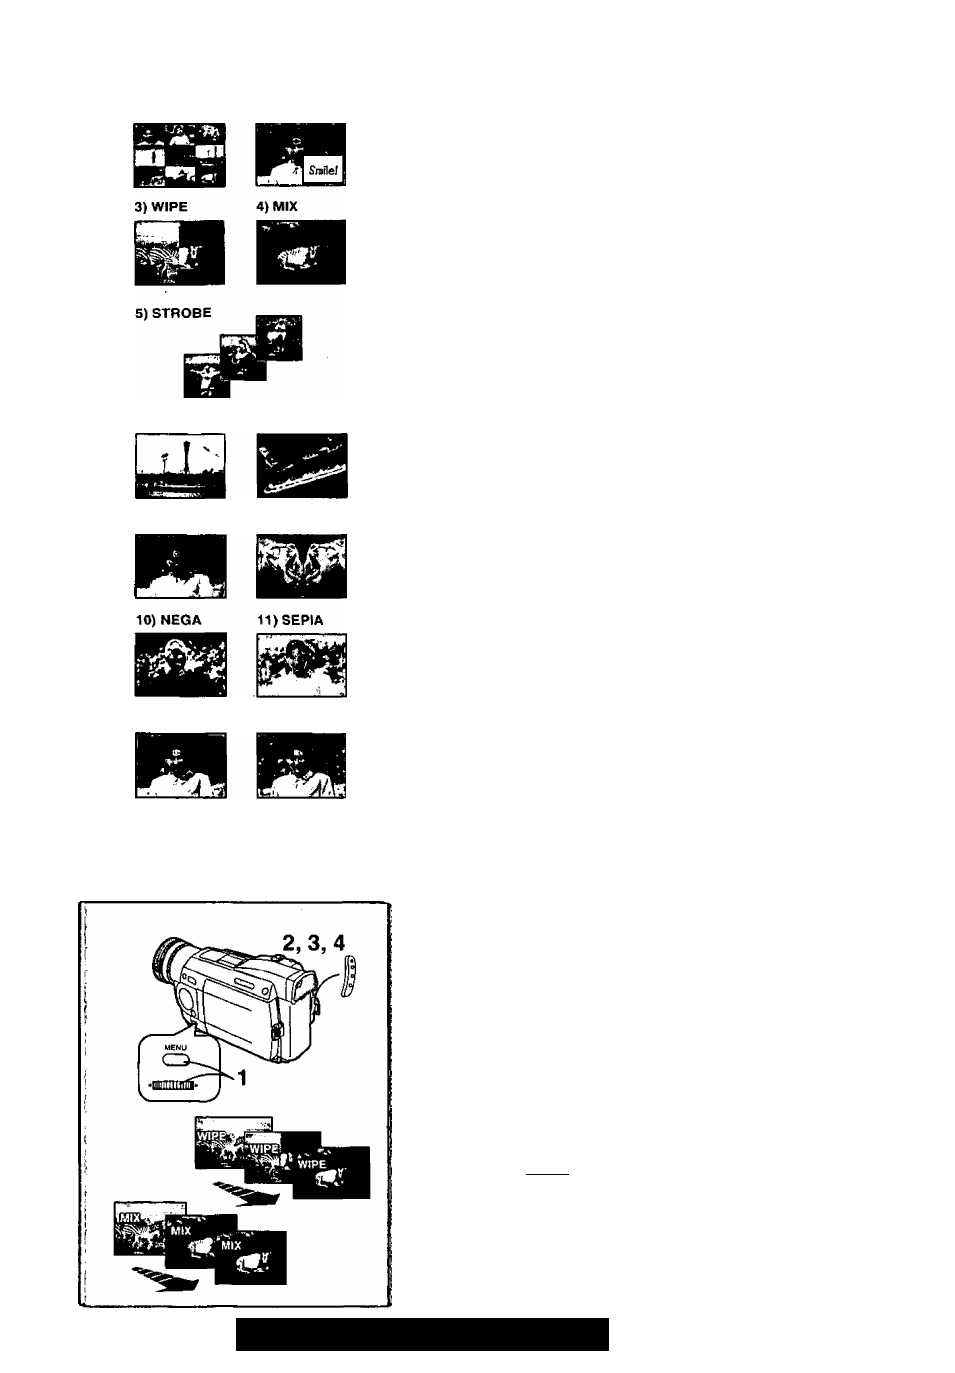
1) MULTI
2)P-1N-P
6) GAIN-UP 7) TRAIL
8) MOSAIC 9) MIRROR
12) MONO
13)SOLARI
Digital Effect Functions
This Palmcorder is equipped with digital effect Functions that add special
effects to the scene.
Digital Effects 1 [EFFECT1]
1) [MULTI] Multi-Picture Mode
2) [P-IN-P] Picture-in-Picture Mode
3) [WIPE] Wipe Mode
4) [MIX] Mix Mode
5) [STROBE] Strobe Mode
• It records images with a stroboscopic effect.
6) [GAIN-UP] Galn-upMode
• It brightens images electronically.
•Adjust focus manually when using this Mode.
7) [TRAIL] Trailing Effect Mode
• It records images with a trailing effect.
8) [MOSAIC] Mosaic Mode
• It produces a mosaic-like image.
9) [MIRROR] Mirror Mode
•The right half of an image becomes a mirror image of the left half.
Digital Effects 2 [EFFECT2]
10) [NEGA] Negative Mode
•The colors of the recorded image are inverted as seen in a negative.
11) [SEPIA] Sepia Mode
• It records a scene with a brownish tint, like the color of old pictures.
12) [MONO] Black&White Mode
• It records an image in black and white.
13) [SOLARI] Solarization Mode
• It records an image with a painting-like effect.
Selecting a desired digital effect
Set [CAMERA FUNCTIONS] » [DIGITAL EFFECT] » [EFFECTIJor
[EFFECT2] » a desired digital effect.
Canceling the digital effect
Set [CAMERA FUNCTIONS] » [DIGITAL EFFECT] » [EFFECT1] or
[EFFECT2]»[OFF]’.
• For other notes, see page 52.
■ Wipe Mode and Mix Mode
Wipe Mode;
Like a curtain is being pulled, the still picture of the last recorded scene
gradually changes to the moving image of a new scene.
Mix Mode:
While the moving image of a new scene fades in, the still image of the last
recorded scene gradually fades out.
1 Set [DIGITAL EFFECT] » [EFFECT1] » [WIPE] or [MIX].
• The [WIPE] or [MIX] Indication appears.
2 Press the Recording Start/Stop Button to start Recording.
3 Press the Recording Start/Stop Button to pause the
Recording.
• The last scene is stored in memory. The [WIPE] or [MIX] Indication
changes toiPaiSHi or [¡50].
4 Press the Recording Start/Stop Button to restart the
Recording.
• The last image of the previous scene gradually changes to the new
scene.
•
• For other notes, see page 52.
26
For assistance, please call: 1-800-21 i-PANA{7262) or