L digital zoom function, Digital electronic image stabilizer function, Fade in/out functions – Panasonic PV-DV901 User Manual
Page 22: Digital zoom function
Attention! The text in this document has been recognized automatically. To view the original document, you can use the "Original mode".
‘ L
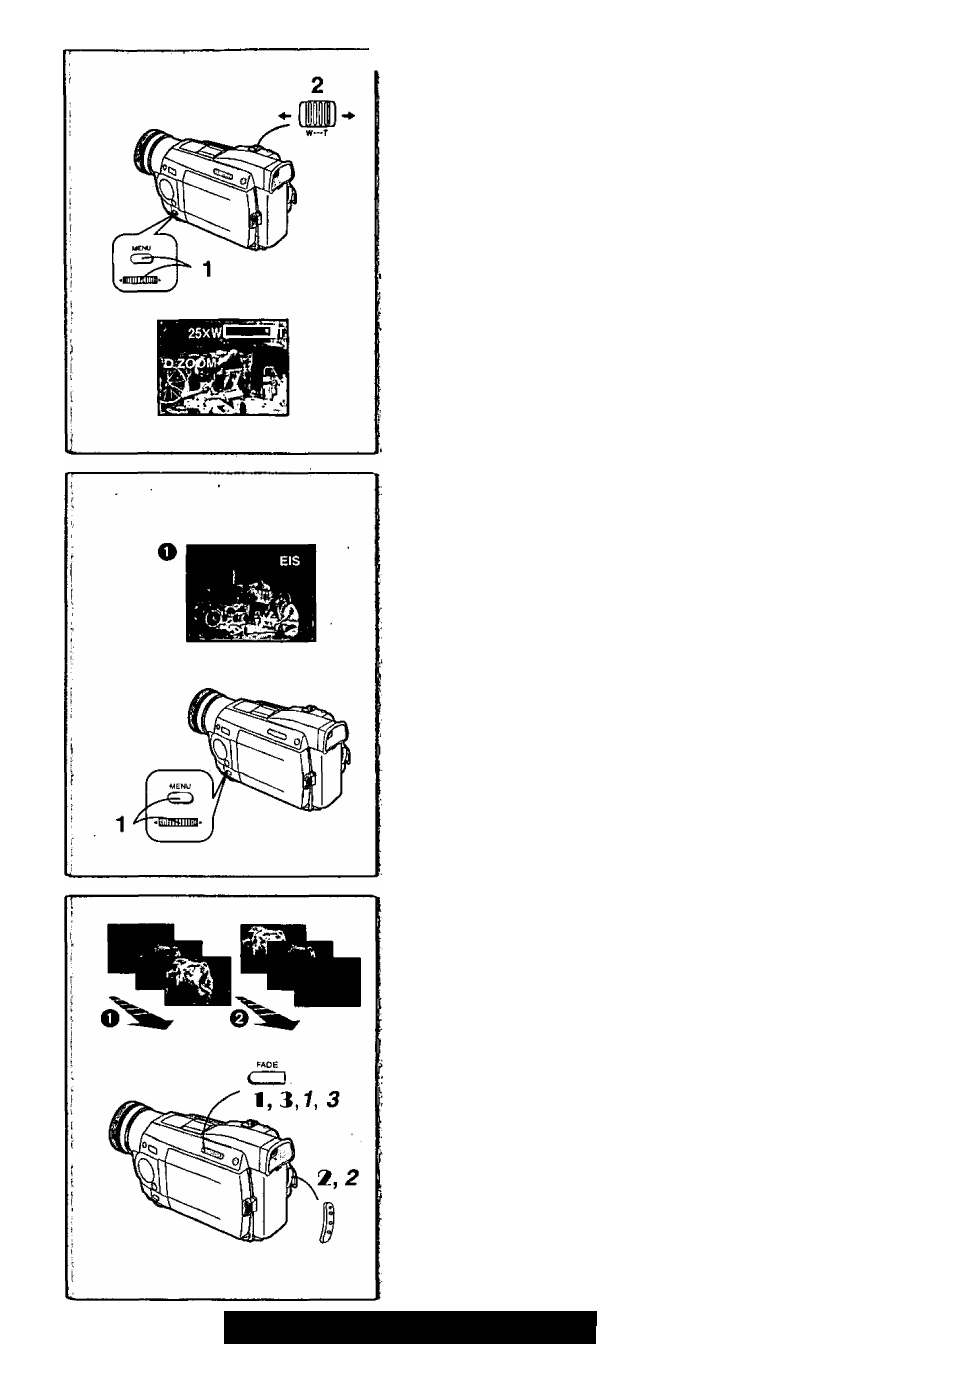
Digital Zoom Function
This function is useful when you want to record close-up shots of subjects
located beyond a normal zoom range of 1 X to 10X magnification. With the
digital zooming Function, you can select a magnification of 25 X or even to
100X.
1 Set [CAMERA FUNCTIONS] » [CAMERA SETUP] »
[□.ZOOM] » [25x] or [lOOx]
• 25X: Digital zooming to 25X
• 100X: Digital zooming to 100X
2 To zoom in or out, press the [W/T] zoom lever towards [W] or
towards [T].
• As the magnification of digital zooming increases, the quality of image may
deteriorate.
Canceling the Digital Zooming Function
Set [D.ZOOM] on the [CAMERA SETUP] Sub-menu to [OFF].
For other notes, see page 5i.
Digital Electronic Image Stabilizer Function
If you are recording in unstable situations and the Palmcorder is shaky, you
can use this function to correct the distortion in these images.
• If the Palmcorder shakes too much, this Function may not be able to
stabilize images.
1 Set [CAMERA FUNCTIONS] » [CAMERA SETUP] » [EIS] »
[ON]
• The [EIS] Indication Q appears.
Canceling Digital Electronic Image Stabilizer
Set [EIS] on the [CAMERA SETUP] Sub-Menu to [OFF],
EIS function may not work when...
• Palmcorder movement is too extreme.
• Recording a subject with distinct horizontal or vertical stripes.
• Recording in low light situations.
• Recording a subject under a great amount of fluorescent light.
• Recording a scene with very fast motions.
For other notes, see page 5i.
Fade In/Out Functions
Fade In O
Fade In brings out images and sounds gradually from a black screen at the
beginning of a scene.
1
Hold down the [FADE] Button while the Palmcorder Is set to
the Recording Pause Mode.
• The image fades out gradually,
2 When the image is completely gone, press the Recording
Start/Stop Button to start recording.
3 Release the [FADE] Button about 3 seconds after starting
recording.
• The image reappears gradually.
Fade Out 0
^
Fade Out causes images and sounds to disappear gradually, leaving^a black
screen at the end of a scene.
/
1
Hold down the [FADE] Button while recording.
• The image fades out gradually.
^
2
About 3 seconds after the Image is completely gone, press
the recording Start/Stop Button to stop recording.
3
Release the [FADE] Button.
For other notes, see page 51.
22
For assistance, please call; 1-800-211-PANA(7262) or