4. calibration using an external weight, When the mc-10k is used – Rice Lake MC Series Mass Comparator, A&D Weighing - MC-30K User Manual
Page 21
19
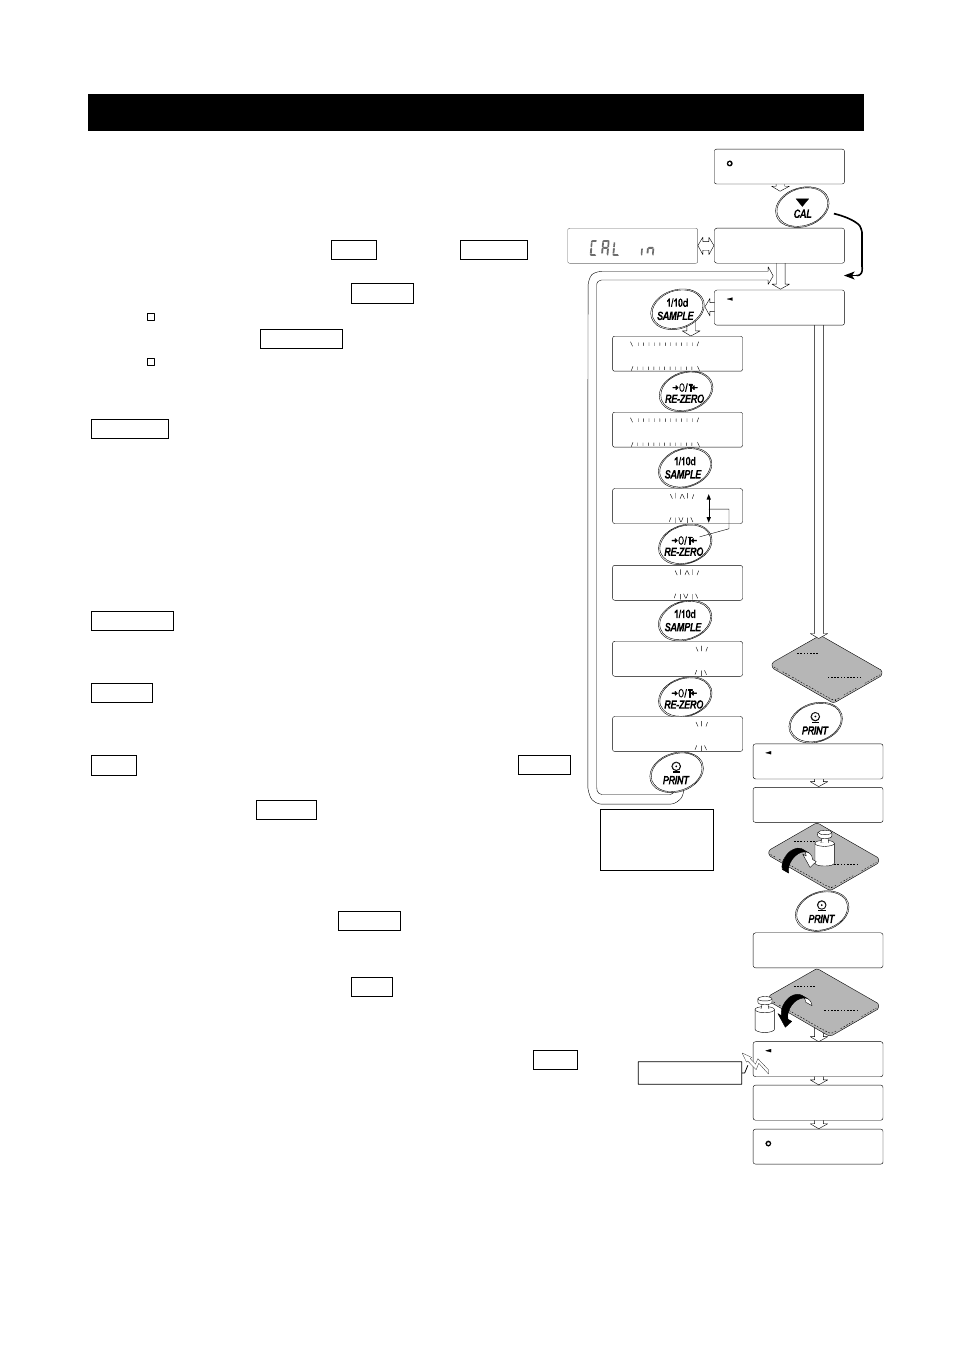
7-4. Calibration Using an External Weight
This function calibrates the balance using an external weight.
When the MC-10K is used
Step 1 Connect the AC adapter and warm up the balance for at
least 30 minutes with nothing on the weighing pan.
Step 2 Press and hold the
CAL
key until
Calout
is displayed, then release the key.
Step 3 The balance displays
Cal 0 .
If you want to change the calibration weight,
press the
SAMPLE
key and go to step 4.
If you use the calibration weight value stored
in the balance, go to step 5.
Step 4 Specify the calibration weight value as follows:
SAMPLE
key... To switch between the calibration weight
selection mode (All of the digits blinking) or
the value adjustment mode (The selected
digits blinking).
With the MC-10K, the digits in the 1
st
, 2
nd
,
and 3
rd
decimal places can be adjusted.
With the MC-31K, the digits in the 1
st
and
2
nd
decimal places can be adjusted.
RE-ZERO
key.. To select the calibration weight or adjust
the value. In the value adjustment mode,
-150 digits appear after +150 digits.
key...... To store the new weight value. Even if the
AC adapter is removed, the data is
maintained in non-volatile memory.
CAL
key ......... To cancel the operation and return to
Cal 0
.
Step 5 Confirm that there is nothing on the pan and
press the
key. The balance measures
the zero point. Do not allow vibration or drafts to
affect the balance. The balance displays the
calibration weight value.
Step 6 Place the displayed calibration weight on the
pan and press the
key. The balance
measures the calibration weight. Do not allow
vibration or drafts to affect the balance.
Step 7 The balance displays
end
.
Remove the weight from the pan.
Step 8 If the "GLP output (
info
)" parameter, of the function table,
is set to "
1
" or "
2
", the balance displays
glp
and
outputs the "Calibration Report" using the RS-232C
interface or stores the data in memory. For details on the
calibration report format, refer to "10-2. GLP Report".
Step 9 The balance will automatically return to the weighing mode.
Step 10 Place the calibration weight on the pan and confirm that the value
displayed is within
±
20 digits of the specified value. If it is not within the range,
check the ambient conditions such as breeze and vibration also check the
weighing pan. Then, repeat steps 1 to 10.
*
0 .0 00
g
e nd
g lp
e nd
2
k
Ca l 0
Ca l 0
Ca lo ut
0.0 00
g
00 00.0 00
g
1
20 00.0 00
g
20 00.1 20
g
20 00 .000
g
20 00.1 20
g
20 00 .12 3
g
Release
Select
Example:
New weight
2000.123 g
Place weight
Remove
GLP output
Press and hold
Press