Subsill fabrication & installation, Step 1) cut length, Step 2) end dam installation – EFCO 433 Series User Manual
Page 51: Includes offset and center-set glazing), Series 433 triple set installation instructions
June 2012
PART NO. Y017
Page 51 of 90
Series 433 Triple Set Installation Instructions
SECTION VI: Subsill Fabrication and Installation
(Includes Offset and Center-Set Glazing)
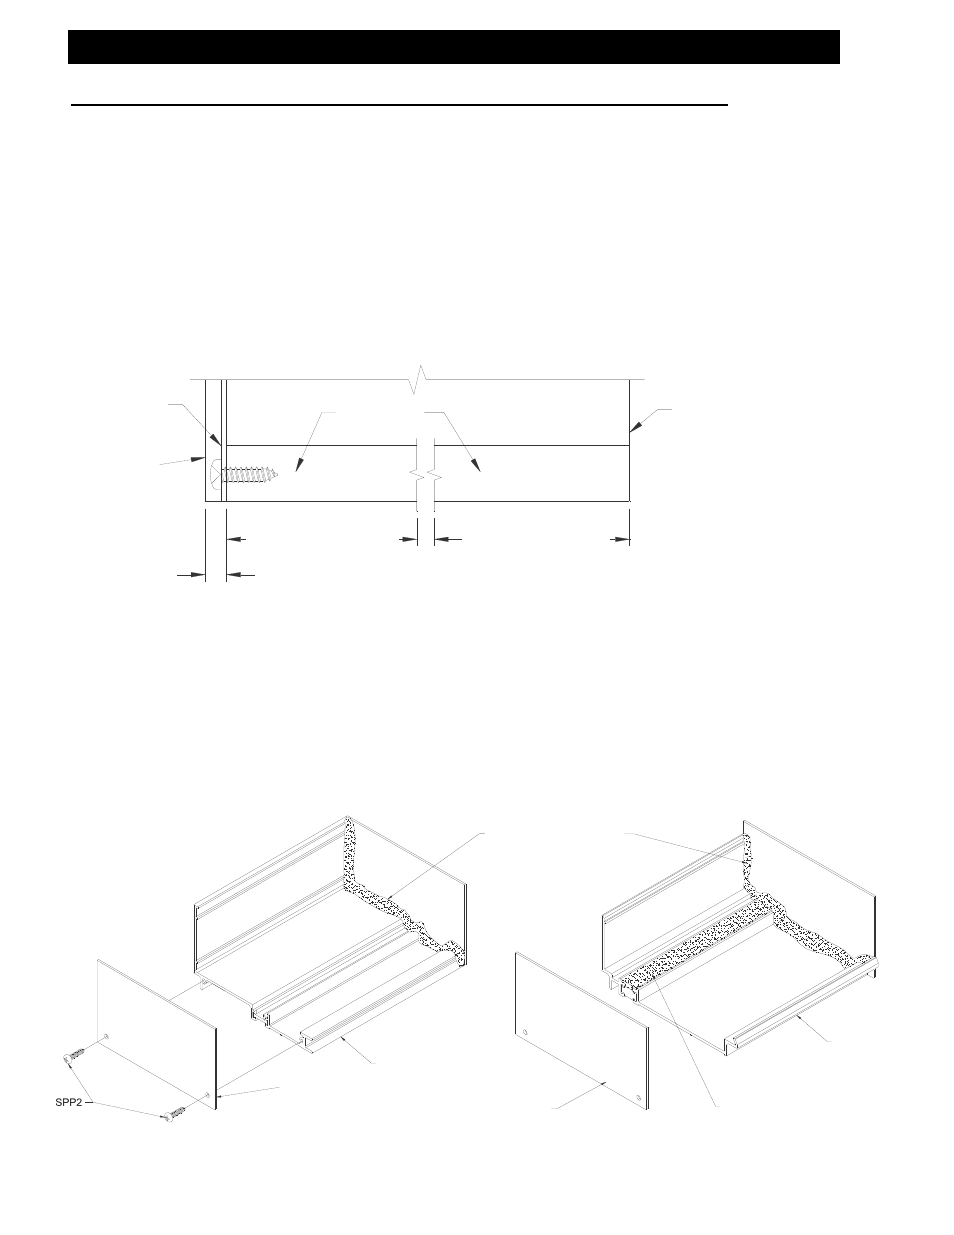
Step 1) Cut Length
Measure the opening to determine the cut length of the subsill. Subtract ¼” for the
width of the end dam and fastener head from the rough opening for each end. Cut the
subsill to the determined length.
If end dams are not required, cut the subsill to the rough opening width.
Step 2) End Dam Installation
The end dam shall be attached to the subsill with 2 SPP2 fasteners on each end. Seal
the end of the subsill with silicone sealant before attaching the end dam to the subsill.
Tool the sealant at the interior joint of the end dam to ensure a good watertight seal.
See Figure 6 below. If end dams are not required, ensure the subsill is tight against
the condition and seal the joint between the subsill and condition similar to Figure 6.
[Fig. 5]
CUT LENGTH = R.O. - 1/2" for end dams (See Figure 5)
CUT LENGTH = R.O. for no end dams (See Figure 5)
+1/8"
- 0"
CUT LENGTH =
ROUGH OPENING
WITHOUT END DAMS
ROUGH
OPENING
3/16"
K941
END DAM
ROUGH
OPENING
SUBSILL 2S44
4471 SIMILAR
CUT LENGTH =
ROUGH OPENING-1/2"
WITH END DAMS
APPLY SEALANT TO THE TOP
OF THE THERMAL CAVITY
ACROSS ENTIRE SUBSILL AND
TOOL SMOOTH
4471
K941 END DAM
FASTENERS WILL
NOT BE USED
K941
END DAM
APPLY SEALANT TO ENDS OF
THE SUBSILL BEFORE
ATTACHING END DAM
TOOL SEALANT AT JOINT
2S44
[Fig. 6]