Front panel, Removing the front panel – Dell XPS/Dimension XPS User Manual
Page 110
110
Removing and Installing Parts
www
.dell.com | support.dell.com
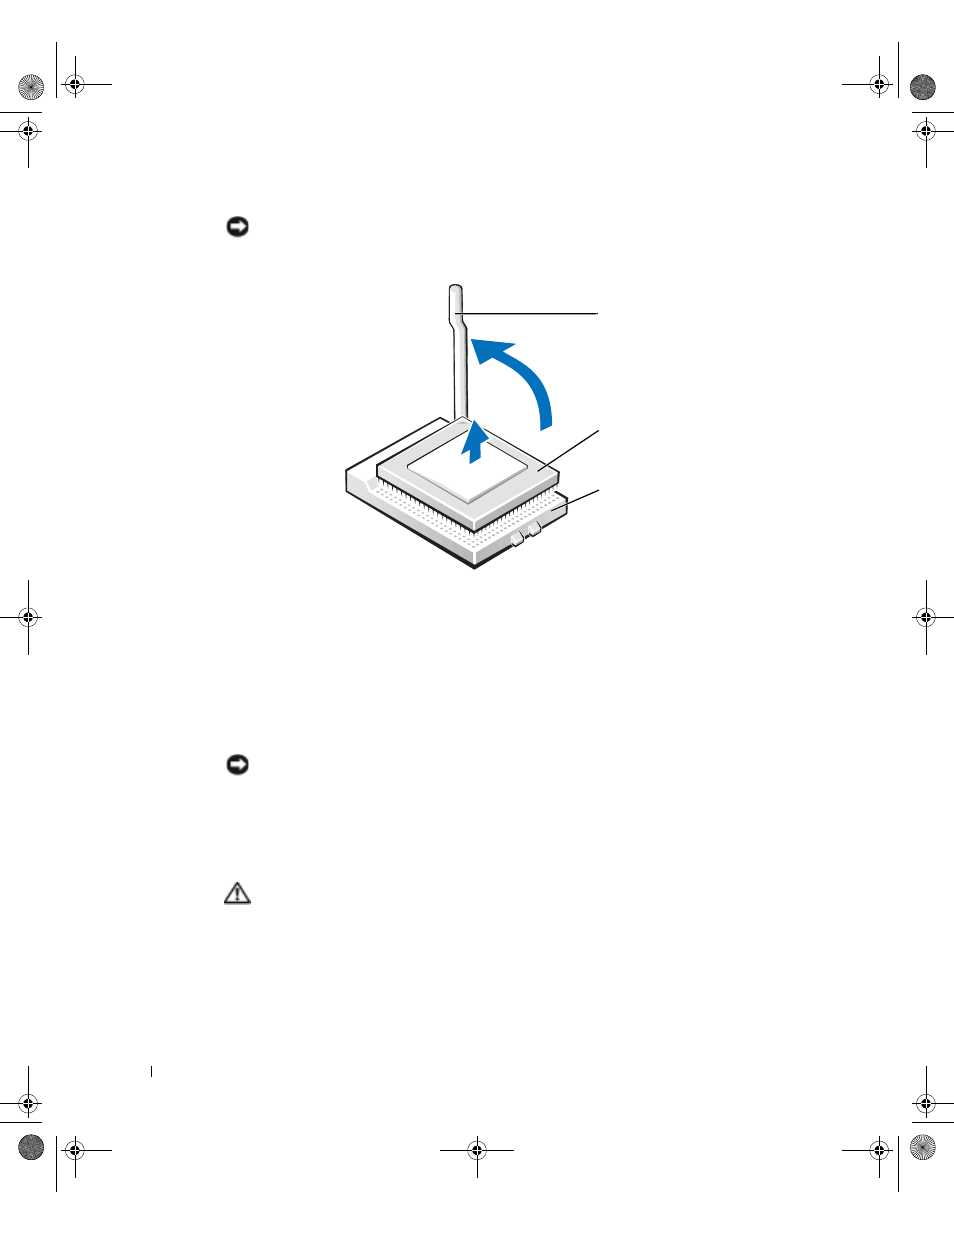
NOTICE: Be careful not to bend any of the pins when you remove the microprocessor from the
socket. Bending the pins can permanently damage the microprocessor.
6
Remove the microprocessor from the socket.
If you are replacing the microprocessor, leave the release lever extended in the release
position so that the socket is ready for the new microprocessor and go to "Installing the
7
Replace the airflow shroud (see page 106).
8
Close the computer cover (see page 117).
NOTICE: To connect a network cable, first plug the cable into the network wall jack and then
plug it into the computer.
9
Connect your computer and devices to electrical outlets, and turn them on.
Front Panel
CAUTION: Before you begin any of the procedures in this section, follow the
safety instructions on page 13.
Removing the Front Panel
1
Follow the instructions in "Before You Begin" on page 80.
2
Open the computer cover (see page 82).
microprocessor
release lever
socket
G0550bk1.book Page 110 Thursday, July 10, 2003 1:55 PM