Installing hard drives, Removing and installing a hard drive, Reinstalling the system – Dell PowerVault 715N (Rackmount NAS Appliance) User Manual
Page 36
Installing Hard Drives
Dell™ PowerVault™ 715N Systems Installation and Troubleshooting Guide
Removing and Installing a Hard Drive
Your system comes with four IDE hard drives. The drives are not hot swappable.
Removing and Installing a Hard Drive
1. Remove the front bezel.
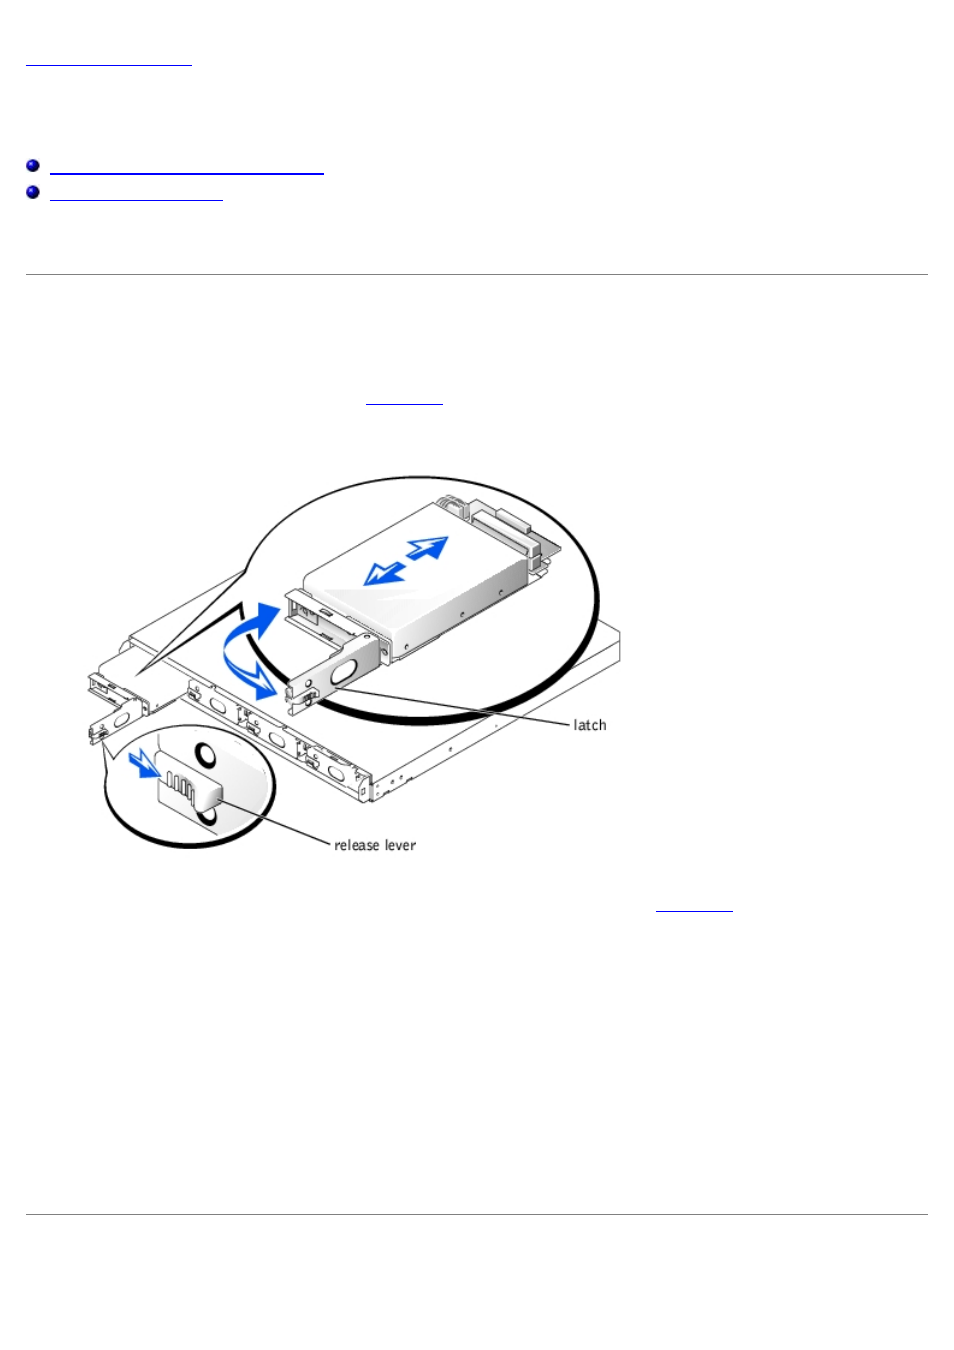
2. Push the release lever to the right (see
Figure 6-1. Releasing the Drive Latch
3. Pull open the latch and use it to pull the drive carrier out of the drive bay (see
4. Remove the screws on the bottom of the carrier and remove the drive from the carrier.
5. Disconnect the drive carrier's power and IDE cables from the drive.
6. Connect the power and IDE cables to the new drive.
7. Attach the drive to the carrier with the screws you removed.
8. Insert the carrier, with the latch partially opened, into the system.
9. Push the carrier into the bay until it is fully seated with a connection to the backplane board.
10. Close the latch.
11. Replace the bezel.
Reinstalling the System