Removing an expansion card – Dell PowerVault 715N (Rackmount NAS Appliance) User Manual
Page 28
CAUTION:
See "Protecting Against Electrostatic Discharge" in the safety instructions in your System
Information document.
3. Open the expansion-card latch and remove the filler bracket.
NOTE:
Keep this bracket in case you need to remove the expansion card. Installing a filler bracket over an
empty expansion slot is necessary to maintain Federal Communications Commission (FCC) certification of the
system. The brackets also keep dust and dirt out of the system and aid in proper cooling and airflow inside
the system.
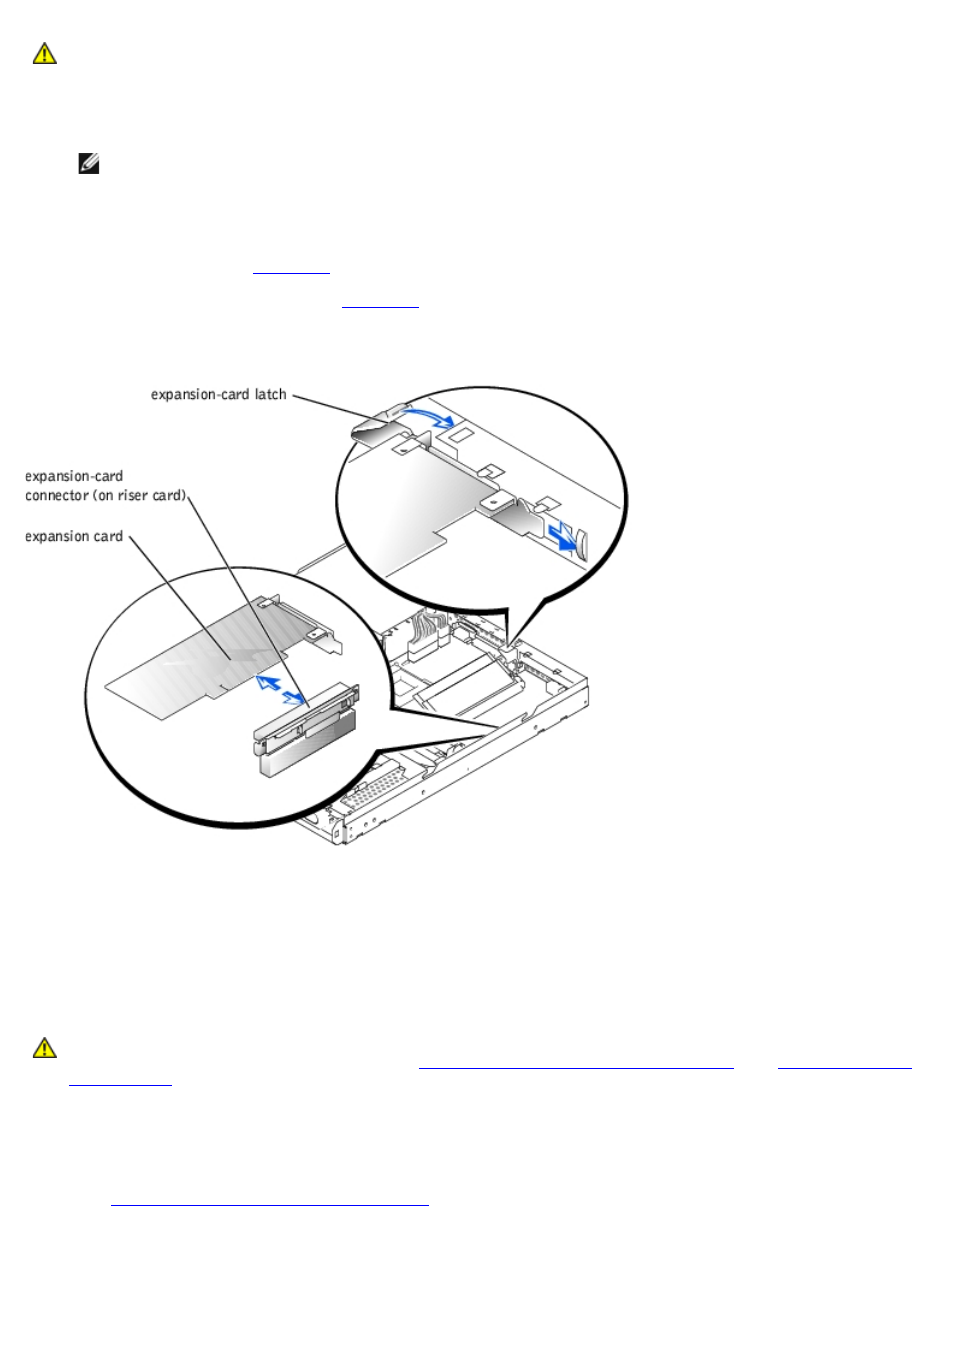
4. Without removing the riser card, insert the card firmly into the expansion-card connector on the riser card until the
card is fully seated (see
5. Close the expansion-card latch (see
).
Figure 5-3. Installing the Expansion Card
6. Connect any cables that should be attached to the card.
7. Replace the system cover, and then reconnect the system and peripherals to the power source and turn on the
system.
Removing an Expansion Card
CAUTION:
Before you perform this procedure, you must turn off the system and disconnect it from its
power source. For more information, see "
Safety First—For You and Your System
" in "
1. Turn off the system, including any attached peripherals, and disconnect the system from the electrical outlet.
2. Remove the cover.
See "
Removing and Replacing the System Cover
" in "Troubleshooting Your System."
3. Disconnect any cables connected to the expansion card.
4. Rotate the expansion-card latch away from the expansion card to release the card.