Expansion cards, Installing an expansion card – Dell PowerEdge 2550 User Manual
Page 65
Expansion Cards
Expansion cards are installed on the system's riser board (see
). The riser board plugs into the RISER connector on the system board (see
) and is considered an extension of the system board.
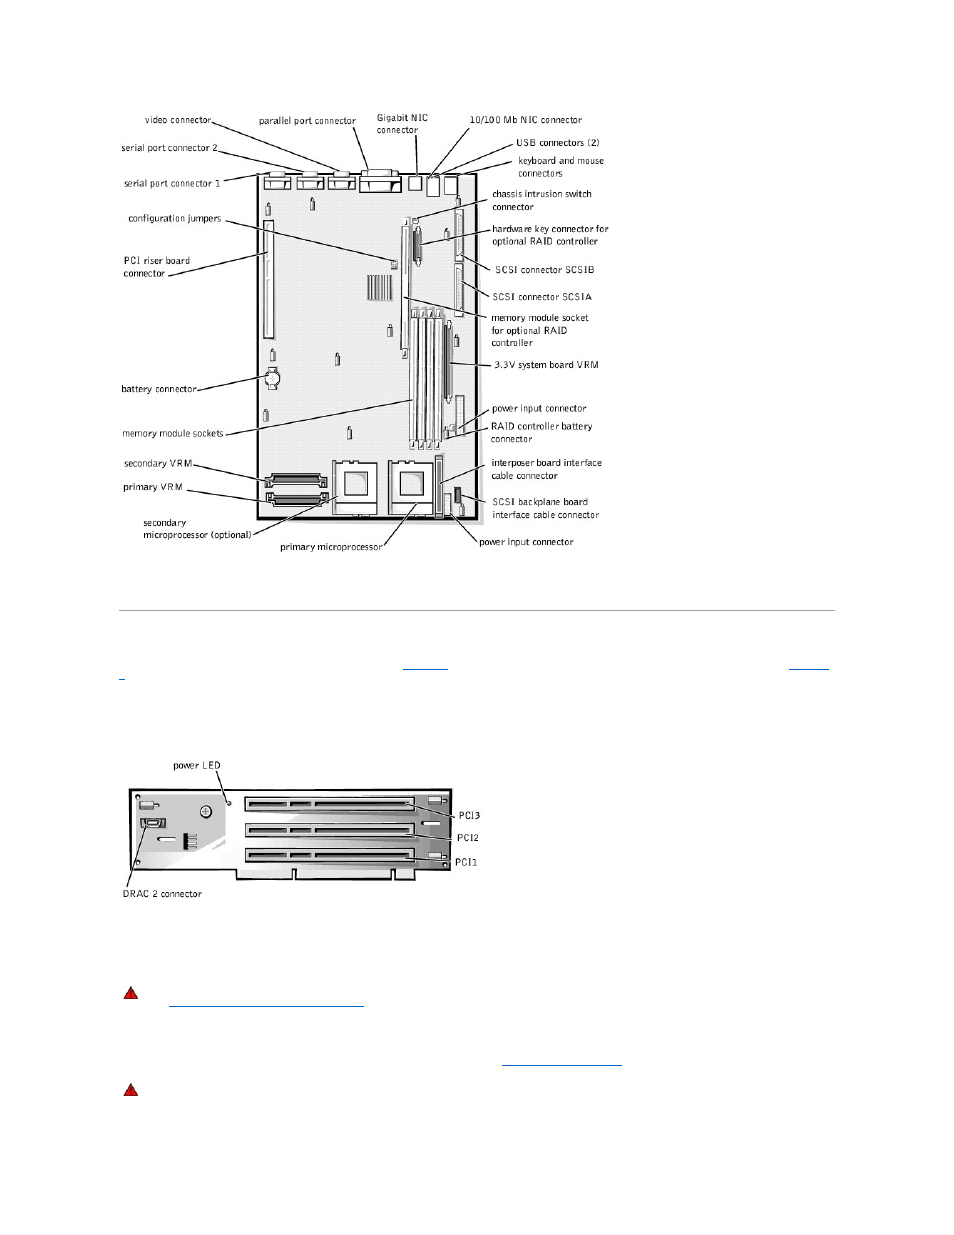
The riser board contains three full-length 64-bit, 33-megahertz (MHz), Peripheral Component Interconnect (PCI) expansion-card connectors. All three
expansion card connectors support 5-V or universal PCI cards. Connector PCI2 supports an optional Dell OpenManage™ Remote Assistant Card 2 (DRAC 2).
Figure 8-2. Riser-Board Expansion-Card Connectors
Installing an Expansion Card
To install an expansion card, perform the following steps.
1.
Turn off the system, including any attached peripherals, and disconnect the system from its electrical outlet.
2.
Prepare the expansion card for installation, and open the system doors (see "
Opening the System Doors
" in "Checking Inside the System").
See the documentation that came with the expansion card for information on configuring the card, making internal connections, or otherwise
customizing the card for your system.
WARNING: Before you perform this procedure, you must turn off the system and disconnect it from its AC power source. For more information,
see "
Safety First—For You and Your Computer
" in "Checking Inside the System."
WARNING: See "Protecting Against Electrostatic Discharge" in the safety instructions in your System Information document.