Inside the chassis, Removing the expansion-card cage, Replacing the expansion-card cage – Dell PowerEdge 2550 User Manual
Page 51
installed expansion cards in a single step.
Removing the Expansion-Card Cage
To remove the expansion-card cage, perform the following steps:
1.
Turn off the system, including any attached peripherals, and disconnect the system from the electrical outlet.
2.
").
3.
Check any cables connected to expansion cards through the back-panel openings. Disconnect any cables that will not reach to where the cage must be
placed upon removal from the chassis.
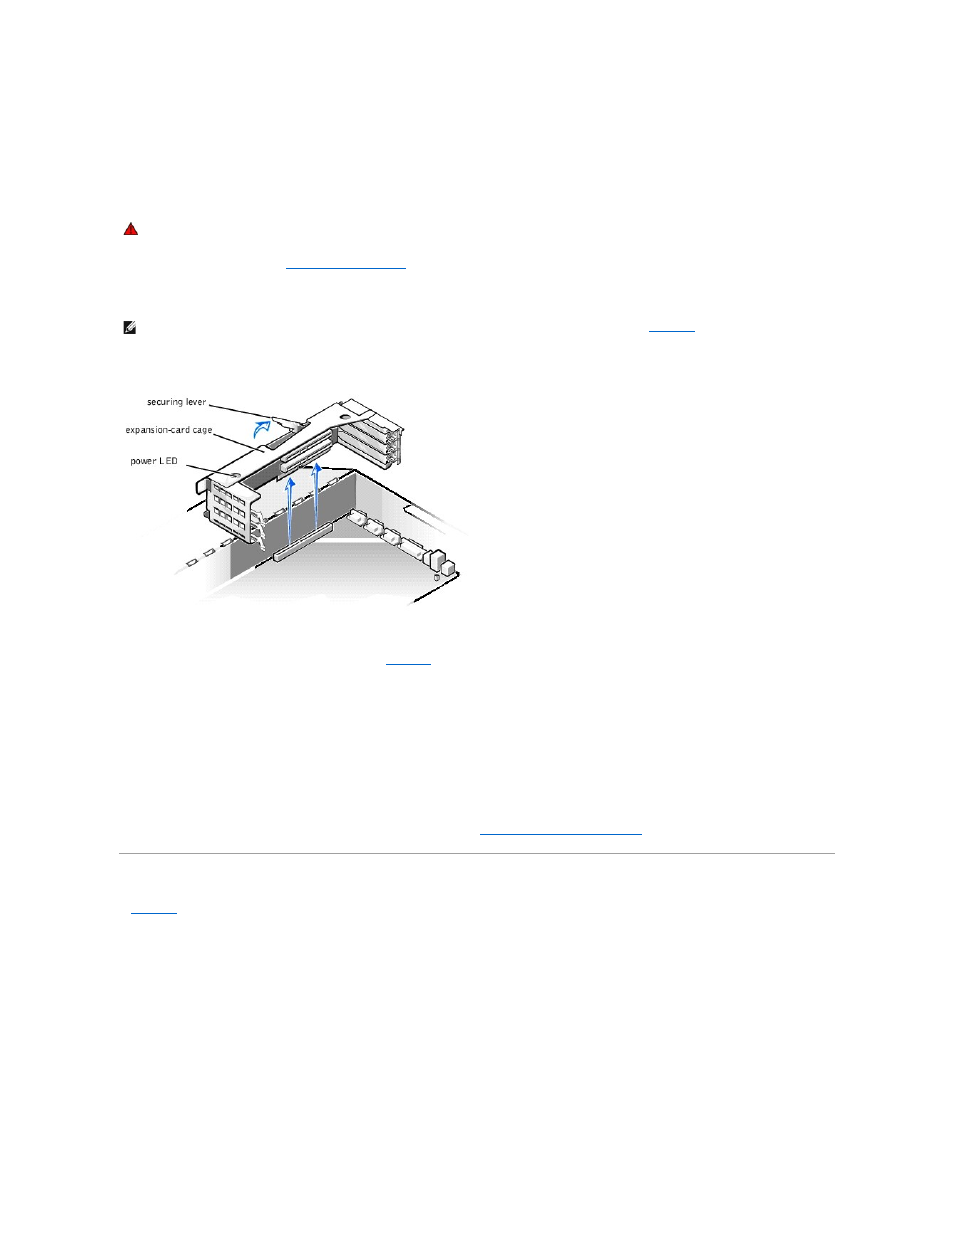
Figure 7-3. Removing the Expansion-Card Cage
4.
Locate the expansion-card cage securing lever (see
), and rotate the lever upward until it stops in an upright position.
5.
Lift the expansion-card cage up and away from the chassis.
Replacing the Expansion-Card Cage
To replace the expansion-card cage, perform the following steps:
1.
With the securing lever in the upright position, lower the expansion-card cage into place until it is aligned.
2.
Rotate the securing lever downward until it is flush with the top of the chassis. Make sure that the riser board is fully seated in the RISER connector on
the system board.
3.
Reconnect any cables you removed in step 3 of the previous procedure, "
Removing the Expansion-Card Cage
Inside the Chassis
, the system doors are open to provide an interior view. Refer to this illustration to locate interior features and components discussed later in this
guide.
Figure 7-4. Inside the System
WARNING: See "Protecting Against Electrostatic Discharge" in the safety instructions in your System Information document.
expansion-card cage.