Upgrading the microprocessor, Microprocessor, Install the – Dell PowerEdge 500SC User Manual
Page 29: Microprocessor and heat-sink removal
Upgrading the Microprocessor
To take advantage of future options in speed and functionality, you can upgrade the system microprocessor.
The microprocessor and its associated L2 cache memory are contained in a PGA package that is installed in a ZIF socket on the system board. The following
subsection describes how to upgrade or replace the microprocessor.
Microprocessor and Heat-Sink Removal
To remove the microprocessor and heat sink assembly, perform the following steps.
1.
Turn off the system, including any attached peripherals, and disconnect the power cord from its power source.
2.
.
3.
4.
).
5.
Remove the securing clip.
6.
Remove the heat sink and set it down with the underside of the heat sink facing up.
7.
Pull the socket release lever straight up until the microprocessor is released (see
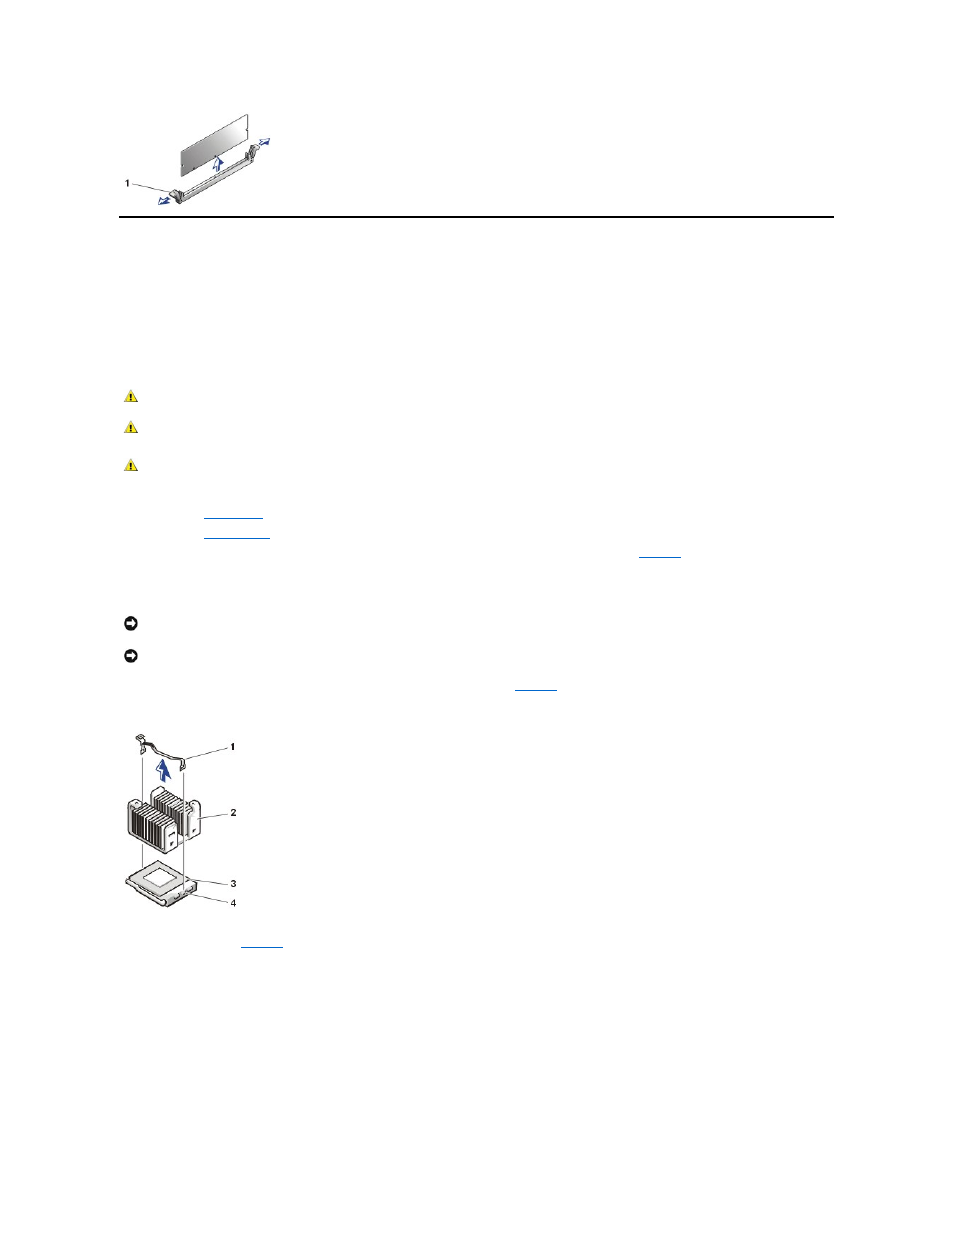
Figure 23. Securing Clip and Heat-Sink Removal
8.
Lift the microprocessor away from the ZIF socket and leave the release lever in the upright position so that the socket is ready for the replacement
microprocessor (see
).
Figure 24. Removing the Microprocessor
1 Memory module socket ejectors (2)
CAUTION:
Read the safety instructions in System Information document.
CAUTION:
The microprocessor and heat-sink assembly can get extremely hot during system operation. Be sure the assembly has had sufficient time to
cool before you touch it.
CAUTION:
When handling the microprocessor and heat-sink assembly, take care to avoid sharp edges on the heat sink.
NOTICE:
Note the orientation of the heat sink with respect to the microprocessor and its ZIF socket.
NOTICE:
Be careful not to disturb the thermal grease applied to the underside of the heat sink, and to the top surface of the microprocessor.
1 Securing clip
2 Heat-sink assembly
3 Microprocessor
4 ZIF socket