Cooling shroud, Remove the, Diskette drive – Dell PowerEdge 500SC User Manual
Page 22: Removing and replacing other drives, Removing and replacing the cd drive, Removing and replacing the diskette drive
Removing and Replacing Other Drives
Your system includes a diskette drive and a CD drive. You can add drives, such as DVD drives and tape drives, using the procedures in the following sections.
Removing and Replacing the CD Drive
To remove the CD drive, perform the following steps:
1.
Turn off the system, including any external devices, and disconnect the system from its electrical outlet.
2.
Remove the
.
3.
Remove the
.
4.
Remove the
.
5.
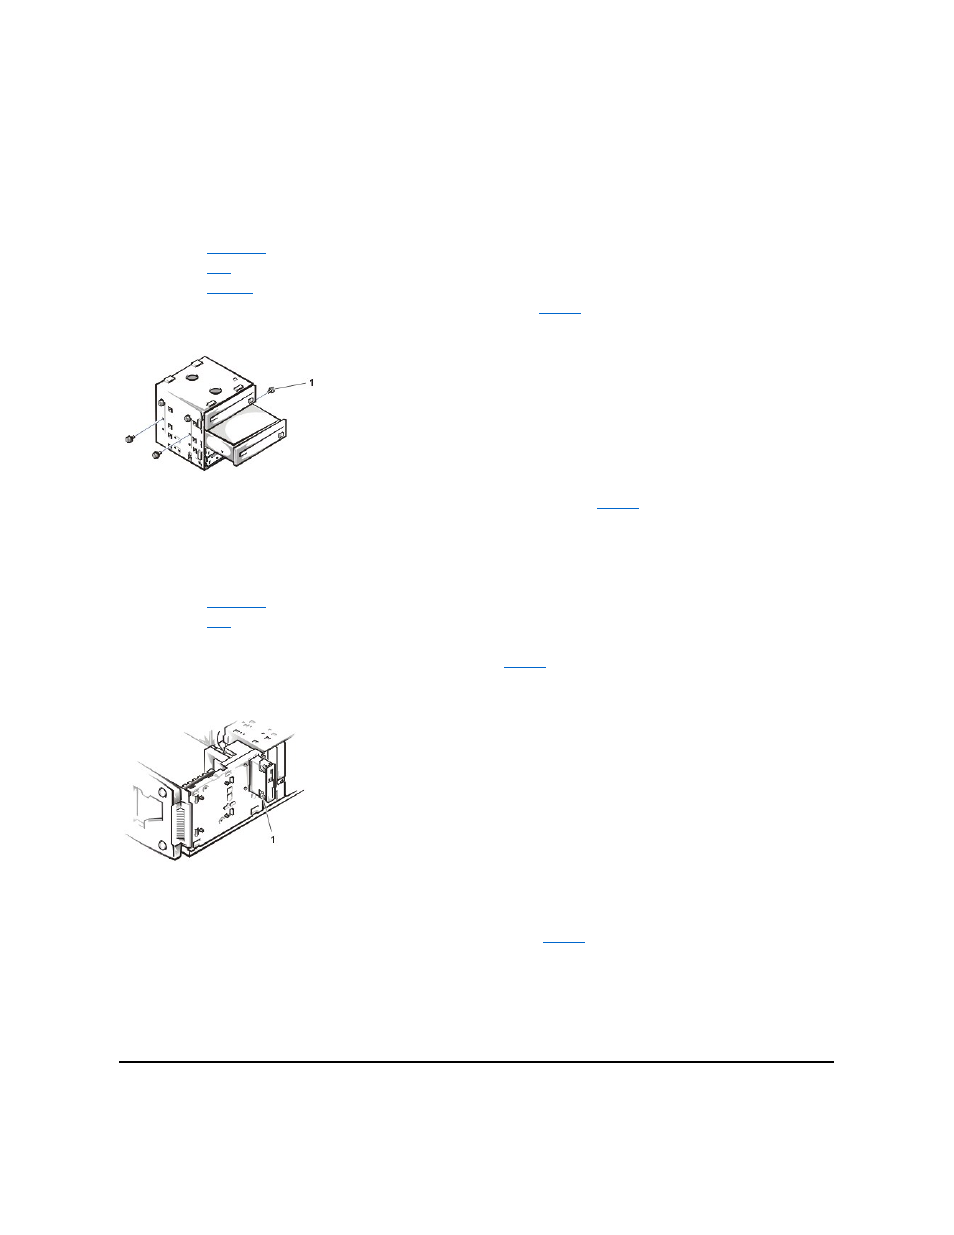
Remove the three drive-mounting screws and slide the drive out of the drive bay (see
).
Figure 11. Removing and Replacing a CD Drive
).
Removing and Replacing the Diskette Drive
To remove the diskette drive, perform the following steps:
1.
Turn off the system, including any external devices, and disconnect the system from its electrical outlet.
2.
Remove the
.
3.
Remove the
.
4.
Disconnect the power and interface cables from the back of the diskette drive.
5.
Press the two drive-release tabs, and slide the drive out of the drive bay (see
).
Figure 12. Removing and Replacing the Diskette Drive
To replace the diskette drive, perform the following steps:
1.
Before you install the new diskette drive, transfer the drive-release tabs from the drive you removed to the replacement drive.
2.
Slide the diskette drive into the drive bay until the two drive-release tabs engage (see
).
3.
Connect a power cable and the diskette drive interface cable to the diskette drive.
4.
Replace the bezel.
5.
Replace the system cover.
6.
Plug your system and any external devices into their electrical outlets, and turn them on.
7.
See the drive documentation for instructions on installing any software required for drive operation.
Cooling Shroud
1 Screws (3)
1 Drive-release tabs (2)