Cooling fan, Power supply, Removing the cooling fan – Dell PowerEdge 500SC User Manual
Page 23
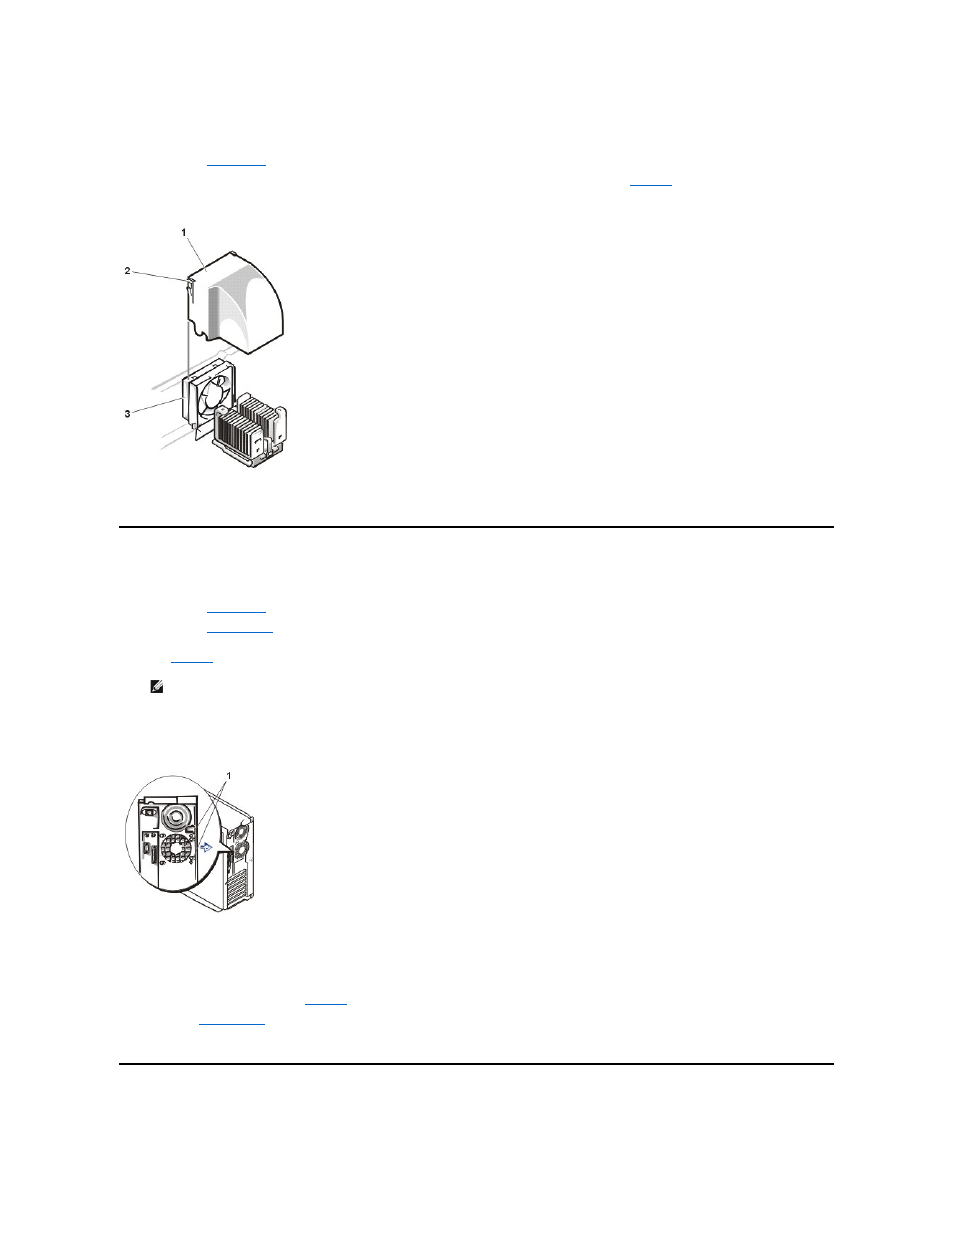
To remove the cooling shroud, perform the following steps:
1.
Turn off the system, including any peripherals, and disconnect the power cable from the electrical outlet.
2.
Remove the
.
3.
).
Figure 13. Removing and Replacing the Cooling Shroud
To replace the cooling shroud, place the shroud in the fan assembly guide slots and slide the shroud straight down until the retaining clips snap in place.
Removing the Cooling Fan
1.
Turn off the system, including any peripherals, and disconnect the power cable from the electrical outlet.
2.
Remove the
.
3.
Remove the
4.
While pushing the fan assembly upward, press the two release buttons on the back of the system and lift the fan assembly out of its retaining brackets
(see
5.
After the fan has been released from the retaining brackets, disconnect the fan cable from the SYS_FAN2 connector on the system board and lift the fan
out of the system.
Figure 14. Removing the Fan
To replace the fan, perform the following steps:
1.
Connect the fan power cable to the fan connector (SYS_FAN2) on the system board.
2.
Align the brackets on the back of the fan with the corresponding holes in the back-panel, and gently push down until the fan is firmly seated and the
release buttons are engaged (see
).
3.
4.
Replace the system cover.
Power Supply
1 Cooling shroud
2 Retaining clips
3 Fan
NOTE:
Do not lift the fan out of the system until you have disconnected the fan cable from the system board.
1 Release pins