Expansion cards, Remove the expansion cards, Install the – Dell PowerEdge 500SC User Manual
Page 26: Expansion card removal
Expansion Cards
The system has five fixed expansion-card sockets.
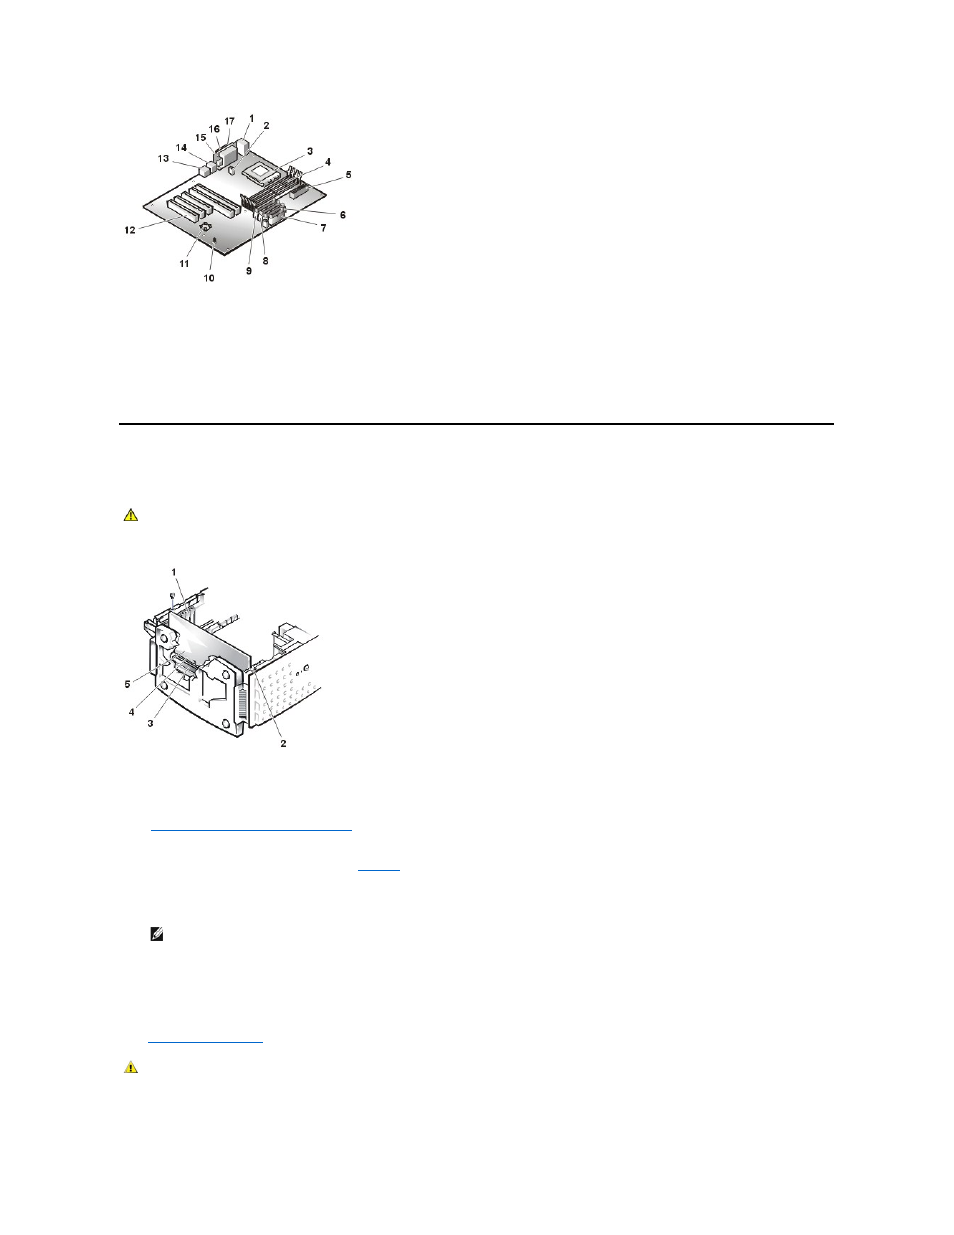
Figure 19. Expansion Card Removal
Expansion Card Removal
To remove an expansion card, perform the following steps.
1.
Remove the system cover and support beam
2.
Disconnect any cables connected to the expansion card.
3.
Remove the screw from the card bracket (see
).
4.
Grasp the card by its top corners, and lift it from the system board.
5.
If you are removing the card permanently, install a metal filler bracket over the empty card-slot opening.
6.
Replace the system cover and support beam, and then reconnect the system and peripherals to their power sources and turn on the system.
To install an expansion card, perform the following steps:
1.
Turn off the system, including any attached peripherals, and disconnect the system from its electrical outlet.
2.
.
See the documentation that came with the expansion card for information on configuring the card, making internal connections, or otherwise
customizing the card for your system.
1 Keyboard (KY) and mouse (MS)
connectors
2 Fan connector (SYS_FAN2)
3 Microprocessor (CPU)
4 Memory module sockets (4) DIMM_x
5 Power connector (POWER)
6 Diskette drive cable connector (FDD)
7 Front panel connector (FRONT PANEL)
8 Primary IDE connector (PRIMARY IDE)
9 Primary IDE connector (Secondary IDE)
10 System jumpers (J12)
11 System battery connector (BATTERY)
12 expansion card slots (5) (SLOT_n)
13 RJ45 NIC connector (LAN1)
14 USB connector (2) (USBn)
15 Video connector (VGA)
16 Parallel port (LPT)
17 Serial port (COM1) connector
CAUTION:
Read the safety instructions in your System Information document.
1 Filler brackets
2 Card guide
3 System board connector
4 Card connector
5 Expansion card
NOTE:
Installing a filler bracket over an empty expansion slot is necessary to maintain Federal Communications Commission (FCC) certification of
the system. The brackets also keep dust and dirt out of the system and aid in proper cooling and airflow inside the system.
CAUTION:
See "Protecting Against Electrostatic Discharge" in the safety instructions in your System Information document.