Dell PowerEdge 500SC User Manual
Page 28
shows the order of the memory module sockets.
4.
the memory modules as necessary to reach the desired memory total.
5.
Replace the system cover.
If you changed the amount of memory in the system, the system will complete the POST routine with an error message, indicating that the amount of
system memory has changed.
6.
The system detects that the new memory does not match the system configuration information, which is stored in nonvolatile RAM (NVRAM). The monitor
displays an error message that ends with the following words:
Press
7.
Press
System Setup program
and check the System Memory setting in the system data box on the System Setup screens. The
system should have already changed the value in the System Memory setting to reflect the newly installed memory.
8.
If the System Memory value is incorrect, one or more of the DIMMs might not be installed properly. Repeat steps 1 through 5 again, checking to make
sure that the memory modules are firmly seated in their sockets.
9.
Run the system memory test in the system diagnostics.
Installing Memory Modules
To install a memory module, perform the following steps.
1.
Turn off the system, including any attached peripherals, and disconnect the power cord from its power source.
2.
.
3.
Locate the memory module sockets in which you will install a memory module.
shows the order of the memory module sockets.
4.
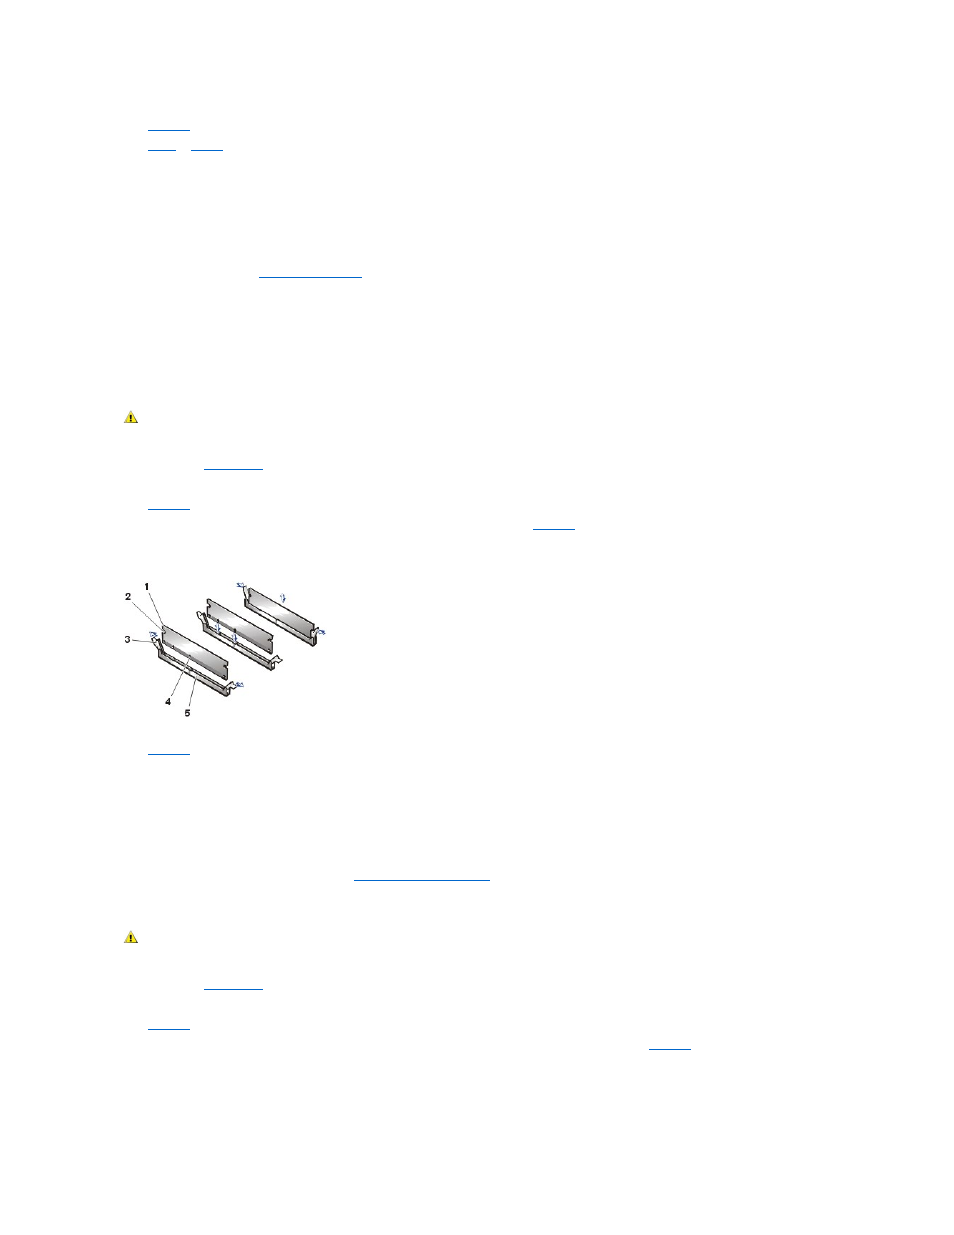
Press down and outward on the ejectors on the memory module socket, as shown in
, to allow the memory module to be inserted into the
socket.
Figure 21. Installing a Memory Module
5.
Align the memory module's edge connector with the alignment keys of the memory module socket, and insert the memory module in the socket (see
The memory module socket has two alignment keys that allow the memory module to be installed in the socket in only one way.
6.
Press down on the memory module with your thumbs while pulling up on the ejectors with your index fingers to lock the memory module into the
socket.
When the memory module is properly seated in the socket, the ejectors on the memory module socket should align with the ejectors on the other
sockets with memory modules installed.
7.
Repeat steps 5 and 6 to install the remaining DIMMs.
8.
Perform steps 6 through 9 of the procedure, "
Removing Memory Modules
1.
Turn off the system, including any attached peripherals, and disconnect the power cord from its power source.
2.
.
3.
Locate the memory module sockets in which you will remove a memory module.
shows the order of the memory module sockets.
4.
Press down and outward on the ejectors on each end of the socket until the DIMM pops out of the socket (see
Figure 22. DIMM Removal
CAUTION:
Read the safety instructions in your System Information document.
1 Memory module
2 Cutouts (2)
3 Securing clips
4 Alignment notches
5 Connector
CAUTION:
Read the safety instructions in your System Information document.