Front bezel, Drive cage, Drive-cage removal – Dell PowerEdge 500SC User Manual
Page 18
To replace the system cover, perform the following steps:
1.
Check that no tools or parts are left inside the system.
2.
).
3.
Replace the screw you removed in step 4 of "
Removing the System Cover and Support Beam
4.
Fit the cover over the sides of the chassis and slide the cover forward until it locks in place.
5.
Secure the cover with the thumbscrew.
Front Bezel
To remove the front bezel of the system, perform the following steps.
1.
.
2.
Press the three tabs along the side of the bezel (see
3.
Swing the bezel away from the system, disengage the hooks, and carefully pull the bezel away from the system.
Figure 4. Front-Bezel Removal
To replace the bezel, insert the bezel hooks into the system slots, and snap the bezel back onto the system.
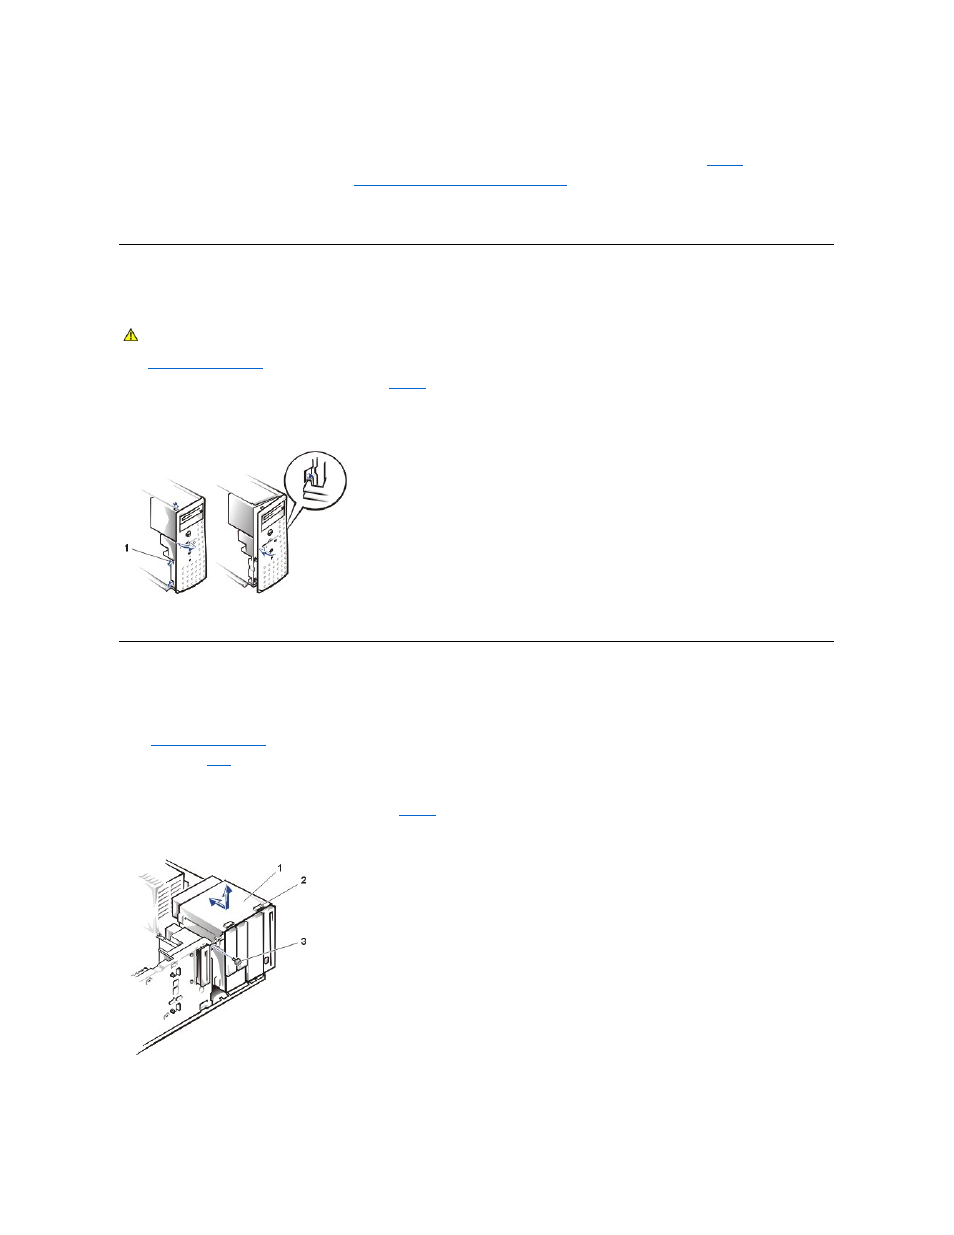
Drive-Cage Removal
To remove the drive cage, perform the following steps:
1.
Turn off the system, including any external devices, and disconnect the system from its electrical outlet.
2.
.
3.
Remove the
.
4.
Disconnect the interface cable and the power cable from all drives installed in the drive cage. Note the location and orientation of all cables attached to
the drives.
5.
Remove the screw from the side of the drive cage (see
Figure 5
). Pull the drive cage toward you to unlock it from the system. Lift out the drive cage.
Figure 5. Drive-Cage Removal
To install the drive cage, perform the following steps:
1.
With the slots on the drive cage extending slightly beyond the front of the system, lower the drive cage and slide it toward the back of the system until
the cage locks into place.
CAUTION:
See the safety instructions in your System Information document before working inside your system.
1 Tabs (3)
1 Drive cage
2 Slots (10)
3 Screw