Replacing the processor – Dell PowerEdge 700 User Manual
Page 64
The following items are included in the processor upgrade kit:
l
A processor
l
A heat sink
Replacing the Processor
1.
Turn off the system, including any attached peripherals, and disconnect the system from the electrical outlet.
2.
Remove the bezel. See "
Removing the Bezel
" in "Troubleshooting Your System."
3.
Lay the system on its right side.
4.
Remove the cover. See "
Removing the Cover
" in "Troubleshooting Your System."
5.
Remove the cooling shroud. See "
6.
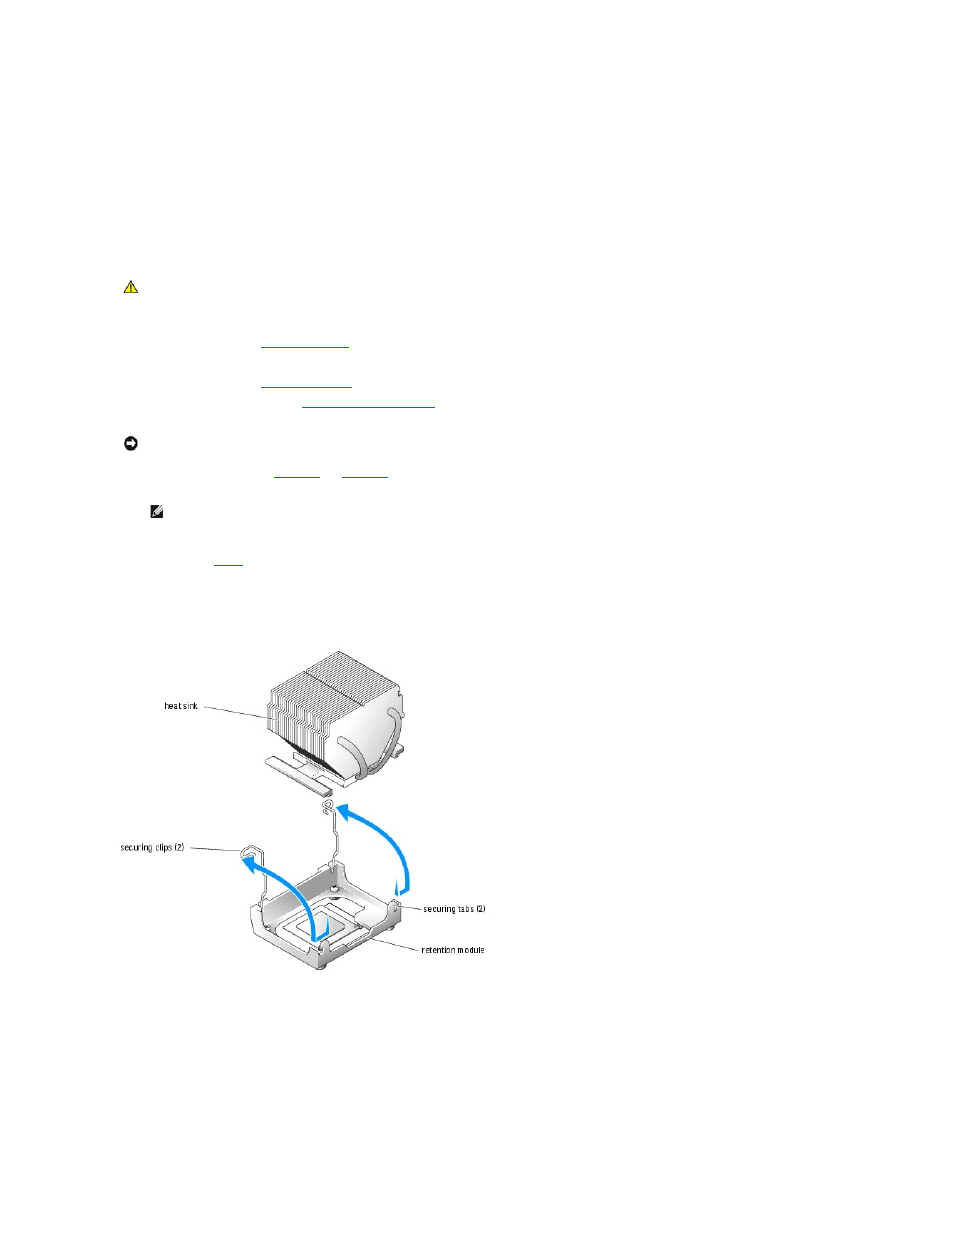
Remove the heat sink. See
a.
Remove one securing clip by pressing the tab on the clip until it clears the securing tab on the retention module, and then lift the clip up.
b.
for the remaining securing clip.
c.
Rotate the heat sink slightly and then lift the heat sink off the processor. Do not pry the processor off the heat sink.
Figure 6-6. Removing the Heat Sink (Low Profile)
Figure 6-7. Removing the Heat Sink (High Profile)
CAUTION:
See your System Information Guide for complete information about safety precautions working inside the computer and protecting
against electrostatic discharge.
NOTICE:
The processor and heat sink can become extremely hot. Allow sufficient time for the processor and heat sink to cool before handling.
NOTE:
Remove the heat sink while the processor is still warm.