Dell PowerEdge 700 User Manual
Page 65
7.
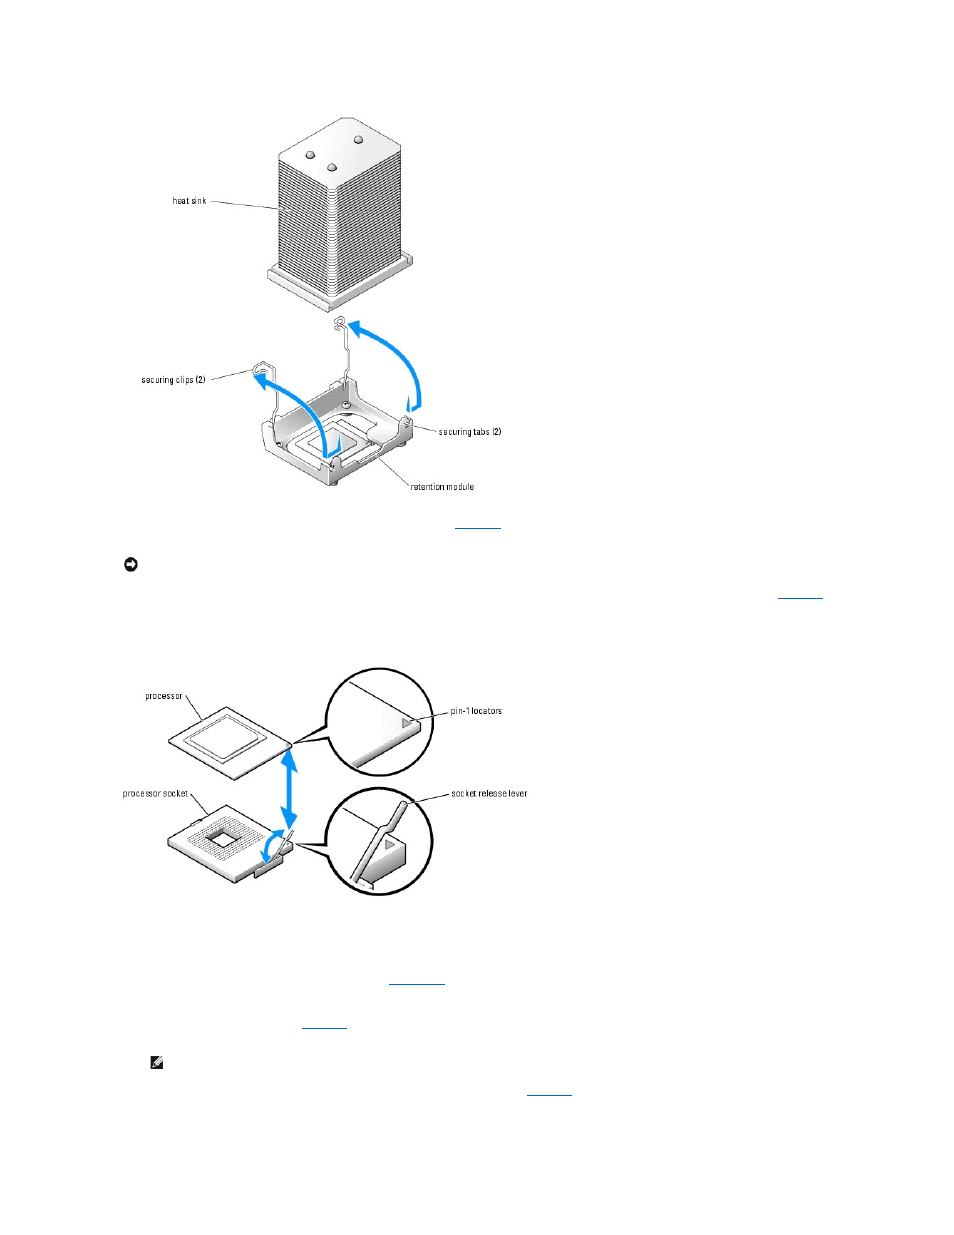
Pull the socket release lever upward to the fully open position. See
8.
Lift the processor out of the socket and leave the release lever in the open position so that the socket is ready for the new processor. See
.
Figure 6-8. Replacing the Processor
9.
Unpack the new processor and heat sink.
If any of the pins on the processor appear bent, see "
Getting Help
" for instructions on obtaining technical assistance.
10.
Ensure that the processor socket release lever is in the fully open position.
11.
Align pin 1 on the processor (see
) with pin 1 on the processor socket.
12.
Carefully install the processor in the socket and press it down lightly to seat it. See
.
NOTICE:
Be careful not to bend any of the pins when removing the processor. Bending the pins can permanently damage the processor.
NOTE:
No force is needed to install the processor in the socket. When the processor is aligned correctly, it should drop into the socket.
- PowerEdge RAID Controller H700 (178 pages)
- PowerEdge RAID Controller H700 (56 pages)
- PowerEdge RAID Controller H700 (200 pages)
- PowerVault TL4000 (2 pages)
- PowerVault TL2000 (176 pages)
- PowerVault TL2000 (16 pages)
- PowerVault TL2000 (3 pages)
- PowerVault TL2000 (116 pages)
- PowerVault 130T DLT (Tape Library) (49 pages)
- PowerVault TL2000 (1 page)
- PowerVault 110T DLT VS80 (Tape Drive) (49 pages)
- PowerVault TL2000 (22 pages)
- PowerVault TL4000 (306 pages)
- PowerVault TL2000 (2 pages)
- PowerEdge 800 (28 pages)
- PowerEdge 800 (58 pages)
- PowerEdge 800 (87 pages)
- PowerEdge 800 (24 pages)
- PowerEdge 800 (82 pages)
- PowerEdge 800 (2 pages)
- PowerEdge 800 (27 pages)
- PowerEdge 6400 (86 pages)
- PowerVault 124T (73 pages)
- PowerVault 124T (65 pages)
- PowerVault 124T (4 pages)
- PowerVault 124T (79 pages)
- PowerVault 124T (2 pages)
- PowerVault 124T (64 pages)
- PowerVault 124T (56 pages)
- PowerVault 124T (66 pages)
- PowerVault 124T (57 pages)
- PowerVault 110T LTO (Tape Drive) (28 pages)
- PowerVault 124T (55 pages)
- PowerVault TL4000 (3 pages)
- PowerVault TL4000 (176 pages)
- PowerVault TL4000 (2 pages)
- PowerVault TL4000 (16 pages)
- PowerVault TL4000 (116 pages)
- PowerVault TL4000 (1 page)
- PowerVault TL4000 (66 pages)
- PowerVault TL4000 (22 pages)
- PowerEdge RAID Controller 6i (120 pages)
- PowerEdge RAID Controller 6i (156 pages)
- PowerVault 715N (Rackmount NAS Appliance) (30 pages)
- PowerVault 715N (Rackmount NAS Appliance) (42 pages)