Dell PowerEdge 700 User Manual
Page 76
1.
Turn off the system, including any attached peripherals, and disconnect the system from the electrical outlet.
2.
Remove the bezel. See "
Removing the Bezel
" in "Troubleshooting Your System."
3.
Lay the system on its right side.
4.
Remove the cover. See "
Removing the Cover
" in "Troubleshooting Your System."
5.
Remove the cooling shroud. See "
Removing the Cooling Shroud
" in "Installing System Options."
6.
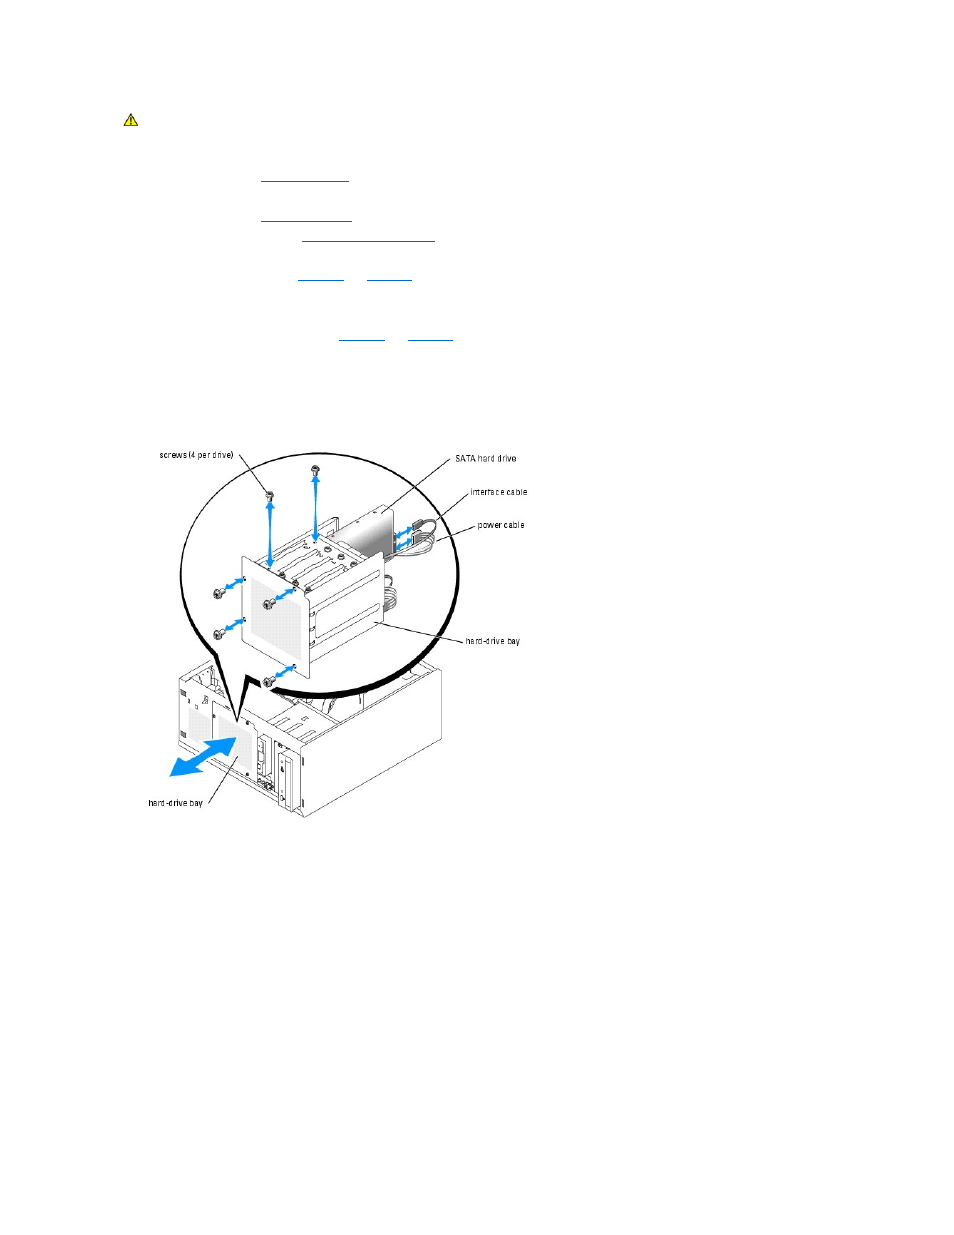
Disconnect the interface and power cables to the hard drives in the drive bay.
7.
Remove the hard-drive bay. See
.
a.
Loosen the four screws that secure the drive bay to the system.
b.
Slide the hard-drive bay out of the system.
8.
Remove the drive from the drive bay. See
and
.
a.
Remove the screws that secure the drive in the hard-drive bay.
b.
Slide the drive out of the drive bay.
Figure 7-5. Removing a SATA Hard Drive
Figure 7-6. Removing a Cabled SCSI Hard Drive
CAUTION:
See your System Information Guide for complete information about safety precautions working inside the computer and protecting
against electrostatic discharge.