Installing the front system fan, Removing the back system fan – Dell PowerEdge 700 User Manual
Page 59
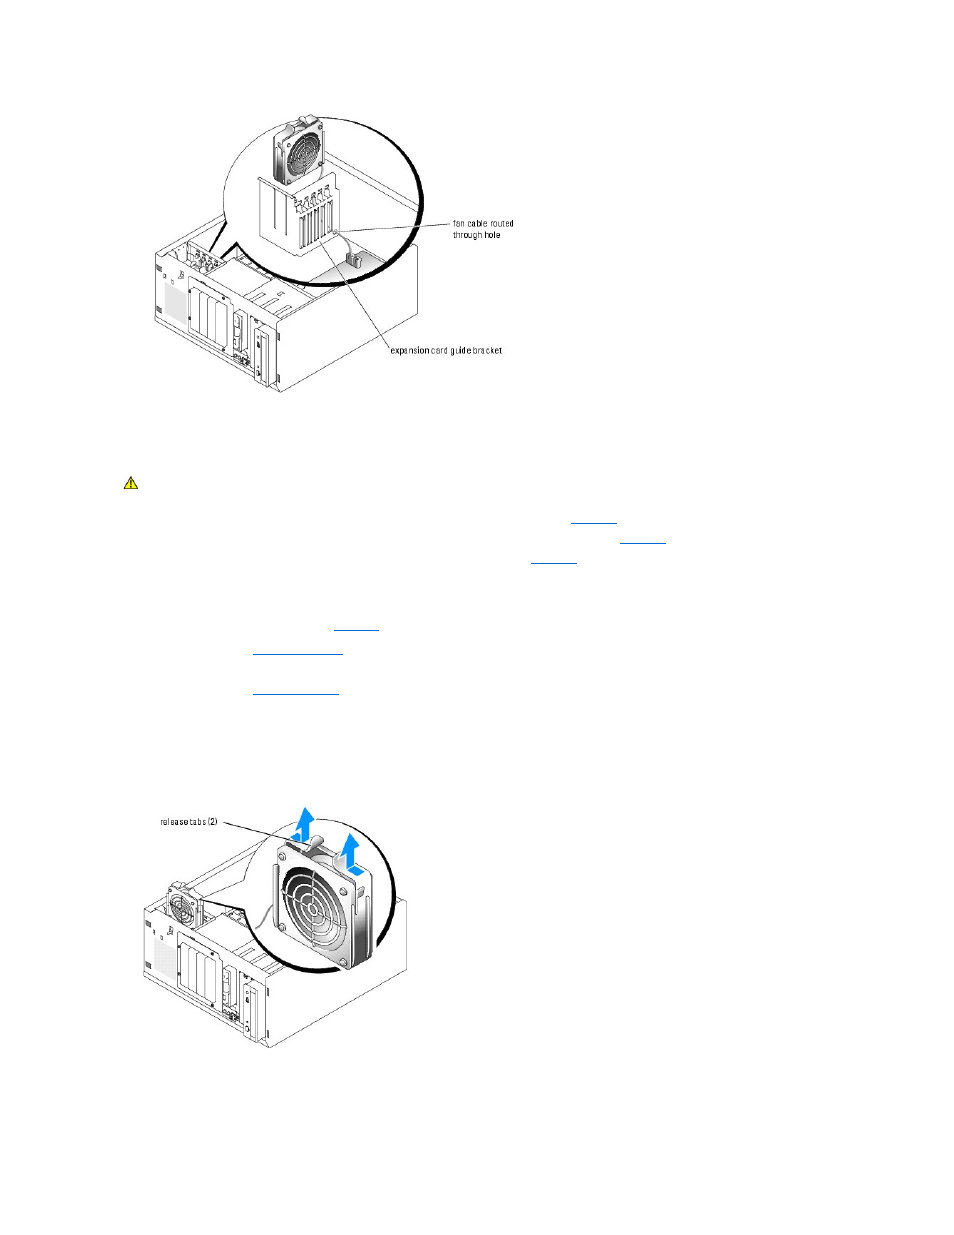
Installing the Front System Fan
1.
Insert the fan cable connector into the routing hole in the expansion-card guide bracket. See
2.
3.
Pull the fan cable through the routing hole in the expansion-card guide bracket. See
4.
Connect the fan cable connector to the FRONT_FAN connector on the system board.
To identify system board connectors, see
Figure A
-3
.
5.
Install the cover. See "
Replacing the Cover
" in "Troubleshooting Your System."
6.
Stand the system upright.
7.
Install the bezel. See "
Installing the Bezel
" in "Troubleshooting Your System."
Reconnect the system to its electrical outlet and turn the system on, including any attached peripherals.
Figure 6-3. Removing and Replacing the Front System Fan
Removing the Back System Fan
CAUTION:
See your System Information Guide for complete information about safety precautions working inside the computer and protecting
against electrostatic discharge.