Bio-Rad Experion RNA Analysis Kits User Manual
Page 17
Technical Support: 1-800-4BIORAD • 1-800-424-6723 • www.bio-rad.com
13
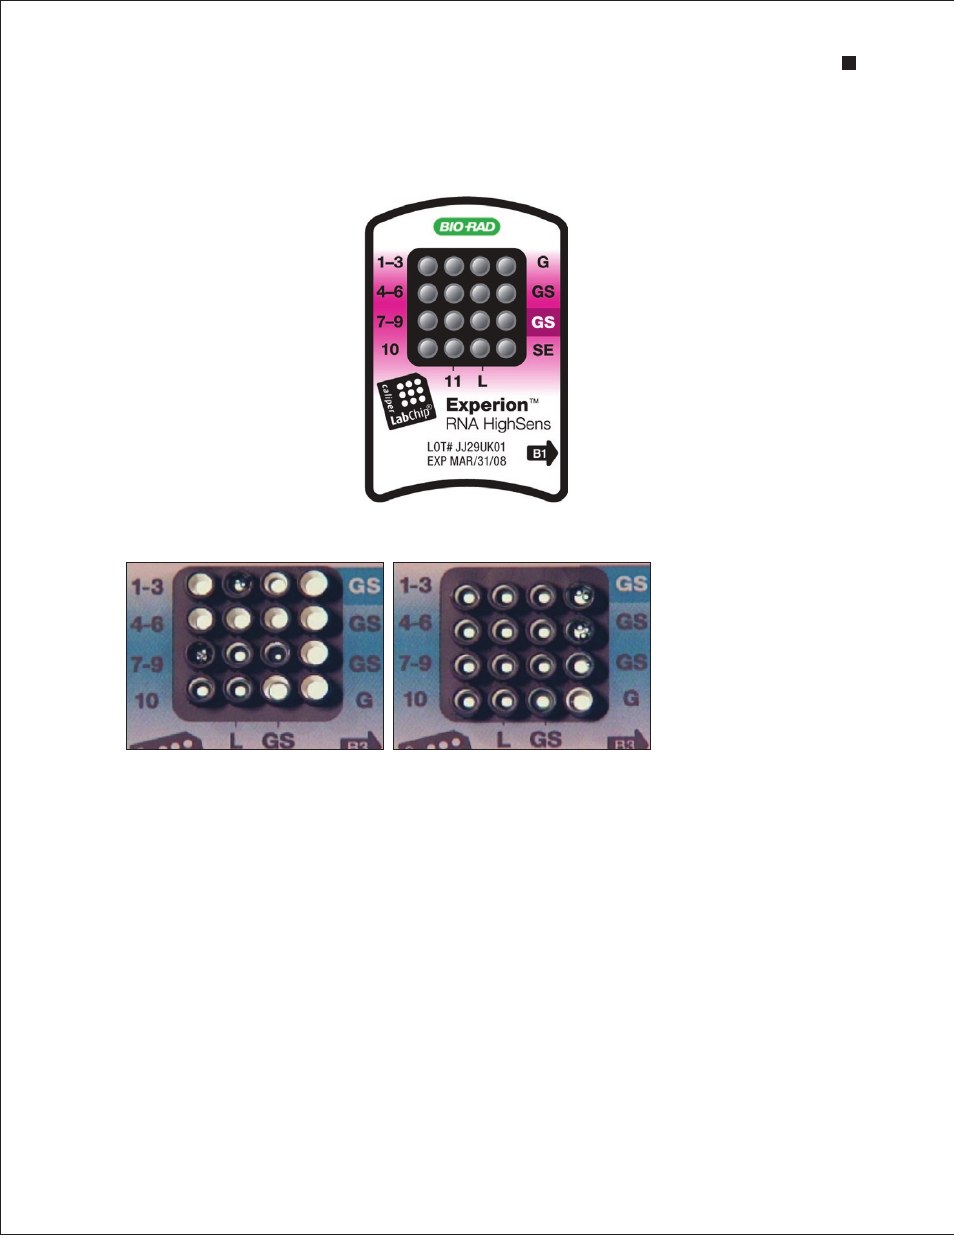
Fig . 3 .2 . Experion RNA HighSens chip . Wells for loading GS, samples, and ladder are indicated.
Load 5 µl loading buffer into sample
wells and well labeled
L
Load 9 µl GS into other well labeled
GS
Load 1 µl ladder into well labeled
L
Load 1 µl sample into wells
1–11
Load 9 µl G into well labeled
G
HighSens only: load 6 µl sensitivity
enhancer into well labeled
SE
Fig . 3 .3 . Bubble formation during loading of Experion Pro260 chips . Surface bubbles do not generally cause
problems during a run, but bubbles at the bottoms of wells must be removed. Left, bubbles trapped at the bottom of
wells. The GS and G wells and sample wells 1, 3, and 4–6 contain no solution. Wells 8, 10, and L are filled properly and
have no bubbles, but large bubbles have formed at the bottoms of wells 7 and 9 (note the difference in the diameter of
the light-colored circles in wells 8 and 9). Right, bubbles have formed at the surface of the three GS wells on the right
side of the chip; the rest of the wells have no bubbles.
8. Slide the chip into the Experion vortex station and turn on the vortex station by pressing Mix.
Vortexing continues for 60 sec and then automatically shuts off. Remove the chip when the vortex
station stops.
9. Inspect the wells again to confirm that there is no excessive bubble formation from pipetting and that
no liquid has spilled outside the wells during vortexing.
10. Place the loaded chip into the Experion electrophoresis station and start the run within 5 min.
7. Inspect all wells for bubbles by holding the chip above a light-colored background and looking
through the wells (Figure 3.3). Dislodge any bubbles at the bottom of a well with a clean pipet tip or
by removing and reloading the solution.
Experion RNA StdSens and HighSens Analysis Kits