6 load the chip – Bio-Rad Experion RNA Analysis Kits User Manual
Page 16
12
Technical Support: 1-800-4BIORAD • 1-800-424-6723 • www.bio-rad.com
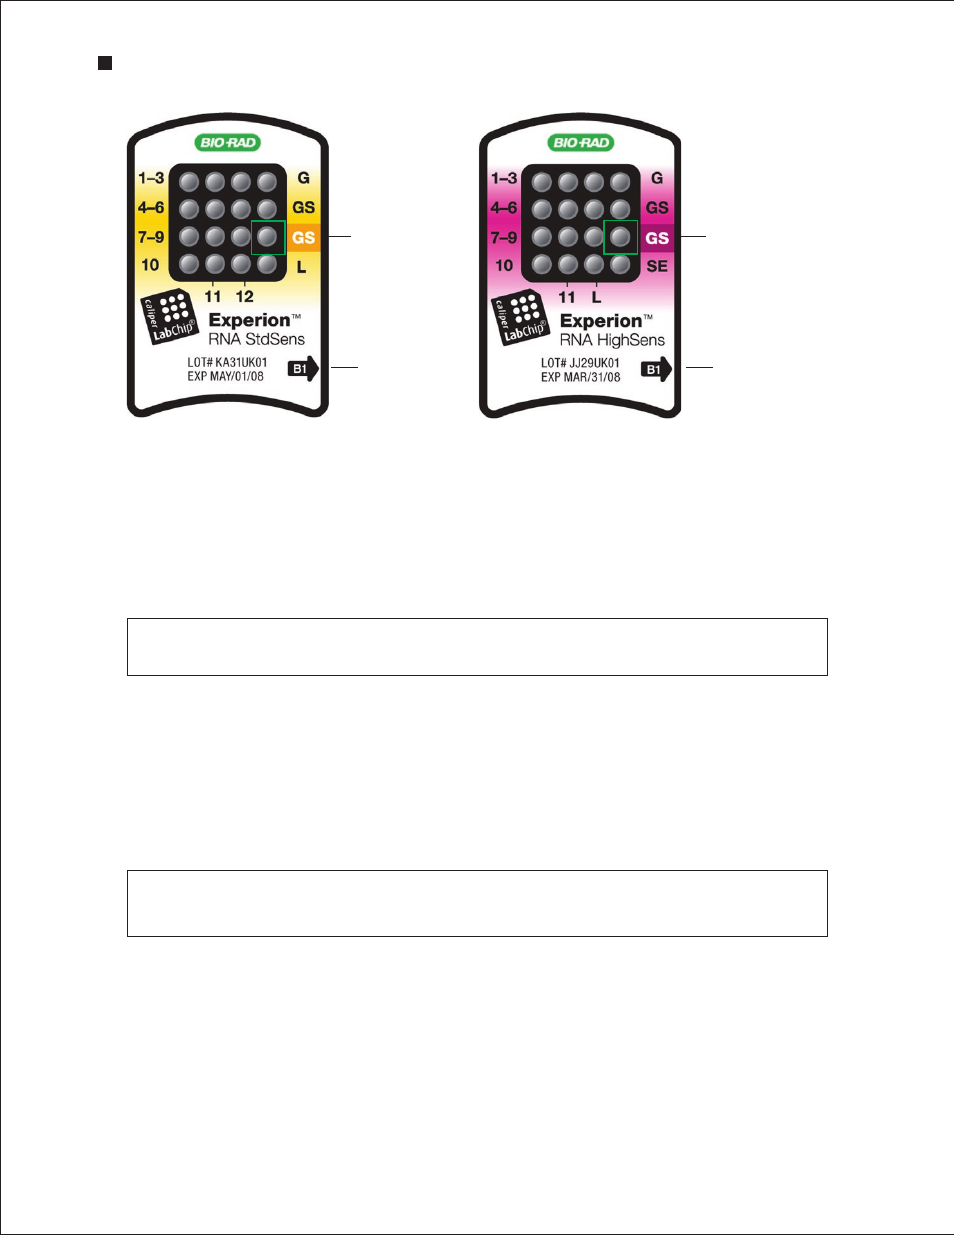
Fig . 3 .1 . Experion RNA chips . The locations of the gel priming well (GS, highlighted) and alphanumeric priming codes are indicated.
Gel priming well
Priming code
6. An audible signal and “Ready” message indicate that priming is complete. Open the priming station
and remove the chip. If the lid sticks, press down on it while pressing down on the release lever.
7. Turn the chip over and inspect the microchannels for bubbles or evidence of incomplete priming.
If the chip is primed properly, the microchannels are difficult to see (compare a primed chip to a new,
unused chip). If you detect a problem, such as a bubble or incomplete priming, prime a new chip.
8. Place the chip on a clean surface for loading.
Gel priming well
Priming code
Use a new pipet tip for each delivery to prevent contamination of the loading buffer. Alternatively,
aliquot 65–70 μl loading buffer into an RNase-free microcentrifuge tube and add 5 μl to each well
from this volume.
5. Pipet 1 µl prepared RNA ladder into the well labeled L. Every chip must have the RNA ladder loaded
into the ladder well labeled L.
6. Pipet 1 µl sample (or blanks, for example loading buffer, DEPC-treated water, or TE buffer) into the
numbered sample wells.
Bubbles forced into microchannels during priming take the shape of the microchannel and are
elongated, not round.
3.6 Load the Chip
1. Pipet 9 µl GS into the other well labeled GS (Figure 3.2).
2. Pipet 9 µl filtered gel (G) into the well labeled G.
3. (HighSens only) Pipet 6 µl sensitivity enhancer (clear cap) into the well labeled SE.
4. Pipet 5 µl RNA loading buffer (yellow cap) into each sample well (HighSens wells 1–11 or StdSens
wells 1–12, ) and the ladder well, labeled L.
Experion Automated Electrophoresis System