Foot hitching, Hitch setup (15ft), Routine hitching (15ft) – Great Plains 2510HDP Operator Manual User Manual
Page 18
14
1510HDP/2010HDP/2510HDP
Great Plains Manufacturing, Inc.
118-245M
2013-10-21
15-foot Hitching
20- and 25-foot hitching is on page 13.
These instructions are for a direct 3-point hitch. If using
an optional CPH, PFH or SSH hitch, consult the hitch
manual.
Hitch Setup (15ft)
Some tractor 3-points may require additional bushings
(not supplied by Great Plains) to adapt the pin diameters:
Upper Link: Qty 1, 1in ID x 1
1
⁄
4
in OD
Lower Link: Qty 2, 1
1
⁄
8
in ID x 1
7
⁄
16
in OD
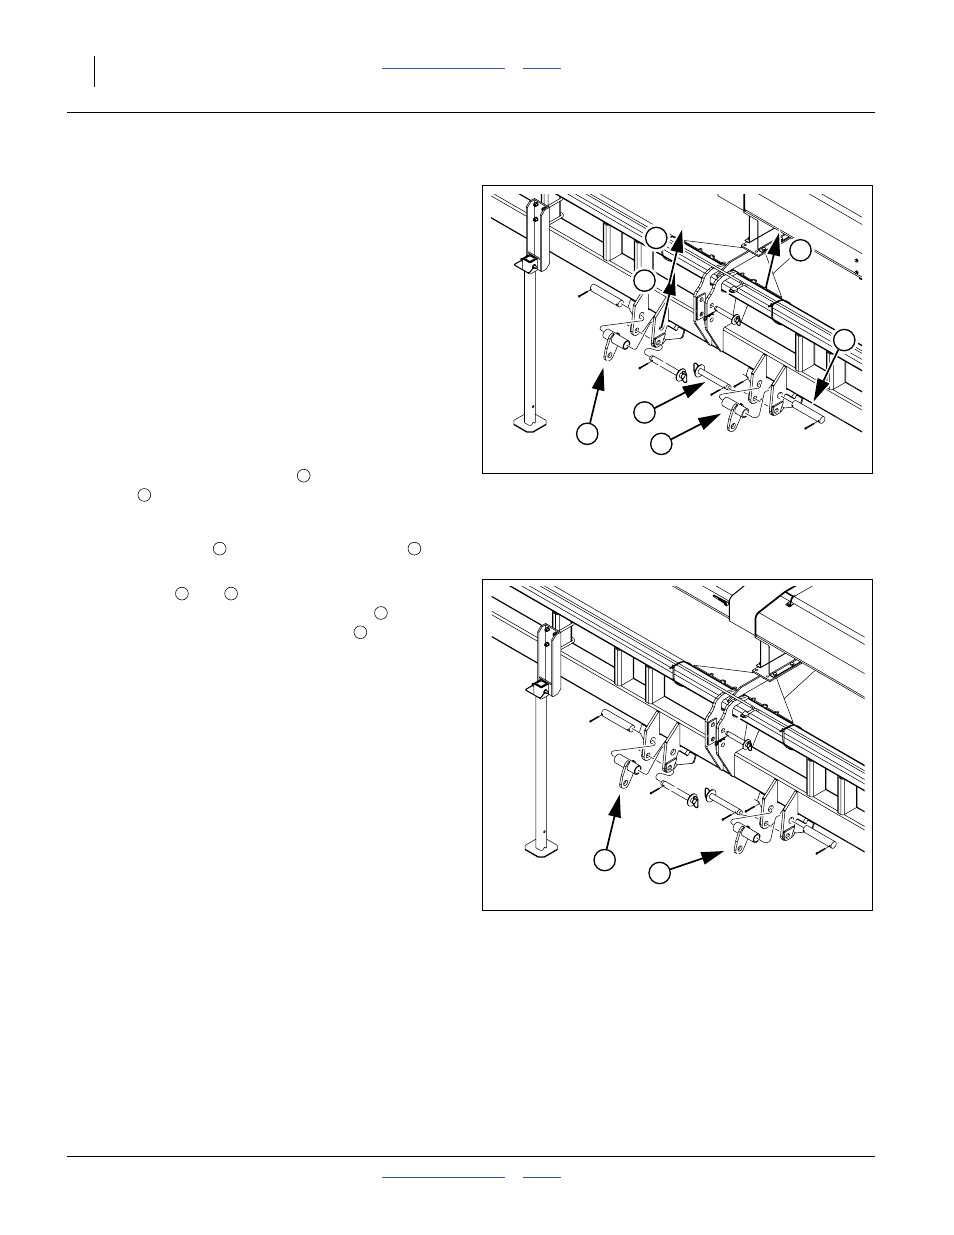
Refer to Figure 5 and Figure 6
As supplied from the factory, 1510HDP hitches are set
for category II.
1.
For tractors with category III and III-N hitches,
position the center/upper pin
in the bottom center
holes
.
For tractors with category IV-N hitches, position the
center/upper pin
in the upper center holes
2.
For tractors with category III hitches, remove all
lower pins (
and
) and re-position the pin
supports from their category II positions
on the
top pins to their category III positions
as shown in
Figure 6
.
Routine Hitching (15ft)
Refer to Figure 5 and Figure 6
3.
Raise or lower tractor three-point arms as needed
and pin lower arms to drill.
4.
Pin upper arm to drill.
For category II, III and III-N tractors, install hitch pin
in the lower hole.
For category IV-N tractors, install hitch pin in the
upper hole.
5.
Slowly raise drill. Watch for cab interference.
6.
If drill has parking stands, pin them up. See page 13
for details.
7.
Adjust top three-point link so that top edge of drill
box is parallel with ground when drilling.
Note: Do not use link to adjust opener depth. For opener
adjustments, refer to “Leveling the Drill” on page
18 and “Adjustments” starting on page 34.
8.
Set your tractor three-point-Control control to Float
position.
Figure 5
15-foot Category II Hitch
27409
5
4
6
6
3
2
1
1
2
1
2
Figure 6
15-foot Category III Hitch
27409
7
7
4
5
6
7