And 25-foot hitching, Hitch setup (20/25ft), Routine hitching (20/25ft) – Great Plains 2510HDP Operator Manual User Manual
Page 17: Raise parking stand (20ft)
Great Plains Manufacturing, Inc.
Preparation and Setup
13
2013-10-21
118-245M
20- and 25-foot Hitching
15-foot hitching is on page 14.
These instructions are for a direct 3-point hitch. If using
an optional CPH, PFH or SSH hitch (model 2010HDP
only), consult the hitch manual.
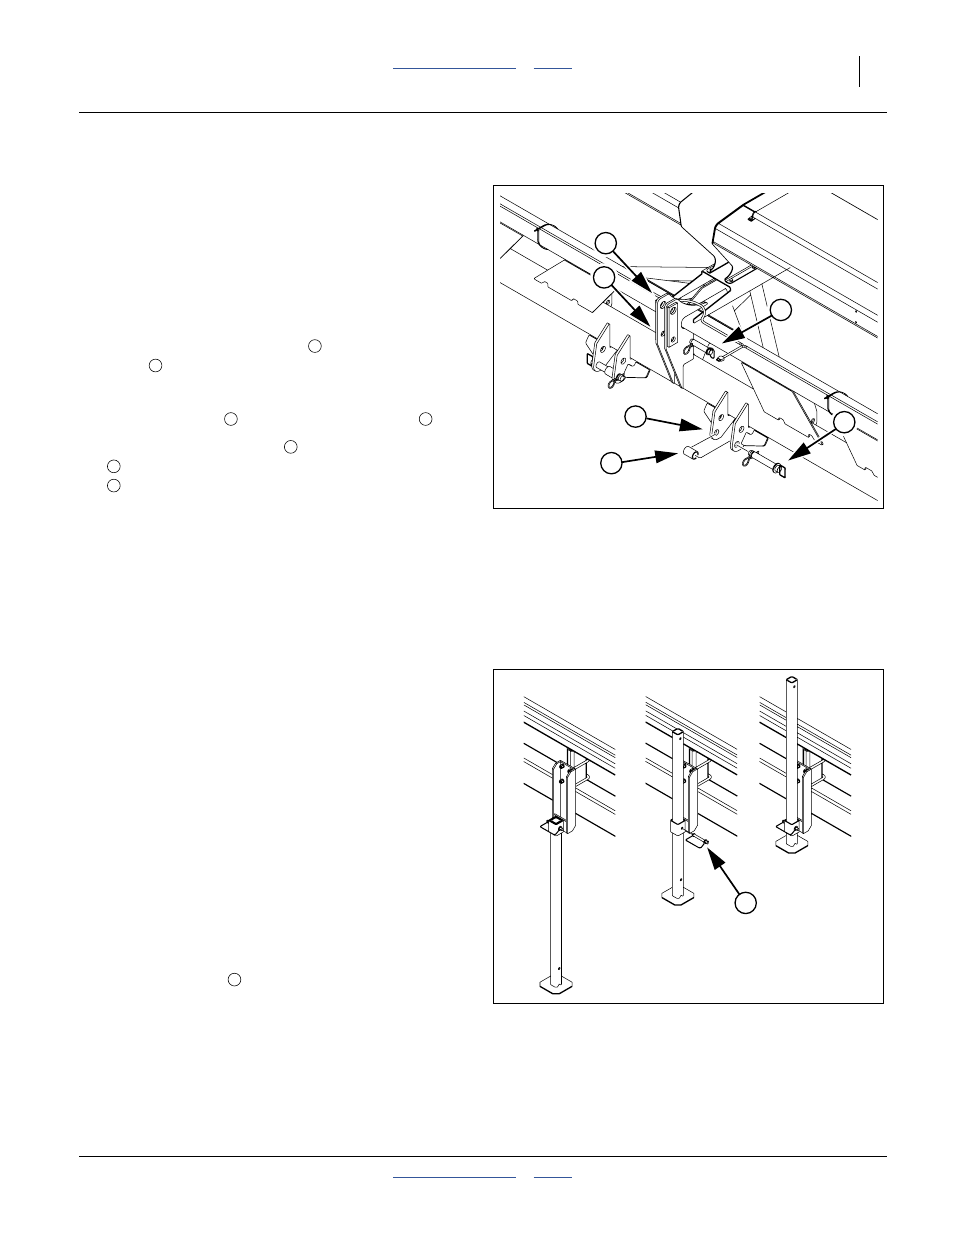
Hitch Setup (20/25ft)
Refer to Figure 3
1.
For tractors with category III and III-N hitches,
position the center/upper pin
in the bottom center
holes
.
For tractors with category IV-N hitches, position the
center/upper pin
in the upper center holes
2.
Make sure the lower pins
are in the bottom holes
of the lower hitch weldments, and that the spacers
are present.
Routine Hitching (20/25ft)
3.
Make sure all cables and hoses are clear of the hitch
area.
4.
For a “quick hitch”, align lower arms with lower hitch
points, set spacers and engage lower arms.
For pinned hitch, remove pins and spacers, align
hitch arms and re-pin.
5.
Slowly raise drill, watching for cab interference.
6.
Adjust top link so that when in field position, top side
of drill mainframe is parallel to the ground.
Note: Do not use 3-point link to adjust opener depth. See
“Planting Depth” on page 35 for a summary of
depth control settings.
7.
Set tractor three-point draft control to Float.
8.
Skip to “Electrical Connections” on page 15.
Raise Parking Stand (20ft)
Only the 15- and 20-foot drills have these stands (one on
each side). The stand is primarily needed when an
accessory hitch is used.
9.
Make sure the drill raising at step 5 above has
removed all weight carried by the stands.
10. Remove the pins
.
11. Slide the stand tube up in the sleeve (you may also
invert the tube, with the foot plate on top).
12. Re-insert the pin.
Figure 3
25-foot 3-Point Hitch
27408
1
3
2
5
6
4
1
2
1
3
4
5
6
Figure 4
Raise Parking Stand
27410
7
7