Hmc-410, 05 programming – Tweco HMC-410 User Manual
Page 55
HMC-410
July 27, 2005
4-13
4.05 Programming
Programming for the HMC-410 is the process of setting
weld parameters into long term memory for each weld
schedule. Programming the HMC-410 is a simple task,
but as with everything new, may take some getting used
to.
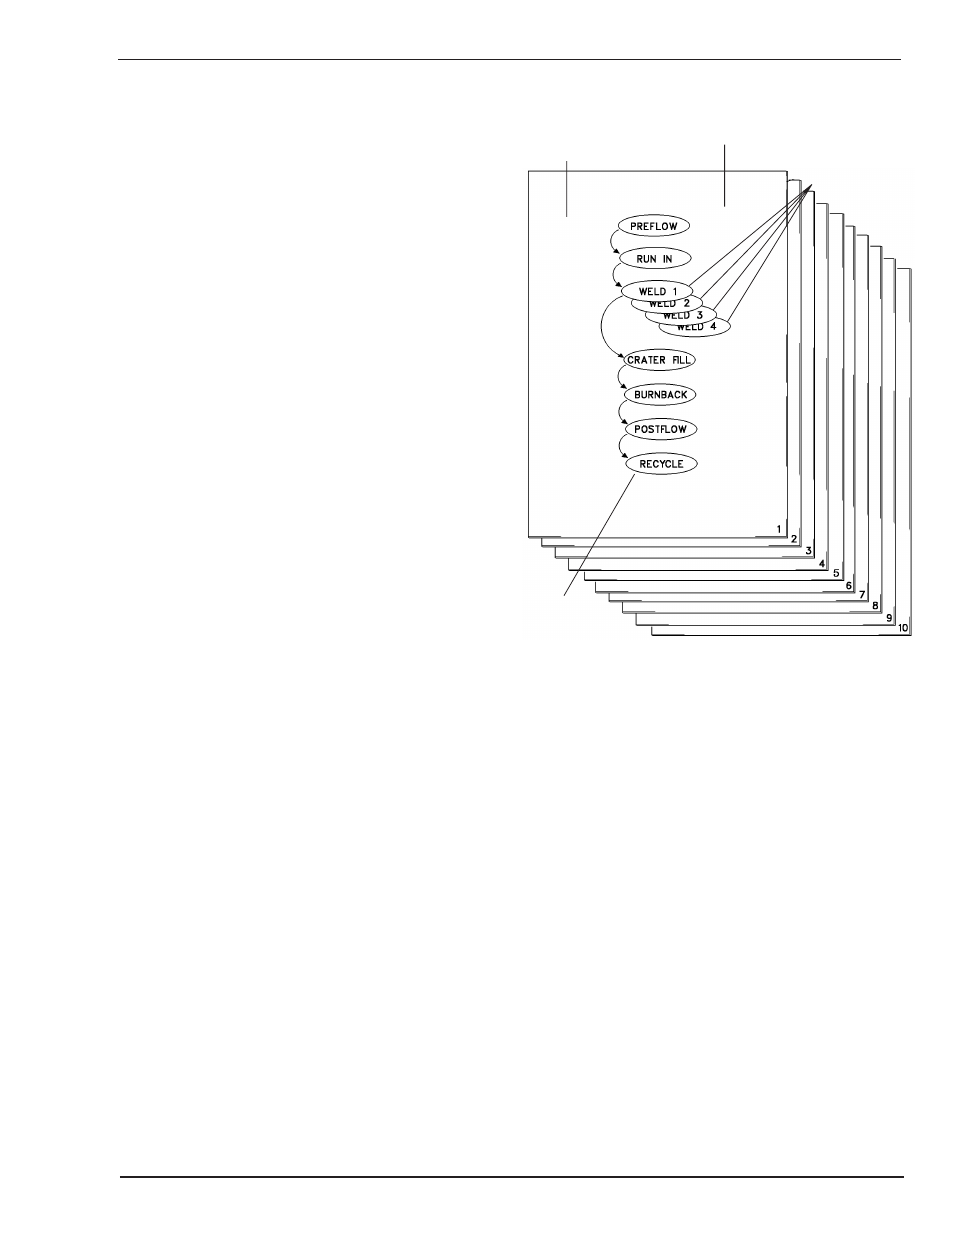
In understanding the programming of the HMC- 410, it
may be helpful to visualize the memory as a book with 10
pages. Each page contains the information for a complete
weld (see Figure 4-1). Each page contains the following
information:
Preflow Data — Time
Run In Data — Time, Voltage, Current
Weld Data — Time, Voltage, Current
Crater Fill Data — Time, Voltage, Current
Burnback Data — Time, Voltage
Postflow Data — Time
Recycle Data — Count, Sub Segment
Cycle — one execution of a weld schedule
Schedule — collection of weld parameters describing
a weld procedure
SCHEDULE
SUB SEGMENT
SEGMENT
ONE CYCLE = ONE TIME THROUGH
THE SEQUENCE
Art # A-04368
Figure 4-1: Programming the HMC-410
On each page is taped four smaller pieces of paper, one
on top of another over the Weld Data. This is the weld
segment data. If the weld sub segment enable is enabled,
the bottom three pieces of paper can be viewed (one at a
time). Otherwise, just the top piece of paper can be viewed.
In order to view each page (schedule), the page to be
viewed is entered in the lower display when the SCHEDULE
light is illuminated. That entire page can then be viewed
by moving the MODE SELECT encoder. As that encoder
is rotated, each segment’s data becomes visible. In order
to change, instead of just viewing what is displayed, rotate
the encoder next to the value to be changed (remember
that to do this, the PROG/WELD key switch must be in
the PROG position).
In order to view any of the other smaller pieces of paper
in the weld data position, the smaller paper’s number is
entered into the RECYCLE segment’s WELD SUB
SEGMENT entry (1 to 4).
By performing this procedure on the full page (schedule),
the schedule is programmed with data pertinent to a
particular weld procedure. Once the data is entered, the
panel is ready to weld. In order to test the sequencing,
put the panel into test mode and initiate the weld as if it
were an actual weld. The timing should mimic the
programmed parameters, only without the power
source and feeder operating.