Mounting the light source, Installing the camera lens, Installing lens filters – Banner PresencePLUS Pro—PRO Camera User Manual
Page 18
01/04
Hardware Installation
PresencePLUS
®
Pro
Banner Engineering Corp. • Minneapolis, MN USA
www.bannerengineering.com • Tel: 763.544.3164
12
P/N 68368 rev. B
01/04
Mounting the Light Source
The light source must be securely mounted. Any movement in the light source during an inspection could affect
inspection performance.
Installing the Camera Lens
These instructions are for Banner Lens Models LCF08, LCF12, and LCF16.
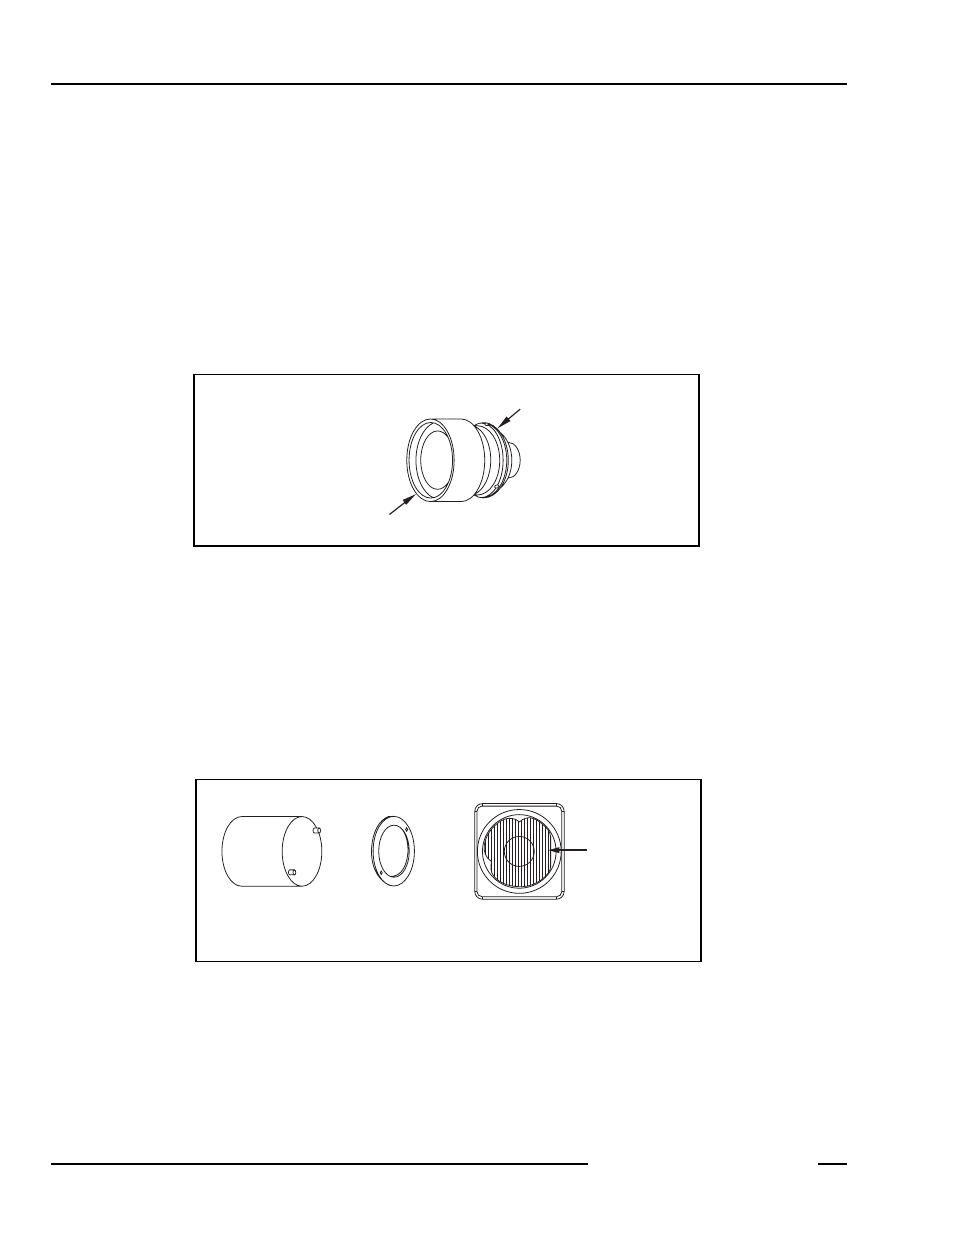
Remove any protective caps from the camera and lens. Turn the metal lens base clockwise to thread the lens onto
the camera. The plastic lens shroud is used for focusing; do not turn it when installing the lens. See the
PresencePLUS Pro Operator’s Guide (P/N 68367) for details on focusing and locking the lens.
---------------------------------------------------------------------------
Installing the Camera Lens
---------------------------------
Installing Lens Filters
These instructions are for Banner filters designed to fit Banner cameras.
Colored, infrared, and polarized lens filters can be used. The filter fits between the lens and camera and is held in
place with a retainer ring. Use the retainer ring tool that is supplied with the filter to add or remove a filter.
---------------------------------------------------------------------------------------
Installing a Lens Filter
Do not grip plastic lens shroud.
Grip silver lens base.
Retainer Ring Tool
Retainer Ring
Front of Camera
(looking into lens)
Filter behind
camera lens